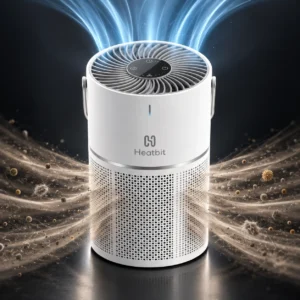
To set up Heatbit Bitair, connect it to power, sign in to the Heatbit app, join a 2.4 GHz Wi-Fi network, add your Bitcoin receiving address, and confirm the selected mining service is accepting work. The app handles purifier controls and mining settings.
This guide covers the first connection, the phone screens, wallet and pool settings, and the checks that show setup is complete. For specifications, filtration, electricity use, and the hardware itself, read our Heatbit Bitair guide.
Quick overview
- Setup method: Configure Bitair through the official Heatbit app on iPhone (iOS) or Android. Sign in with a phone number that can receive a verification code.
- Network requirement: Connect Bitair to 2.4 GHz Wi-Fi and have the network password ready. Follow the app’s permission prompts so your phone can discover the device and complete pairing.
- Connection confirmation: Onboarding is complete only after the app confirms Wi-Fi, internet access, and connection to your Heatbit account. Passing the Wi-Fi check alone is not enough.
- Wallet requirement: For Heatbit solo, save an on-chain Bitcoin receiving address you control and check that it matches your wallet. Never enter a seed phrase or private key; an external pool may require separate payout configuration.
- Mining choice: Use Heatbit solo or a compatible mining pool. Solo mining does not provide regular block rewards; pools apply their own reward methods, fees, and payout thresholds. Manual connections require the operator’s Stratum URL, worker name, and password.
- Successful setup: Confirm mining is enabled, hashrate readings update, and the selected service records accepted work. Check purifier controls separately: an active fan or an app balance alone does not establish that mining or a payment has occurred.
Watch Our Bitair Review and Setup Video
Watch Solo Satoshi’s Bitair setup from 7:35 on YouTube.
Before You Start
- Your Bitair, its specified power supply and cable, and the supplied instructions.
- A stable, dry location with the lower intake and top exhaust unobstructed.
- A smartphone with access to the Heatbit app for iPhone or Heatbit app for Android.
- A phone number that can receive a verification message.
- Your 2.4 GHz Wi-Fi name and password.
- A Bitcoin receiving address you control, if you will use Heatbit solo.
- The pool operator’s current connection and account instructions, if you plan to use a custom pool.
The iPhone illustrations below reproduce the reference Heatbit app screens at a larger, readable resolution. Labels and permission prompts may vary with the phone’s operating system and app version. Follow the current prompts on your own device.
1. Prepare the Bitair and Check the Filter
Keep the appliance unplugged while checking the packaging and filter. Inspect for damage, remove external transit packaging, and check the filter compartment using the supplied instructions. If the filter is wrapped for shipping, remove that wrapping before use. Refit the filter and enclosure securely.
Do not dismantle the mining board, pull internal wiring, or operate the appliance with its housing open. Filter access and electronics disassembly are different tasks.
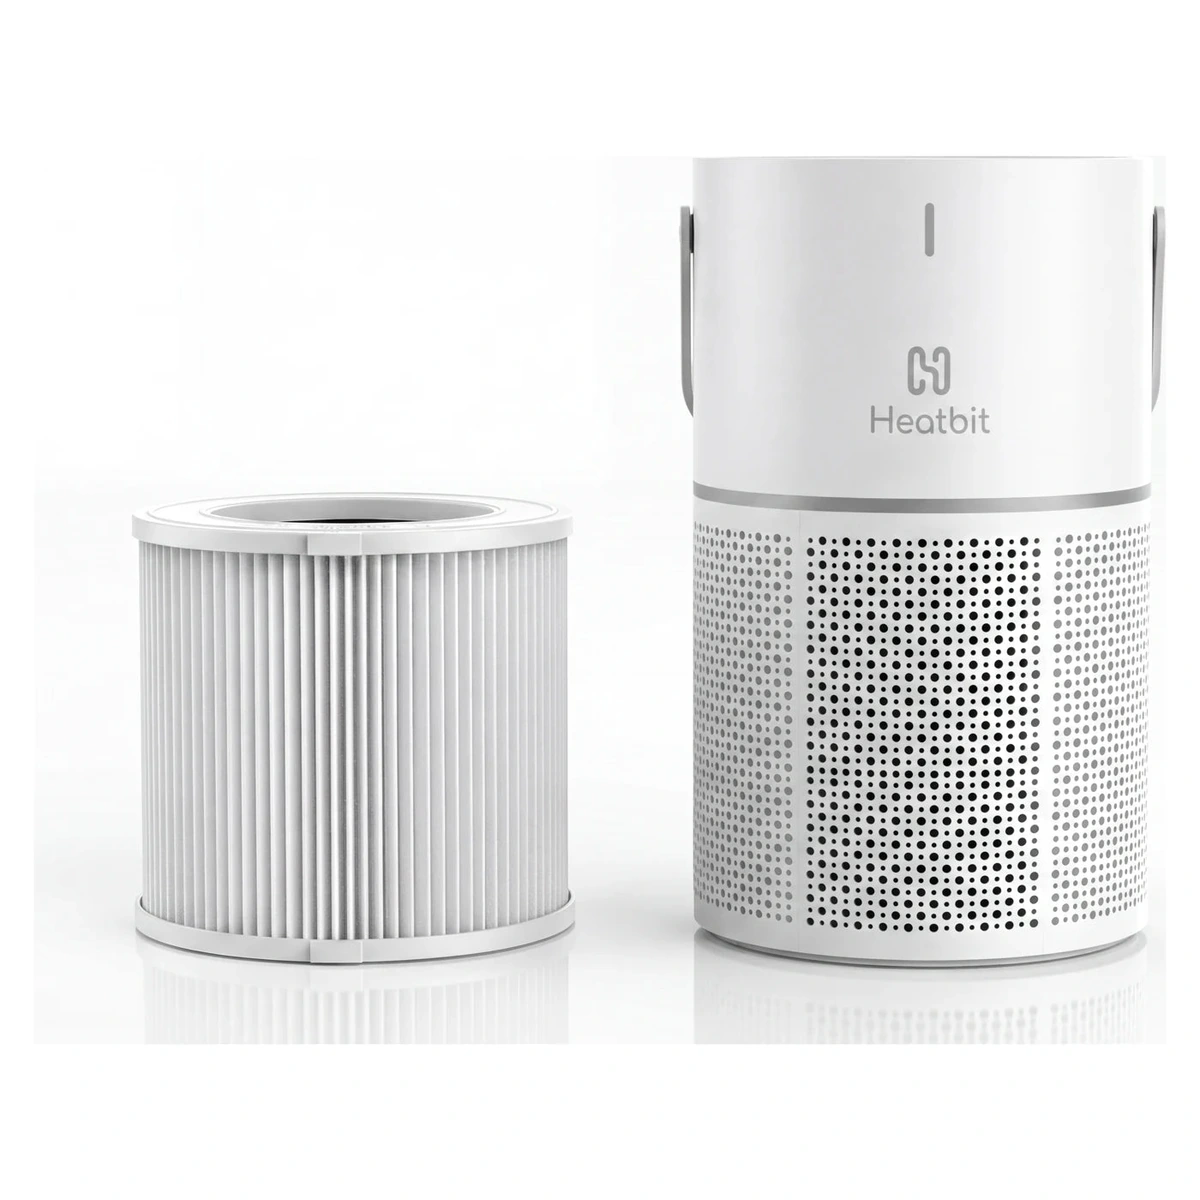
Place Bitair where its intake and outlet have clear space. Keep it away from liquids, curtains, loose papers, and other objects that can obstruct airflow. Connect the specified power supply and cable, then follow the supplied power-on instructions.
Check before continuing: the filter is fitted, packaging is removed, the housing is closed, and the appliance powers on normally.
2. Install the Heatbit App and Sign In
The Heatbit mobile app is available for iPhone (iOS) and Android. Download it from the Apple App Store for iPhone or Google Play for Android.
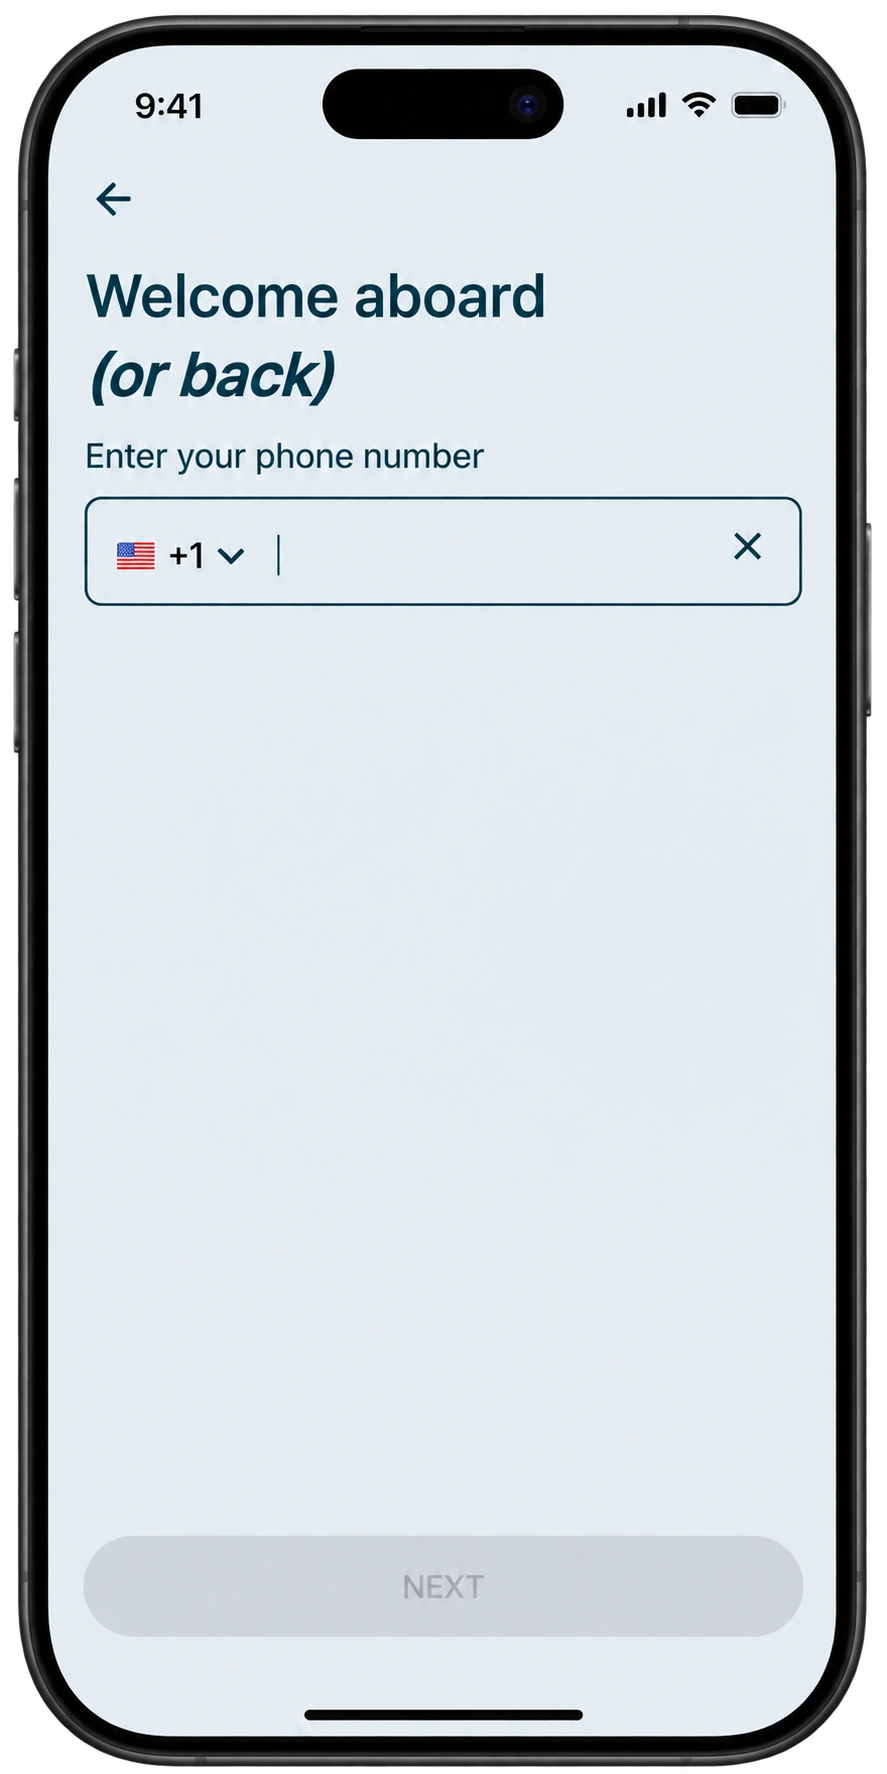
Open Heatbit and choose the correct country code for your phone number. Request the verification code and enter the code sent to that number. Use your own account so the device is linked to you.
If a code does not arrive, check the country code and number, mobile reception, and any SMS filtering. Wait for the app’s resend option rather than repeatedly requesting codes. Keep the code private.
Once signed in, follow the new-device prompt. If you already have devices in the account, use the app’s add-device control and choose Bitair when prompted.
Check before continuing: you are signed in and can begin adding a device, rather than still waiting at the phone-verification screen.
3. Pair Bitair and Connect It to 2.4 GHz Wi-Fi
Keep the phone close to the Bitair during onboarding. Follow any pairing-mode instructions shown by the app or supplied with the device. Use the documented sequence rather than guessing a reset-button duration.
Allow the Permissions Needed for Pairing
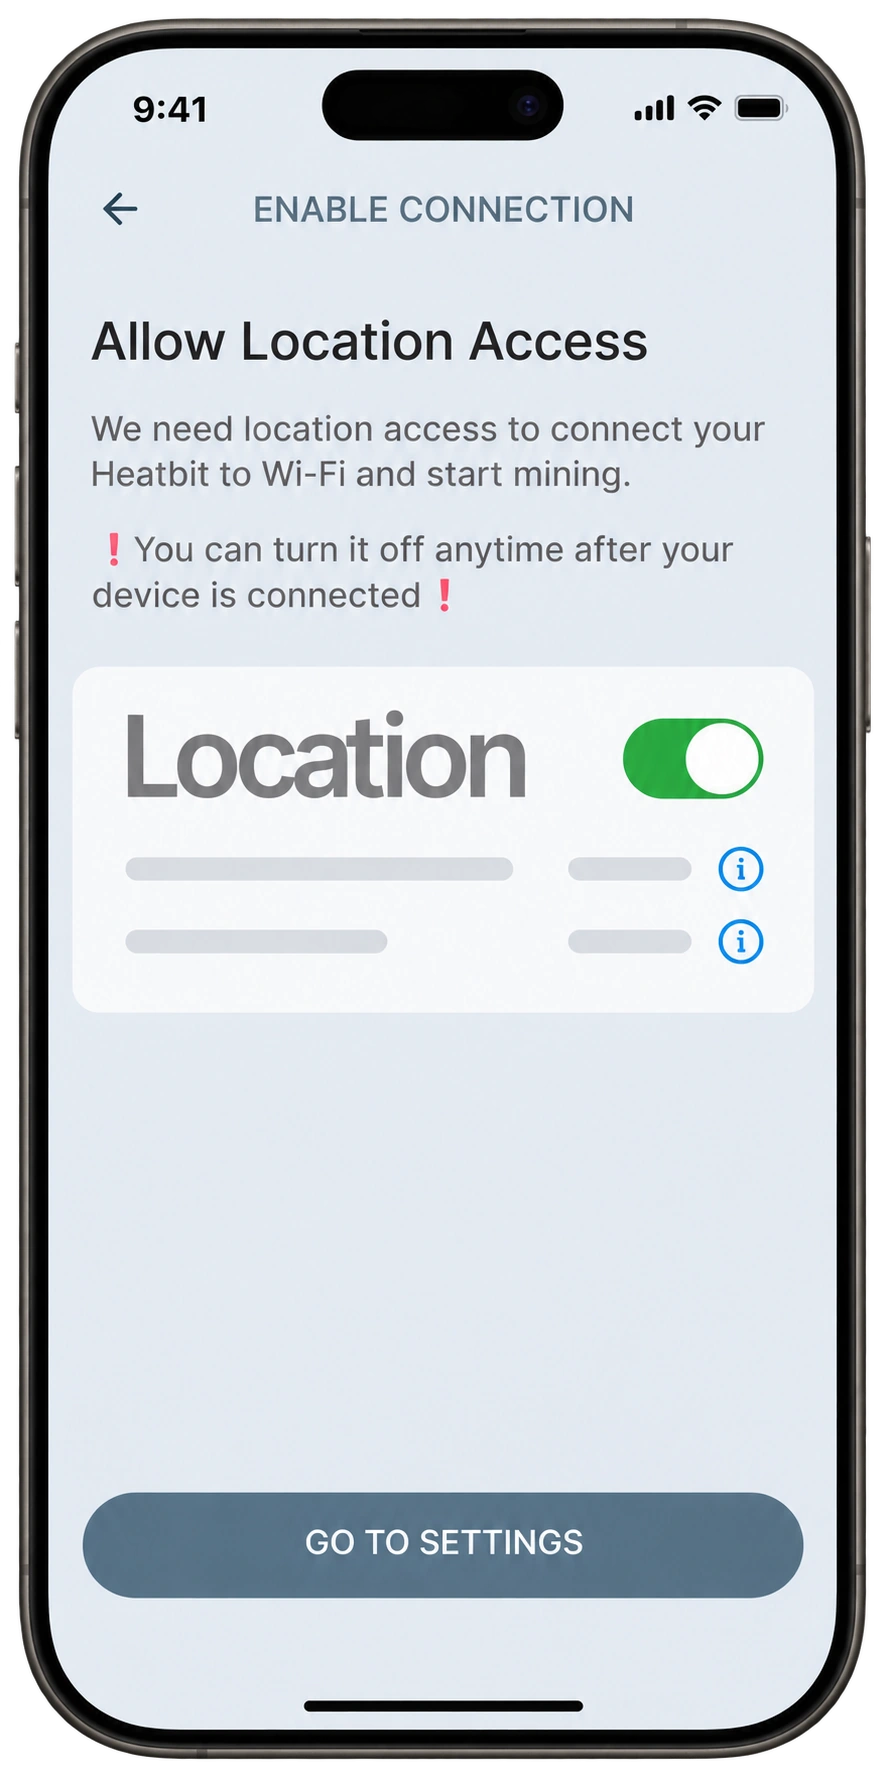
The shown app flow requests location access to connect the appliance to Wi-Fi. Grant the permissions requested for local setup in your phone’s settings, return to Heatbit, and continue. If the operating system also asks for local-network or nearby-device access, allow the access needed to discover your Bitair.
After pairing, review the permissions in your phone’s settings. The reference screen says location access can be turned off after connection. Avoid granting broader ongoing access than the app requires for the functions you use.
Select the Correct Network
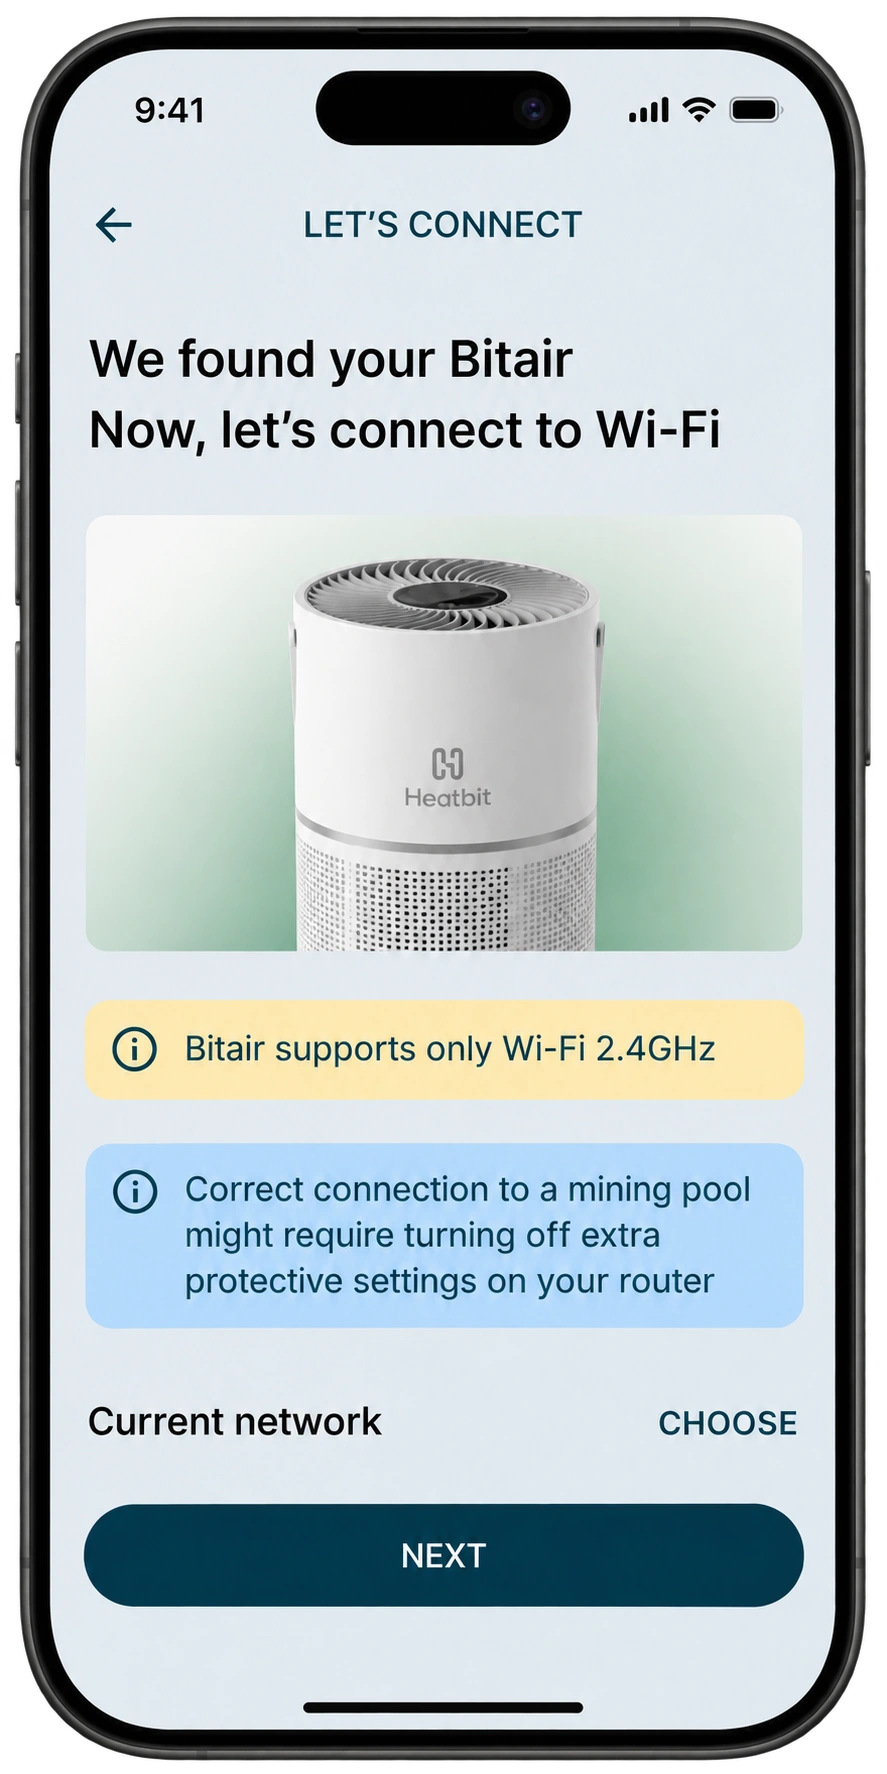
When Bitair is found, select your 2.4 GHz network and enter its password carefully. Check capitalization and avoid accidentally choosing a guest network that blocks device communication or requires a browser sign-in.
If your router combines 2.4 GHz and 5 GHz under one name, the shared name alone does not prove which band is being used for onboarding. Use the router’s documented IoT onboarding feature or a separate 2.4 GHz network when needed. Keep the phone and device on a network arrangement that permits pairing.
Wait for All Three Connection Checks
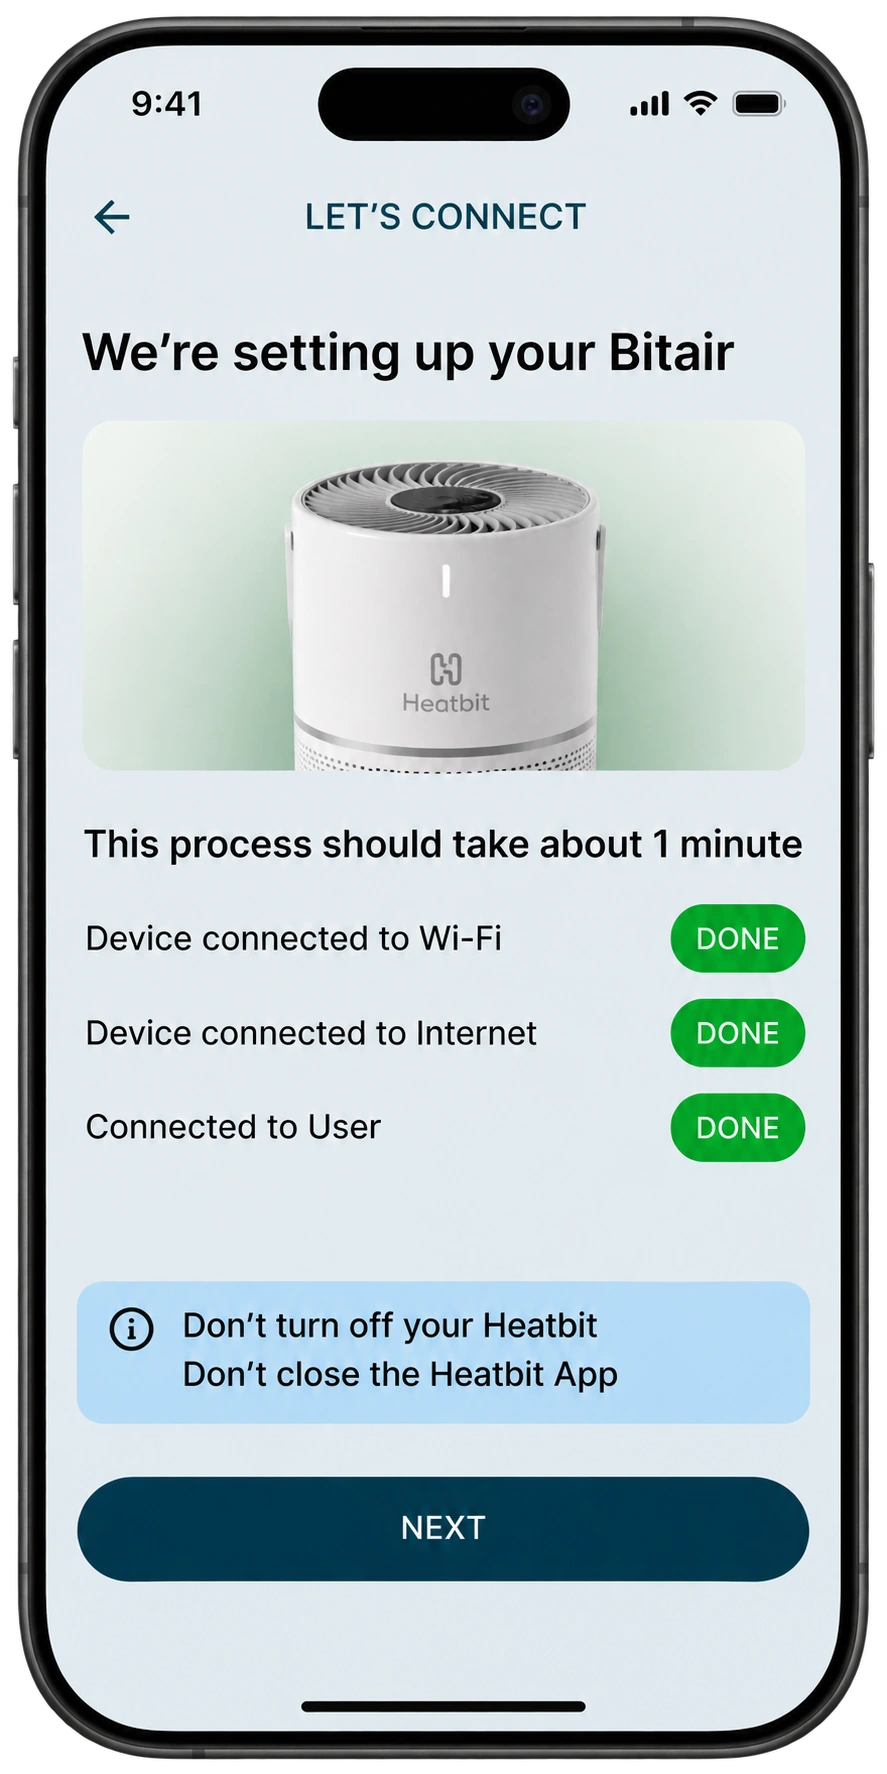
Keep the app open and the Bitair powered while it connects. The illustrated flow checks three separate stages: connection to Wi-Fi, access to the internet, and connection to the user account. Continue after all three complete.
Check before continuing: the app confirms all three stages. Wi-Fi success alone does not establish that internet access or account linking succeeded.
4. Name Your Bitair and Add Your Bitcoin Address
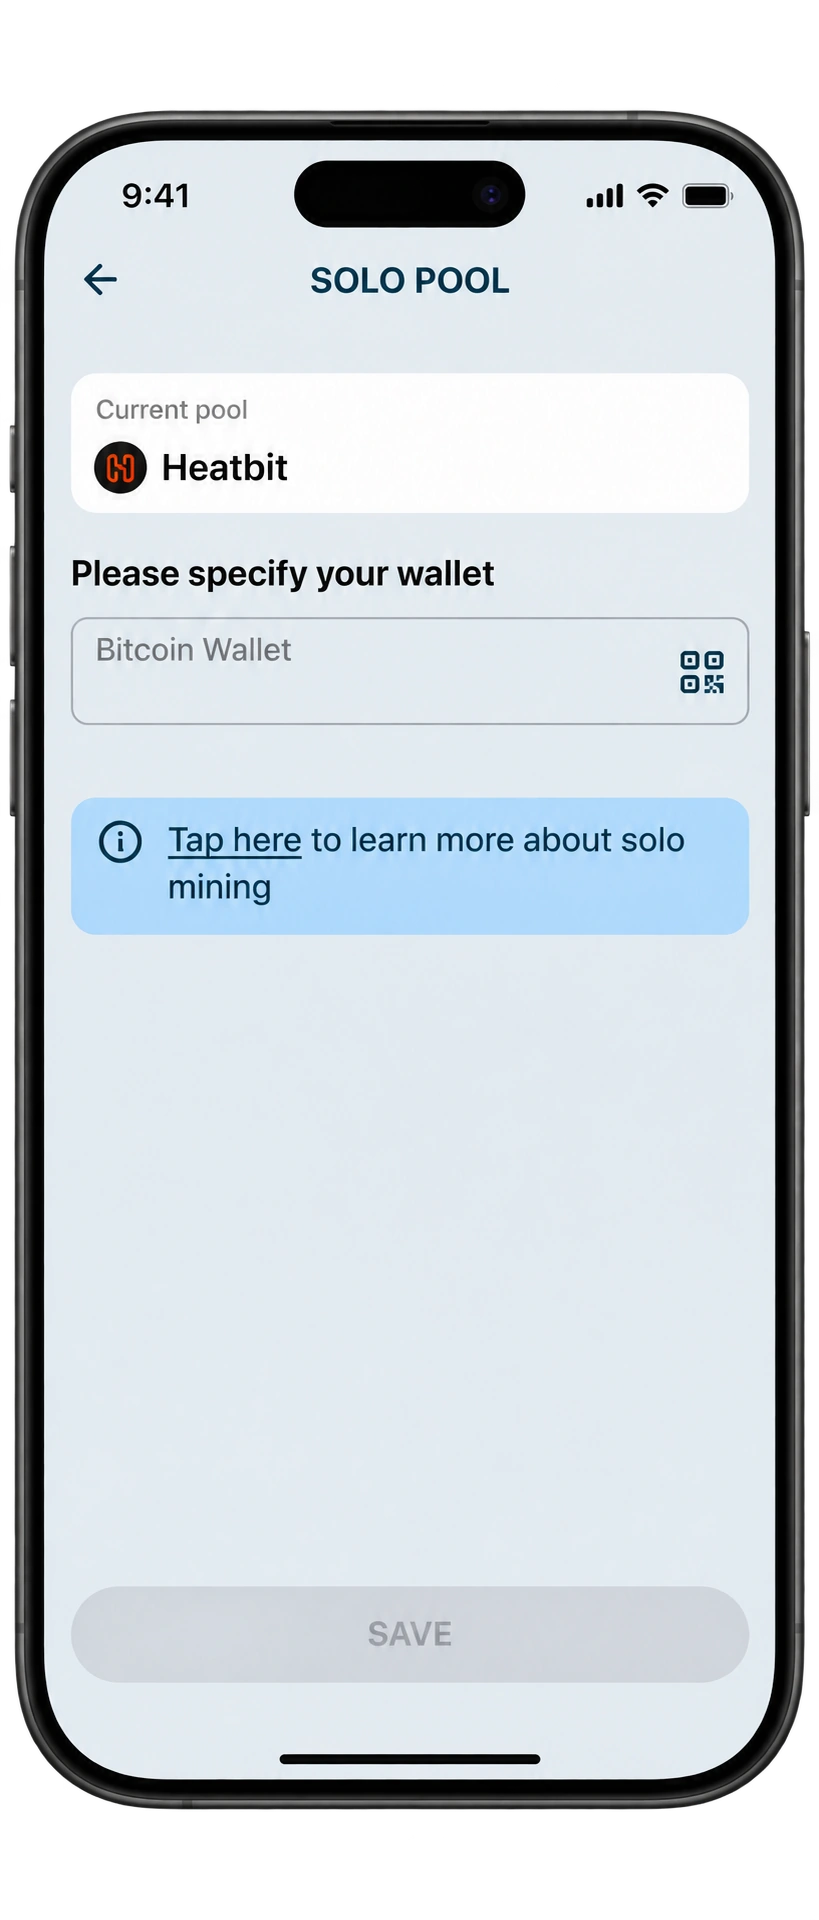
Give the device a useful name if prompted, especially if you own more than one. Then complete the wallet step for the selected solo service.
Open your own Bitcoin wallet and obtain an on-chain Bitcoin receiving address. Paste it into the address field or scan its receiving QR code where supported. Compare the address shown in Heatbit with the one in your wallet before saving.
A receiving address is public information used to receive funds. It is not your seed phrase, private key, exchange password, or an amount-specific Lightning invoice. None of those secrets belongs in this setup field.
Save the address and confirm that the app acknowledges the link. If you later choose an external pool, verify that pool’s payout configuration separately. An address saved for Heatbit solo is not proof that an unrelated pool account is paying the same destination.
Check before continuing: the saved address is yours, its characters match your wallet, and the app confirms it has been linked.
5. Check Purifier Controls and Mining Status Separately
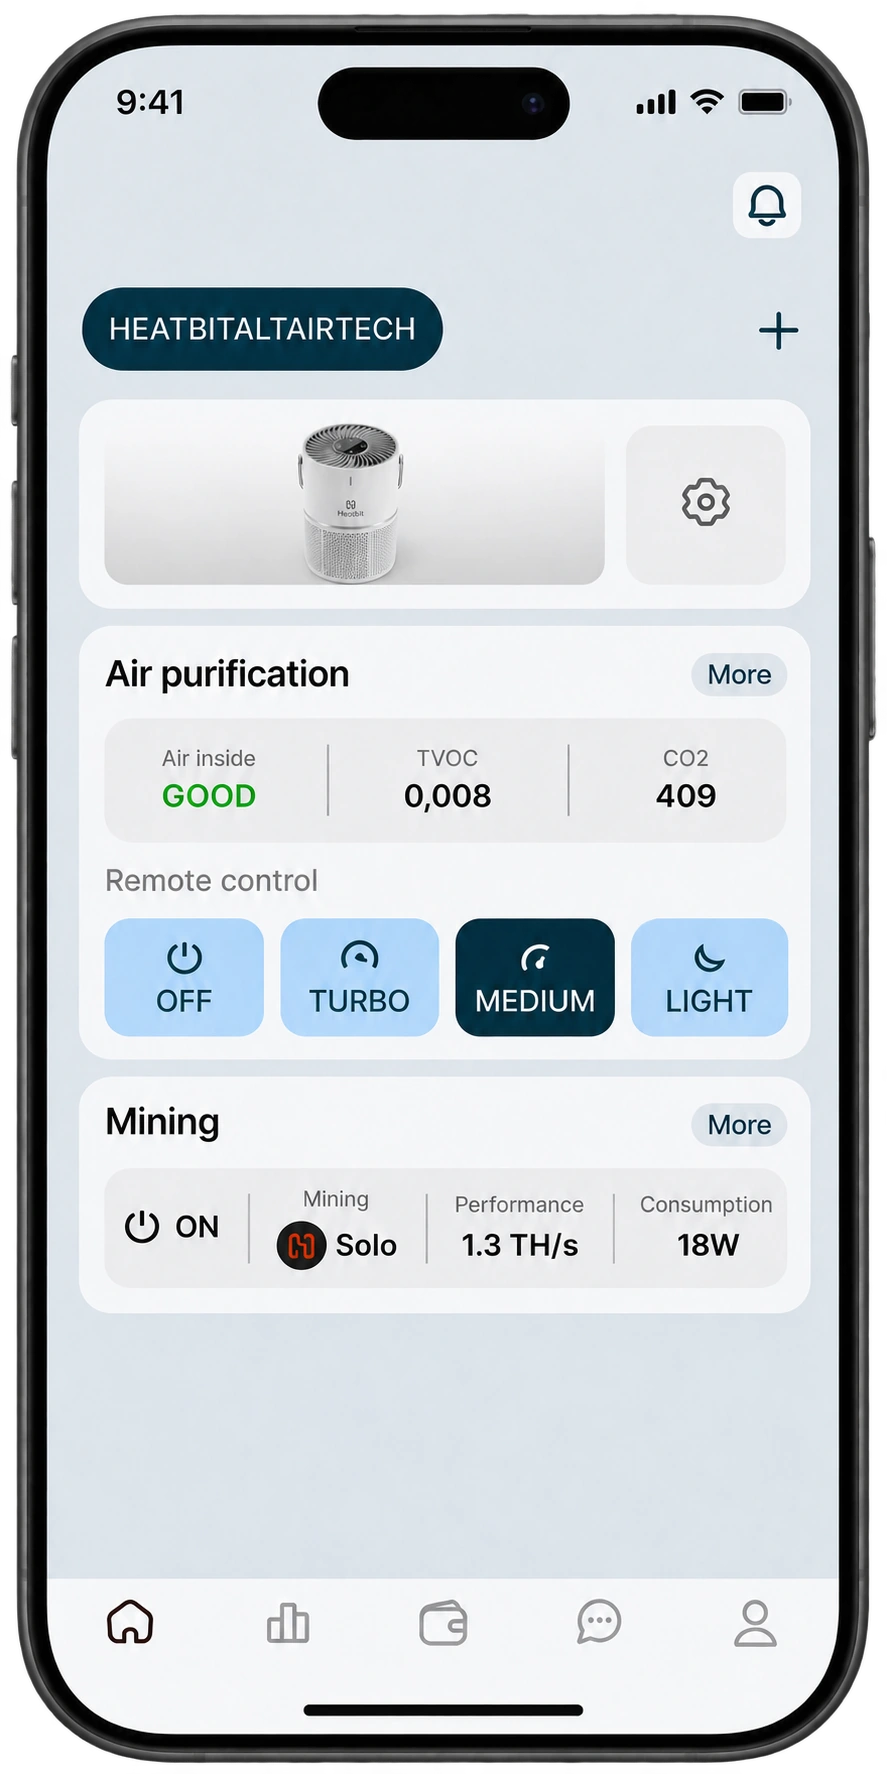
The home screen brings together air information, purifier controls, and mining information. Treat them as separate checks rather than assuming that one active function proves everything is connected.
Use the purifier and mining controls offered by the app. Do not cover the intake or exhaust to make it quieter, and do not assume an air-quality label is a laboratory measurement of every indoor contaminant.
| Area | What to check |
|---|---|
| Purifier controls | Choose a supported mode and confirm that the appliance responds. Mode labels can differ by app version. |
| Air information | Allow time for displayed readings to update. A screenshot’s values are examples, not required targets for your room. |
| Mining switch and mode | Confirm mining is enabled and the selected service is the one you intended. |
| Hashrate and power | Look for readings that update after startup. Do not expect every short sample to equal the advertised average. |
| Rewards and wallet | Confirm the relevant service and payout destination. A balance display does not establish that a withdrawal has occurred. |
6. Choose Heatbit Solo or Another Mining Pool
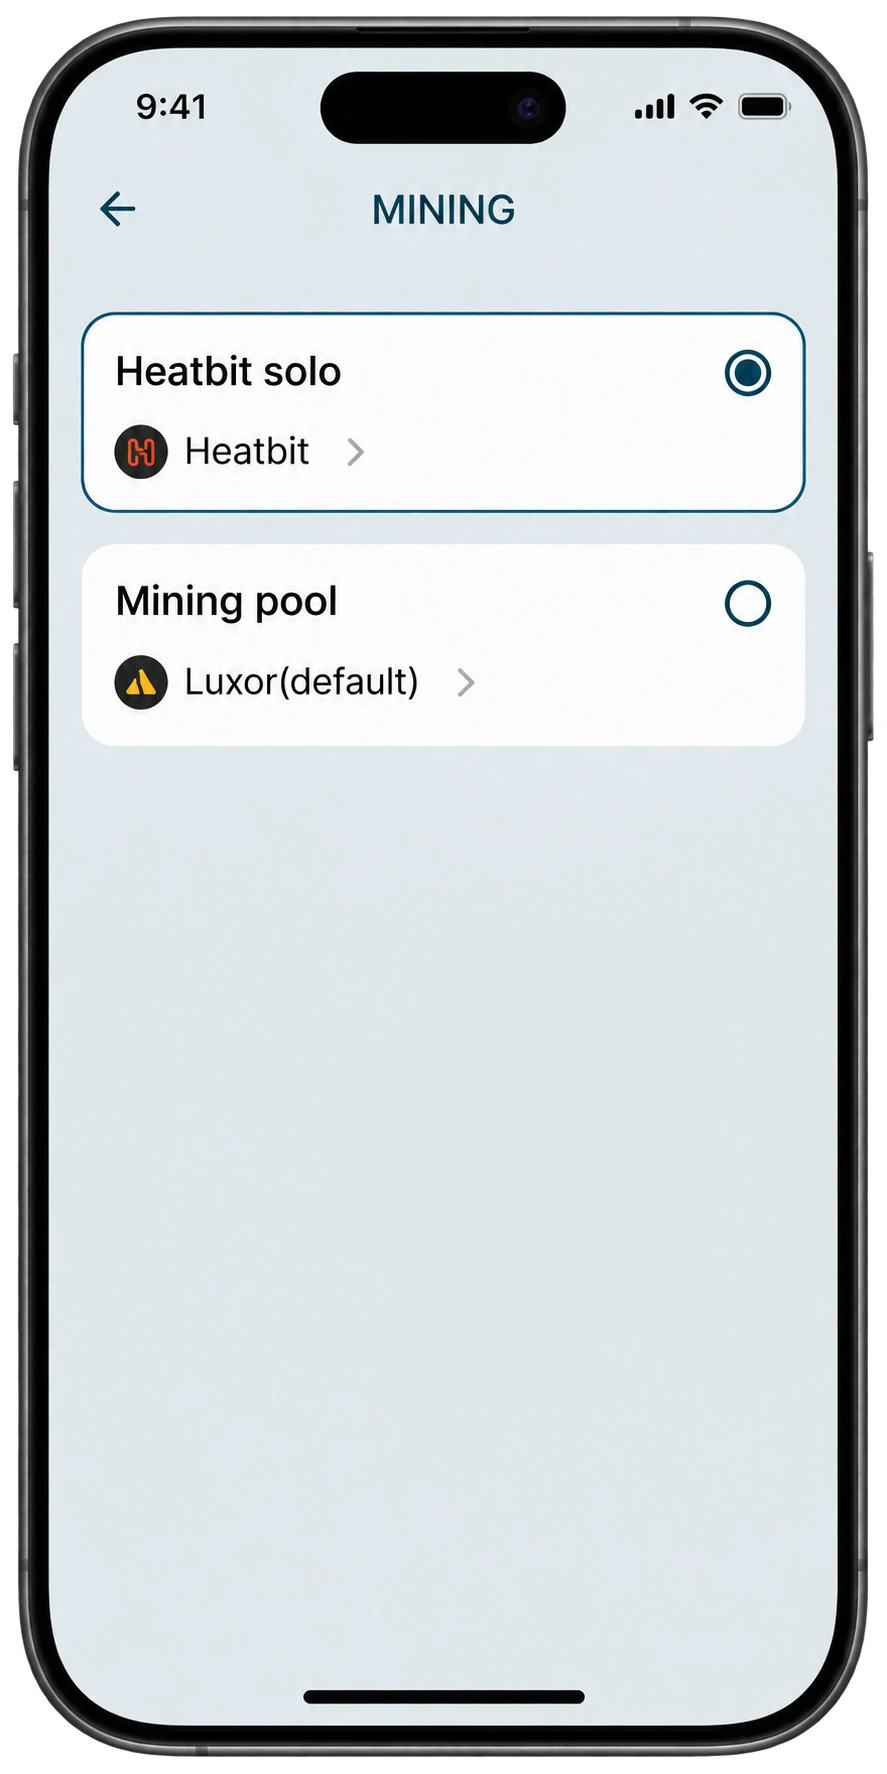
For the simplest initial check, keep the displayed default service until you have confirmed the device is connected and operating. You can then make a deliberate choice about where it sends mining work.
Heatbit solo is a high-variance mode: regular hashrate does not create regular block rewards. Conventional pool mining allocates rewards under the selected service’s method, fees, minimum payout, and withdrawal rules. Our mining-pool guide explains the difference, and the solo-pool comparison covers service selection.
Using a Preset or Manual Entry
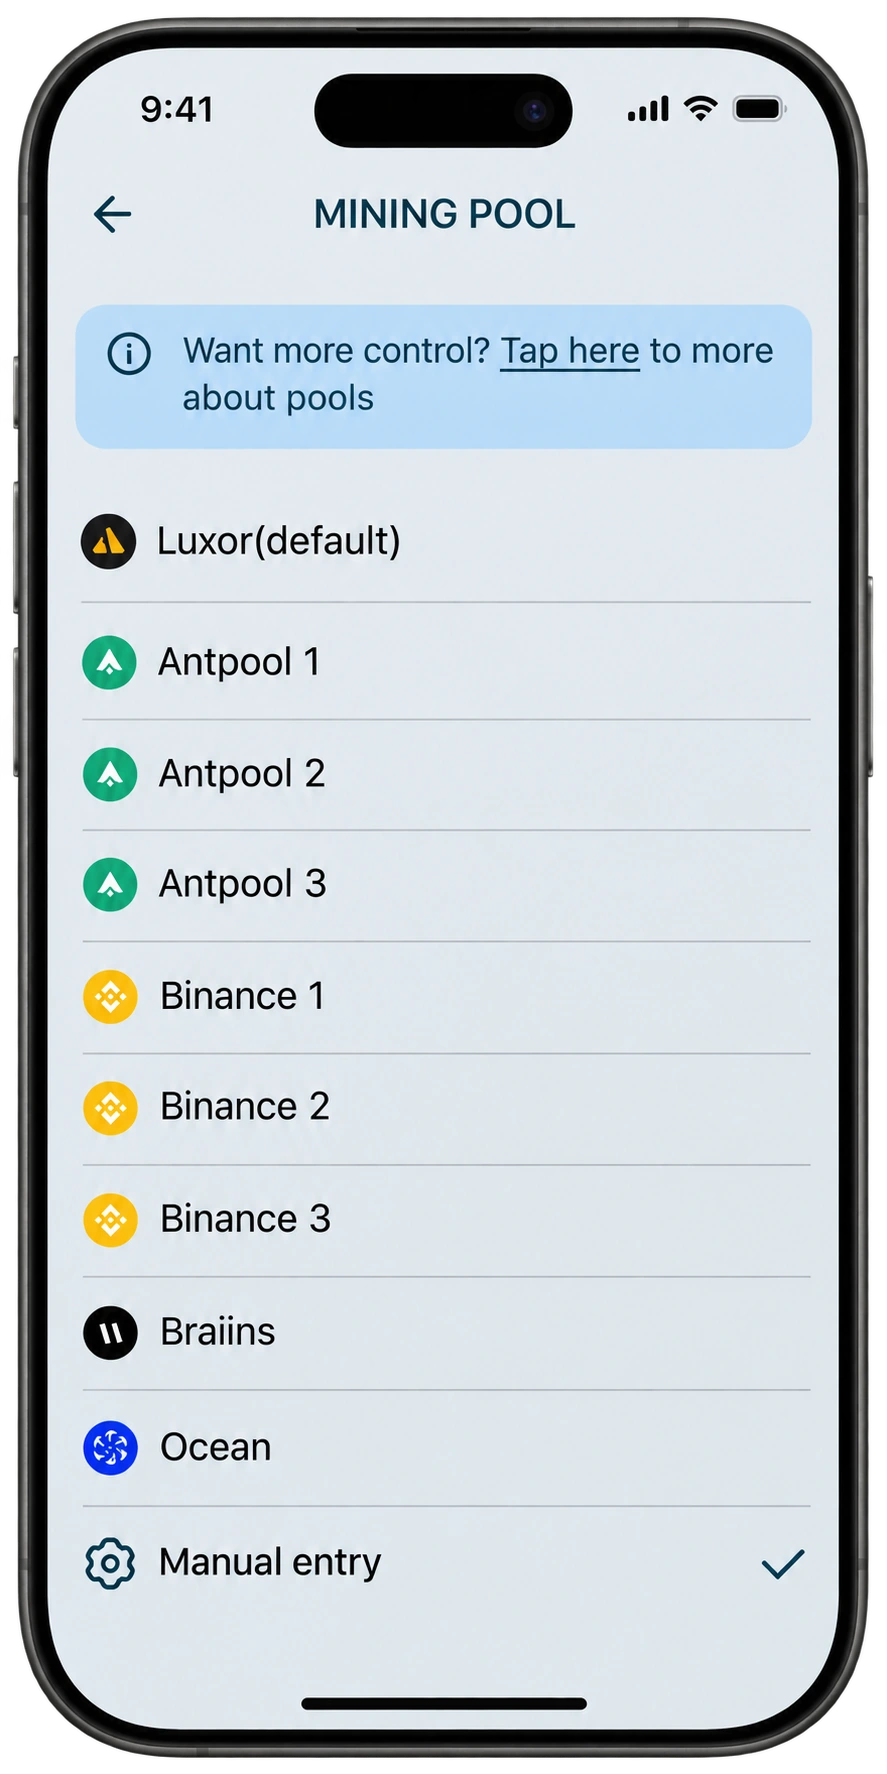
Open the mining settings and choose a listed service or Manual entry where available. A preset name does not replace checking the operator’s current terms and connection instructions.
Check each value before saving. Do not copy an address from a screenshot, another person’s worker configuration, or a setup video. If the chosen service requires registration, create your own account directly with that operator and follow its requirements.
After saving, allow the connection to establish. Then check the external pool’s worker page, accepted shares, or account dashboard. Share timing depends on difficulty and hashrate, so an immediate zero is not enough to diagnose failure.
Custom pools can provide a different level of app statistics than Heatbit’s integrated service. Use the external operator’s accepted-work record to distinguish limited app reporting from an actual connection problem.
| Field | What belongs there |
|---|---|
| Pool URL | The complete Stratum endpoint and port provided for compatible Bitcoin mining. A pool’s website address is not automatically its mining endpoint. |
| Worker name | The format the service requires. Some solo services use a Bitcoin address, optionally followed by a worker suffix. Conventional pools may require an account and worker name. |
| Password | The value the pool specifies for its worker connection. Do not substitute an exchange password, wallet recovery phrase, or private key. |
| Payout settings | Check separately in the relevant service or account. Saving a worker name does not always configure withdrawals. |
7. Verify That Setup Worked
Finish with the following checks rather than stopping when the app closes its onboarding screen:
- The Bitair is connected to the intended 2.4 GHz network and has internet access.
- The device appears in your own Heatbit account with a recognizable name.
- The filter and enclosure are correctly fitted, and the intake and exhaust remain clear.
- A purifier-mode change produces the expected response.
- Mining is enabled on the intended service, with readings that update after startup.
- The correct wallet or pool-account payout destination is saved.
- Where the service exposes worker data, it shows a connected worker or accepted work after an appropriate interval.
- You understand the selected service’s fees, thresholds, and withdrawal rules.
For perspective on power use and mining probability, use our mining calculator. It is a planning tool, not a promise of earnings or a deadline for finding a block.
Bitair Setup Troubleshooting
| Symptom | Check first | Next action |
|---|---|---|
| No sign-in code | Country code, number, reception, and SMS filtering. | Use the app’s resend process and contact Heatbit if the account flow remains blocked. |
| The app cannot find Bitair | Power, proximity, setup permissions, and the documented pairing state. | Return to the current add-device prompts. Follow the supplied pairing instructions rather than guessing reset timings. |
| Wi-Fi connection fails | 2.4 GHz availability, password, signal, and guest-network restrictions. | Try the router’s supported IoT onboarding method or a suitable separate 2.4 GHz network. |
| Wi-Fi succeeds, internet fails | Router internet access, captive portals, and network policy. | Confirm the network allows the appliance’s required outbound access. |
| Internet succeeds, account linking fails | App login, account status, and any prior device association. | Retry through the app or contact support with the serial number and the failed check. |
| Fan works, mining stays inactive | Mining switch, selected service, internet access, and saved pool values. | Verify the service endpoint and check its worker status rather than treating airflow as proof of mining. |
| Custom pool has no shares | Endpoint, port, worker format, account requirements, and share difficulty. | Check the operator’s status and allow a suitable interval. Correct one setting at a time. |
| App statistics change after switching pools | Which statistics the custom service supplies to the app. | Check accepted work at the pool before assuming the miner stopped. |
| No wallet payout | Solo versus pool mode, payout destination, thresholds, and schedule. | Distinguish no block win or pending credited earnings from an actual failed withdrawal. |
Keep router protections in place. The reference app screen mentions additional router filtering, but the next step is to identify the blocked destination or outbound connection. Use a specific trusted exception with the router vendor or network administrator when appropriate. Do not disable the firewall, expose Bitair to the internet, or forward inbound ports just to attempt onboarding.
Changing Wi-Fi, Ownership, and Filter Care
If the network name or password changes, follow the current Heatbit app’s network or re-pairing instructions for your model. Do not remove the account, factory-reset the device, or alter pool settings as a first response to a simple network problem.
For a previously owned unit, confirm that it can be associated with your account and that all saved wallet and pool details have been reviewed. Ask Heatbit support to resolve an ownership association you cannot change through the documented process.
Check filter condition and the app’s maintenance information. Disconnect power before opening the filter compartment, follow the supplied cleaning instructions, and do not wash a HEPA element unless the manufacturer explicitly permits it. Refit everything before powering on.
For airflow, replacement filters, operating costs, and longer-term limitations, return to our Bitair hardware and air-purifier guide. If setup remains blocked, contact Solo Satoshi support with your device model, app version, phone operating system, failed setup stage, and any exact error message. Do not send a Wi-Fi password, verification code, or wallet recovery phrase.