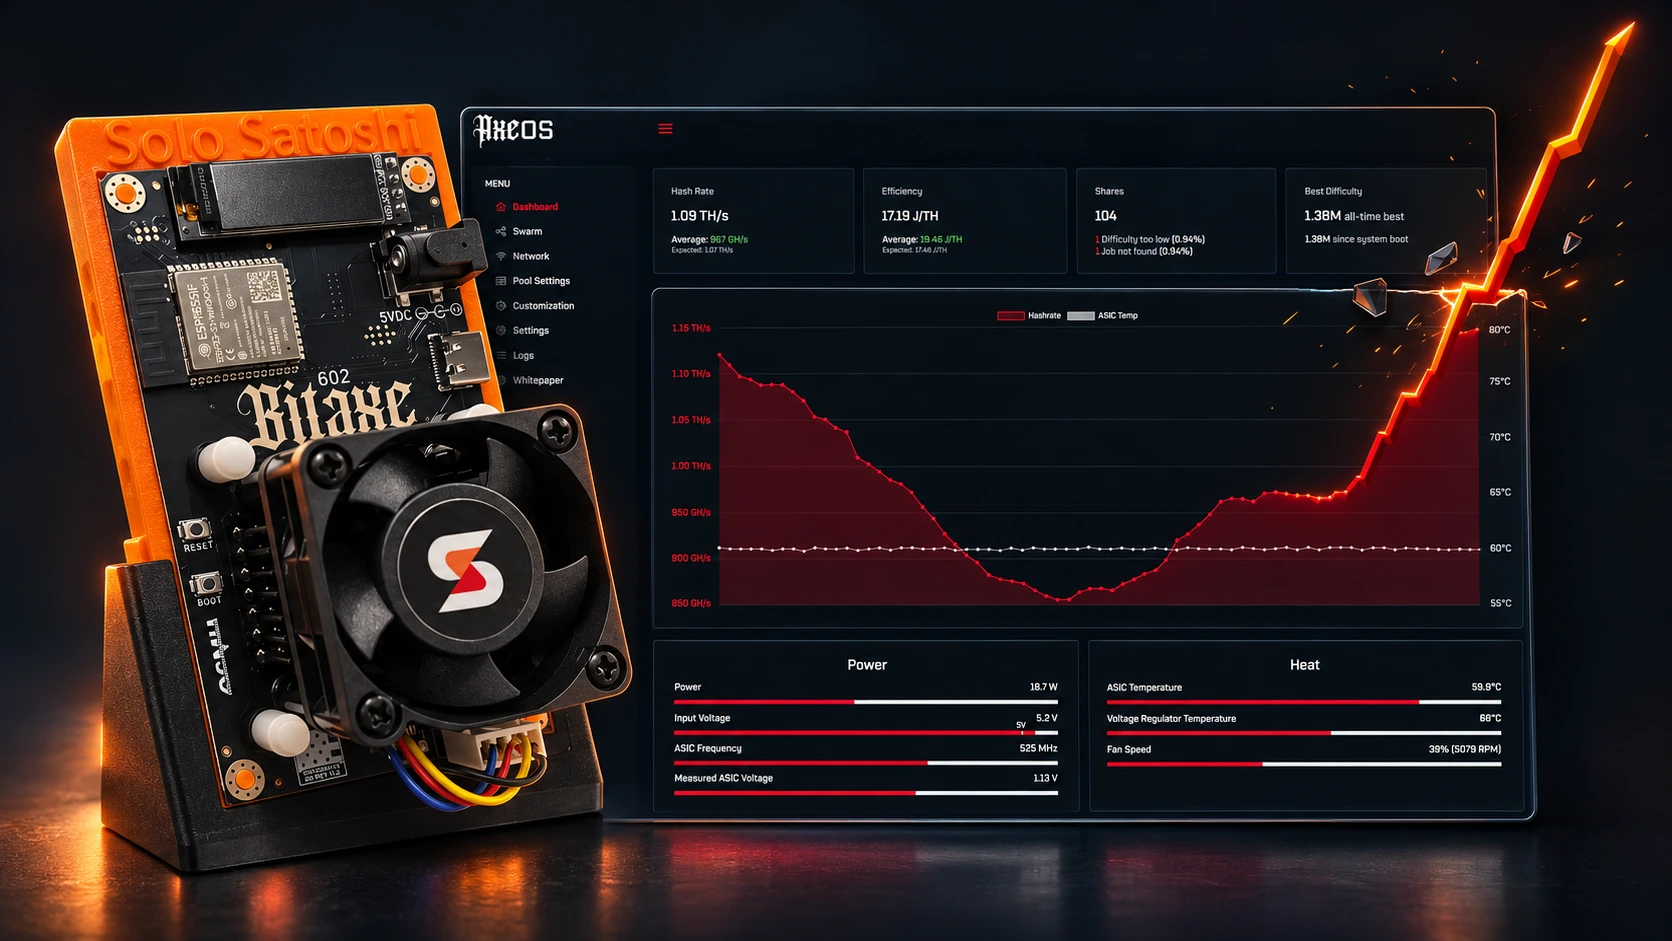
Bitaxe overclocking increases ASIC frequency to produce more sustained mining hashrate, provided the board, power supply, and cooling can support it. Start with the correct defaults for your unit, change one setting at a time, and compare the resulting work, temperatures, and power. Increasing voltage is a separate decision, not an automatic requirement.
This guide covers the Gamma 602, Duo 650, GT 801, Turbo Touch, Naja Duo 1201, Supra, and Ultra. For the complete dashboard and firmware workflow, use our AxeOS guide.
Quick overview
- Start from defaults: Record the correct frequency and voltage for your board and firmware, then increase frequency in small supported steps. More voltage can increase heat and load without producing a worthwhile hashrate gain.
- Keep thermal headroom: Use 60–65°C as the preferred ASIC operating target, with lower temperatures acceptable. Monitor the voltage regulator separately and pause increases when cooling is already at full output.
- Match the power input: Gamma, Duo 650, Supra, and Ultra profiles here use 5V barrel inputs; GT, Touch, and Naja use 12V XT30 systems. Verify the exact board, polarity, cable, connector, and continuous supply rating before tuning.
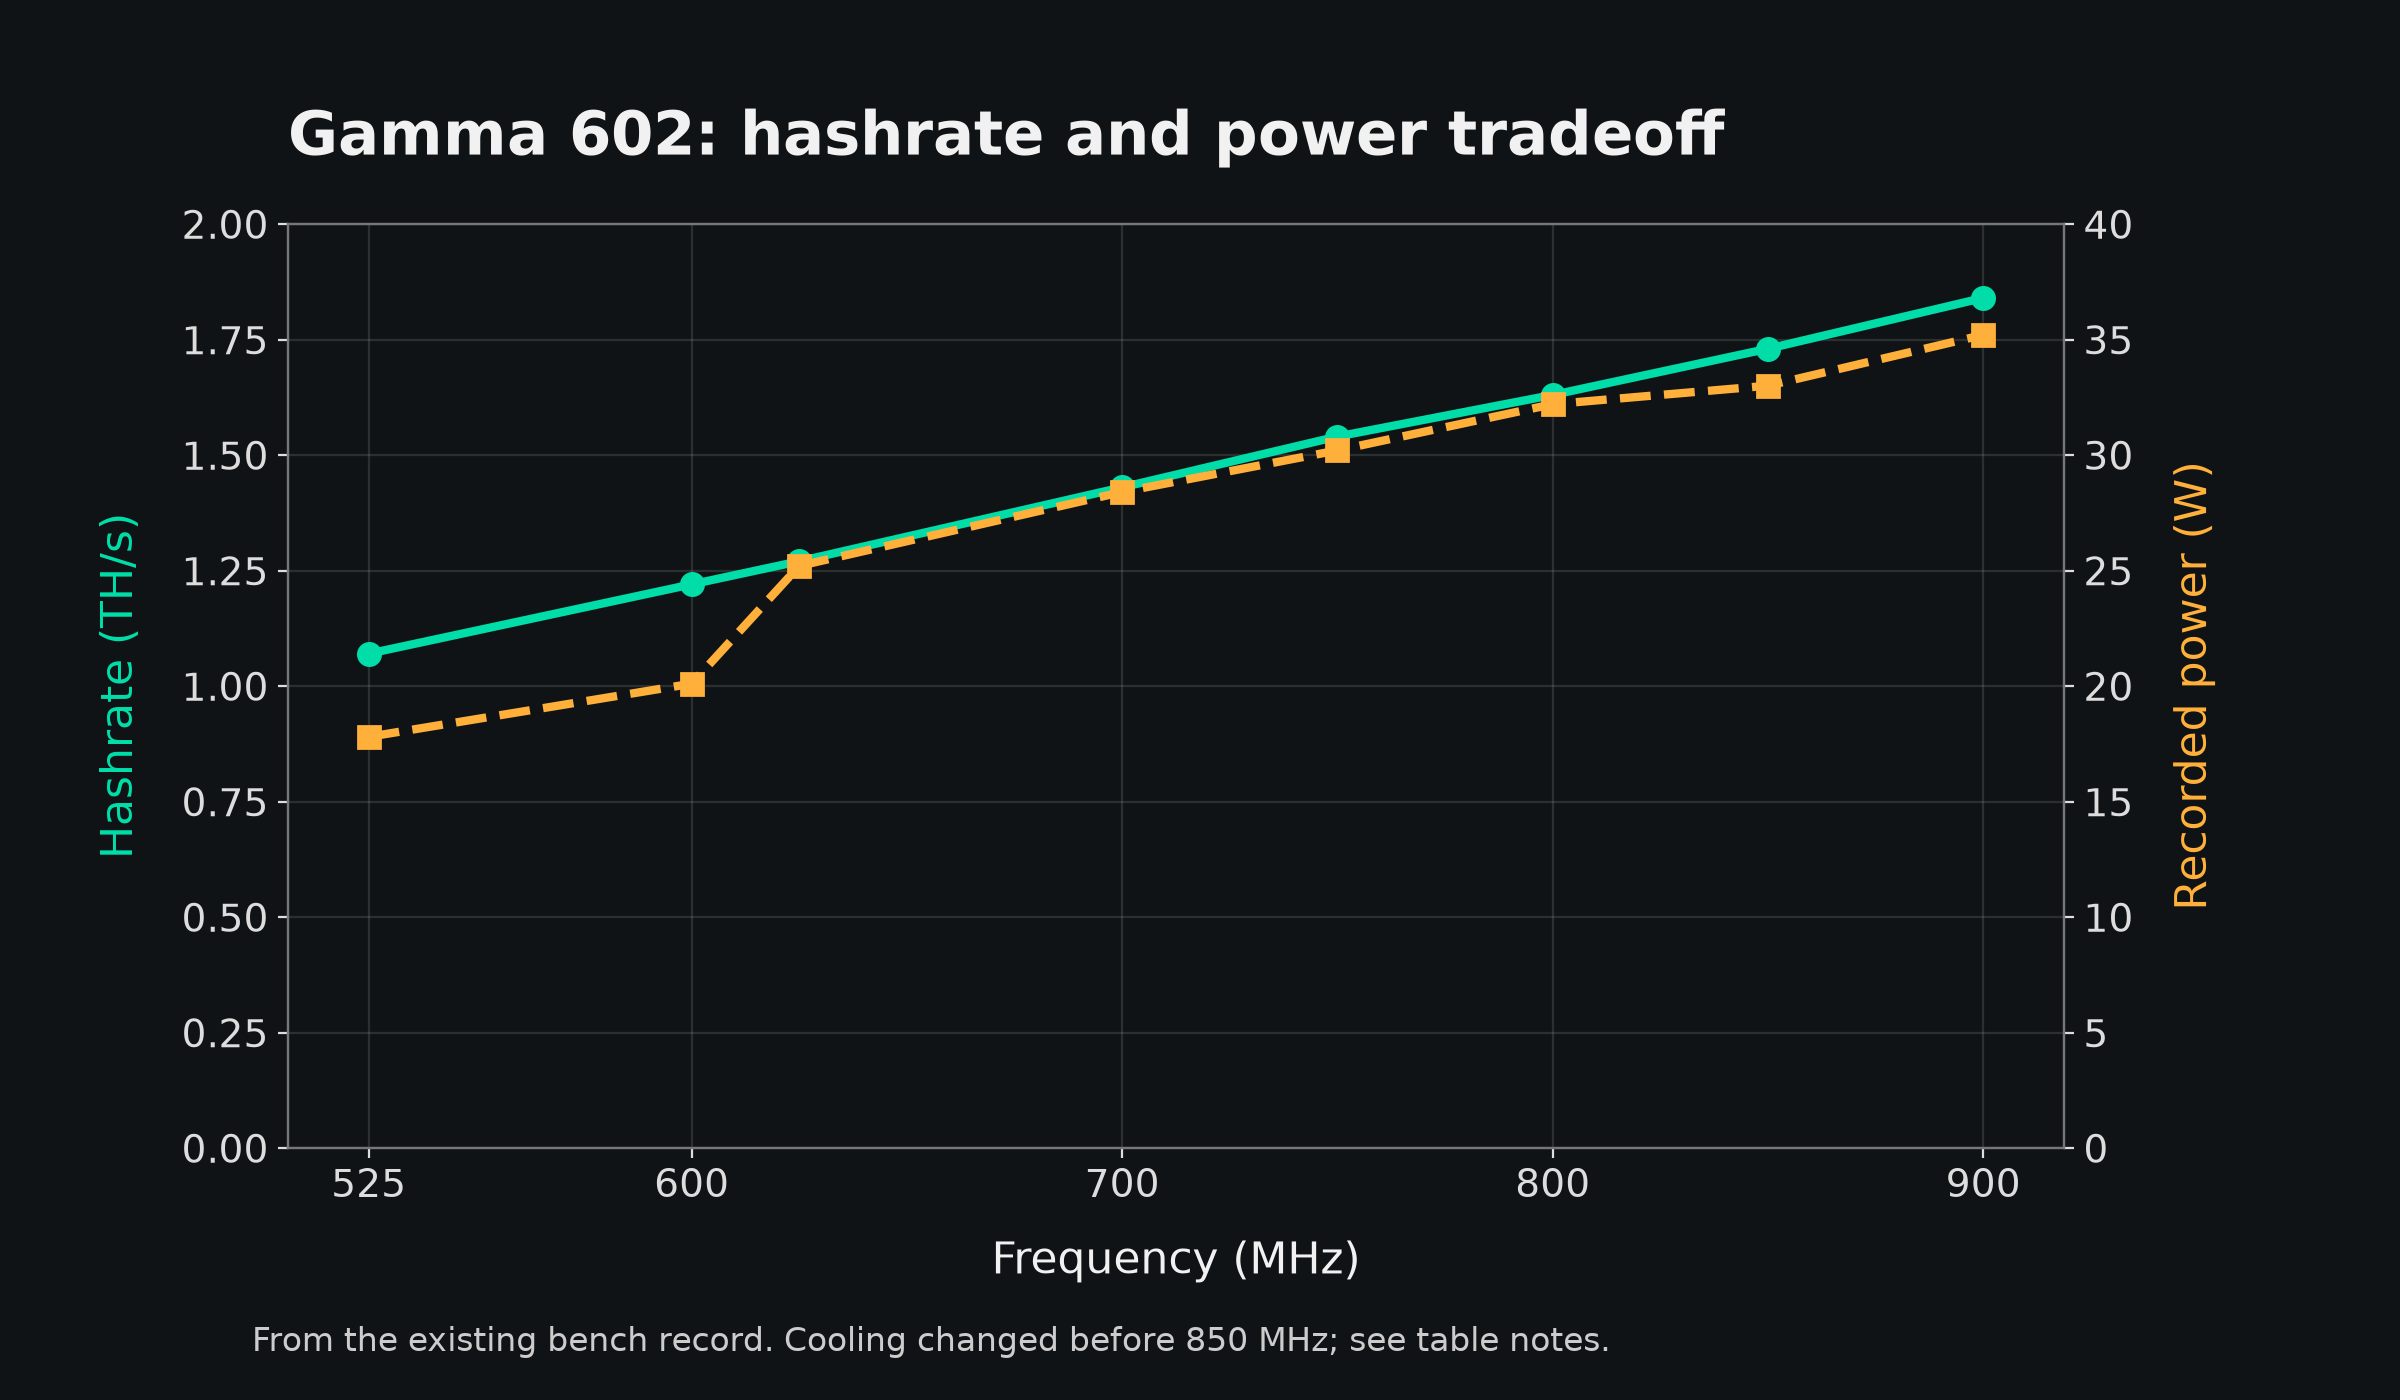
- Compare the actual tradeoff: The Gamma 602 bench record increases from 1.07 TH/s at 17.8W to 1.84 TH/s at 35.2W with upgraded cooling. The highest clock is not necessarily the most efficient or quietest profile, and another unit may behave differently.
- Read errors in context: Aim for 0–2% ASIC errors, investigate readings above 5%, and reduce frequency above 10%. Assess sustained hashrate and power alongside those checkpoints; pool rejection reasons are a separate diagnostic.
- Validate before keeping a profile: Short settling checks help compare settings, but a candidate needs sustained testing across warmer conditions. Record temperature, regulator readings, power, accepted work, and restarts, then validate for 24–72 hours before treating it as a continuous-use profile.
What Is Bitaxe Overclocking?
Bitaxe overclocking means raising the ASIC clock frequency above the stock setting for your exact model, board revision, and firmware to increase its potential hashrate. Begin with one small supported frequency increase in AxeOS, keep core voltage unchanged, and compare sustained hashrate, errors, temperatures, power, and stability before keeping the change. Adjust voltage separately only when needed and within the limits of the specific hardware. Higher settings can increase power consumption, heat, fan noise, and instability.
Why Increase the Frequency?
Increasing frequency can raise sustained hashrate because the ASIC completes more hashing work each second. Keep the increase only when the miner remains stable and the additional useful work justifies its power, heat, noise, and cooling demands.
Every SHA-256 hash your Bitaxe computes is an independent attempt to find a valid nonce that satisfies the current network difficulty target. The ASIC chip processes these attempts in parallel across multiple computational cores, each executing a fixed number of hash rounds per clock cycle. When you increase the clock frequency, every core completes its rounds faster, producing more valid hash results per second.
At stock settings, the BM1370’s cores complete approximately 1.07 trillion hashes per second (1.07 TH/s). At 900 MHz, those same cores complete approximately 1.84 trillion (1.84 TH/s). The silicon itself has not changed. You have increased the rate at which it performs its hashing work. The tradeoff is higher current draw through the transistor gates, which generates more heat and demands more from your power supply and cooling system.
Overclocking can increase performance from hardware you already own, but the gain depends on the particular unit and its supporting equipment. Compare the extra sustained hashrate with the additional power, noise, cooling cost, and load on the board. A higher clock setting is useful only if the miner remains stable and produces more useful work.
The practical payoff depends on how you mine. For solo miners, every additional gigahash directly improves your probability of finding a block. The potential reward is 3.125 BTC plus transaction fees. For conventional pool mining, accepted work contributes to rewards under the pool’s payout method. Neither approach makes a short test or a higher displayed frequency a guarantee of higher earnings.
Bitaxe Model Reference
Hardware covered in this guide. Approximate published ratings and earlier profile figures are reference points, not measurements from a single shared test:
| Model | ASIC Chip | Chips | Stock Hashrate | Stock Power | Efficiency | Power Input | Status |
|---|---|---|---|---|---|---|---|
| Bitaxe Gamma (600 Series) | BM1370 | 1 | 1.07 TH/s | 17.8 W | ~16.6 J/TH | 5V barrel jack | Current |
| Bitaxe Gamma Duo (600 Series) | BM1370 | 2 | 1.63 TH/s | 25.8 W | ~15.8 J/TH | 5V barrel jack | Current |
| Bitaxe GT (800 Series) | BM1370 | 2 | 2.15 TH/s | 43 W | ~20.0 J/TH | 12V XT30 | Current |
| Bitaxe Turbo Touch (800 Series) | BM1370 | 2 | 2.15 TH/s | 43 W | ~20.0 J/TH | 12V XT30 | Current |
| Bitaxe Supra (400 Series) | BM1368 | 1 | 500-650 GH/s | 12 W | ~18.5–24 J/TH | 5V barrel jack | Legacy |
| Bitaxe Ultra (200 Series) | BM1366 | 1 | 400-500 GH/s | 12 W | ~24–30 J/TH | 5V barrel jack | Legacy |
| Bitaxe Naja Duo 1201 | BM1373 | 2 | ~4.4 TH/s | ~42 W | ~9.5 J/TH | 12V XT30 | Published stock rating |
The BM1370 is used in the Gamma, Duo, GT, and Touch; the BM1373 powers the Naja Duo. The Supra uses BM1368, and the Ultra uses BM1366. Chip count does not identify supply voltage: the two-chip Duo 650 retains a 5V barrel input, while GT, Touch, and Naja use 12V XT30 systems. Match the supply and cable pinout to the exact board.
Every ASIC chip is subject to the silicon lottery: manufacturing variations mean your specific chip may overclock better or worse than identical models. Two BM1370 chips from the same production batch can have different stable ceilings. Begin tuning from the correct defaults for your board and firmware. The Gamma 602 table contains recorded bench measurements under its stated conditions. Other model tables contain reference profiles and ranges rather than measurements of your unit. None establishes another unit’s limit. Temperature figures above the preferred 60–65°C target describe the listed profile, not a recommendation to operate continuously at that temperature.
How Overclocking Works: Frequency, Voltage, and Temperature
Frequency sets the hashing pace, voltage affects operating margin and power, and temperature constrains the load the hardware can sustain. Understanding their interaction helps you evaluate useful performance and avoid unstable settings.
Core Frequency (MHz)
Frequency controls the ASIC clock rate. With the same chip count and architecture, hashrate generally rises with frequency until errors, power delivery, or thermal conditions limit useful performance. Available presets, supported increments, and defaults in AxeOS depend on the board and firmware. Use a small supported step, commonly 25 MHz where available, rather than transferring one chip’s settings to every model.
Core Voltage (mV)
Voltage can provide the electrical margin needed for a higher frequency, but an increase is not always necessary and does not guarantee stability. Voltage-control hardware and supported ranges vary between boards. There is no universal 1,300 mV setting that is appropriate for every Bitaxe.
Increase frequency first while keeping the correct default voltage. If instability develops, return to the previous stable frequency or consider a small voltage adjustment only within the documented limits for that board, regulator, power supply, and cooling system. An available input in AxeOS is not proof that a setting is suitable for continuous operation.
Dynamic switching power is approximately proportional to voltage squared multiplied by frequency. The often-quoted 21% increase from raising voltage by 10% assumes frequency and other factors remain unchanged; it does not predict the exact increase in whole-miner power or temperature.
Temperature and Operating Headroom
Use 60–65°C as the preferred ASIC operating target when tuning. Lower temperatures are also acceptable; there is no reason to heat a cooler-running miner to reach this range. This is a practical target, not a guarantee of component life or a replacement for the board’s documented limits.
Monitor every available ASIC sensor and the voltage-regulator temperature separately. Regulator readings are not ASIC readings and do not share the same target. Watch cooling performance, ambient temperature, fan or pump operation, input voltage, and power as well as hashrate error percentage. A miner already near 65°C with its cooling at full output has little thermal headroom for another increase.
| ASIC reading | Tuning response |
|---|---|
| Below 60°C | Acceptable if operation is stable. Check electrical and regulator limits before increasing frequency. |
| 60–65°C | Preferred operating target. Confirm stable hashrate, accepted work, and sufficient cooling margin. |
| Above 65°C or continuing to rise | Pause increases. Reduce the load or improve cooling, then reassess under sustained conditions. |
| Thermal protection activates | Stop tuning and investigate. Firmware protection is a last-resort safeguard, not an operating target. |
The Diminishing Returns Curve
At unchanged voltage, a modest frequency increase can improve performance without a large efficiency penalty. Further increases may require more voltage, causing power to rise faster than useful hashrate. Measure the effect instead of assuming a fixed percentage gain. Efficiency in J/TH is power in watts divided by hashrate in TH/s; lower is better when the measurement boundary and operating conditions match.
Choose a profile for your goal: maximum sustained hashrate, lower energy use, quieter operation, or a balance. Compare useful hashrate, power, noise, temperatures, and restarts over the same test window. For example, an extra 17W running continuously for 30 days uses 12.24 kWh, costing about $1.47 at $0.12/kWh. Use wall-meter readings to calculate the actual electricity cost.
Pre-Overclocking Checklist
Check the power supply, cooling, baseline performance, firmware, Wi-Fi, and wall-power measurement before increasing load. Weak power or cooling can produce unstable results and misleading data.
1. Power Supply
A supply, cable, or connector that cannot support the load can cause voltage sag, restarts, or unstable hashing. Confirm the miner’s required input voltage and polarity first. The supply examples below do not increase the current rating of the board’s connector or wiring.
| Model | Connector | Supply example (stock) | Higher-load reference | Solo Satoshi PSU |
|---|---|---|---|---|
| Gamma 602 | 5V barrel jack | 5V / 6A (30W) | 5V / 10A (50W) | Mean Well LRS-50-5 |
| Duo 650 | 5V barrel jack | 5V / 6A (30W) | 5V / 10A (50W) | Mean Well LRS-50-5 |
| Supra | 5V barrel jack | 5V / 6A (30W) | 5V / 6A (30W) | 5V 6A PSU |
| Ultra (Legacy) | 5V barrel jack | 5V / 4A (20W) | 5V / 6A (30W) | 5V 6A PSU |
| GT 801 | 12V XT30 | 12V / 5A (60W) | 12V / 10A (120W) | 12.4V 124W PSU |
| Turbo Touch | 12V XT30 | 12V / 5A (60W) | 12V / 10A (120W) | 12.4V 124W PSU |
| Naja Duo 1201 | 12V XT30 | Match board input; ~42W stock rating | Size for actual peak demand | Compatible listed XT30 supply option |
Use the voltage specified for the exact board and supply. Do not raise supply voltage merely to compensate for an undersized or poor-quality cable. A supply’s advertised wattage does not establish that a barrel jack, pigtail, or terminal can carry the same load. USB-C used for flashing is not a substitute for the specified mining power input. For wiring and suitable supplies, see our Mean Well power-supply guide. Exposed-terminal mains supplies require appropriate installation and protection.
2. Thermal Solution
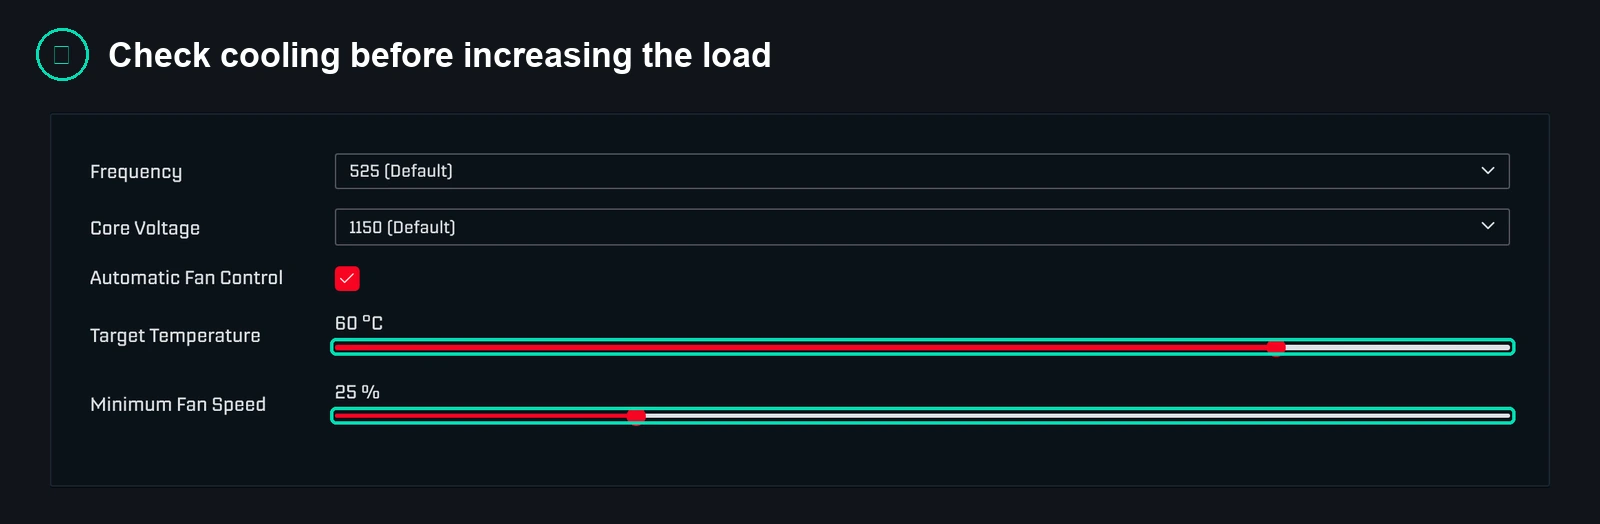
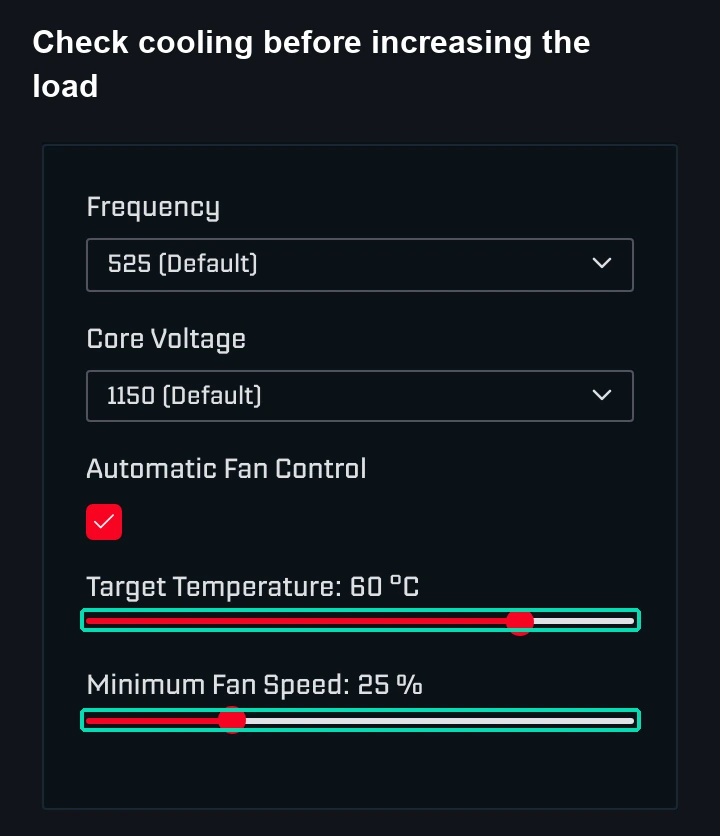
Check the installed cooler, fan, mounting, and ambient conditions at defaults before adding load. Upgraded cooling may help, but its suitability depends on the board and installation.
Heatsink: The Dark Horse pin-fin heatsink is one cooling option for supported Bitaxe boards. Check mounting compatibility for your revision, including the two-chip Duo. Temperature improvements depend on the original cooler, airflow, contact, and load.
Thermal paste: Check cooler contact and use the thermal interface specified for the assembly. Kryonaut Extreme is the paste identified in the Gamma bench setup, but changing paste does not guarantee a fixed temperature reduction. Do not substitute paste for a pad where the pad is needed to bridge a component gap. Follow the cooler’s installation method and avoid excessive mounting pressure.
MOSFET heatsinks: Regulator heating can become the limiting condition even when the ASIC reading looks acceptable. AxeOS reports VR temperature on the dashboard, but many overclockers focus only on the ASIC reading and miss the VR climbing into dangerous territory. Regulator operating limits depend on the component and board design; do not apply one generic maximum to every model. The Gamma 602 bench table records a 94°C regulator reading at 800 MHz while the ASIC measured 62.4°C. An ASIC reading within the preferred range does not establish acceptable regulator temperature or adequate electrical headroom. Our copper MOSFET heatsink kit can improve local cooling when installed in the verified locations for the board. It does not establish a higher electrical rating. Placement guidance: MOSFET Heatsink Placement Guide.
3. Baseline Benchmark
Run at stock settings for 24 hours. Record: average hashrate, ASIC temperature at steady state, fan speed, power draw (use a Kill-A-Watt meter), accepted/rejected shares, ASIC error count, and hashrate error percentage. Every overclock is measured against this baseline.
4. Firmware
Use a stable release that supports the exact board. The official ESP-Miner releases listed v2.15.4 as latest when checked on November 9, 2026. Confirm the correct board artifact and save a working configuration before updating. Update and recovery instructions: how to update Bitaxe firmware.
5. WiFi
All Bitaxe models connect to their mining pool over 2.4 GHz WiFi. Check RSSI in AxeOS. RSSI is measured in negative dBm, so values closer to zero are stronger:
- -30 to -50 dBm: Excellent. No connectivity concerns.
- -50 to -60 dBm: Good. Stable for 24/7 mining.
- -60 to -70 dBm: Fair. Monitor for stale shares.
- -70 dBm or worse (further from zero): Weak. Likely to cause stale shares and connection drops that mimic overclocking instability. Move closer to your router or add a 2.4 GHz extender.
6. Watt Meter
A Kill-A-Watt (or equivalent) plug-in meter lets you measure actual wall power at each setting. Pair it with your hashrate to calculate true J/TH efficiency per overclock step.
Step-by-Step Overclocking Process
Start from the defaults for the exact board and installed firmware, then change one variable at a time. Confirm the power supply, cable, connectors, and cooling are suitable before applying a default profile or increasing its load. If a unit cannot run its defaults within the operating targets, correct that problem before overclocking.
Step 1: Establish the Default Baseline
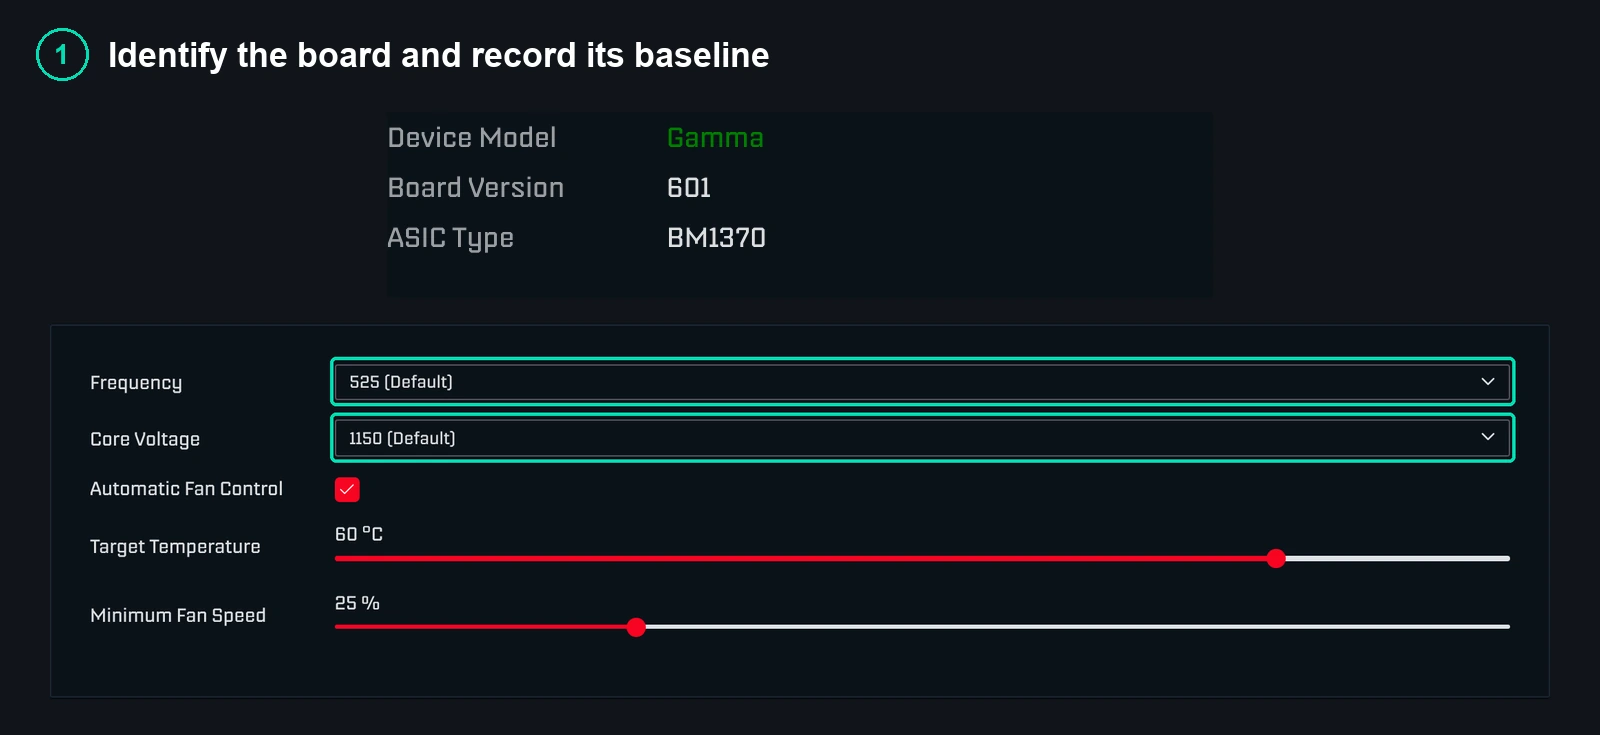
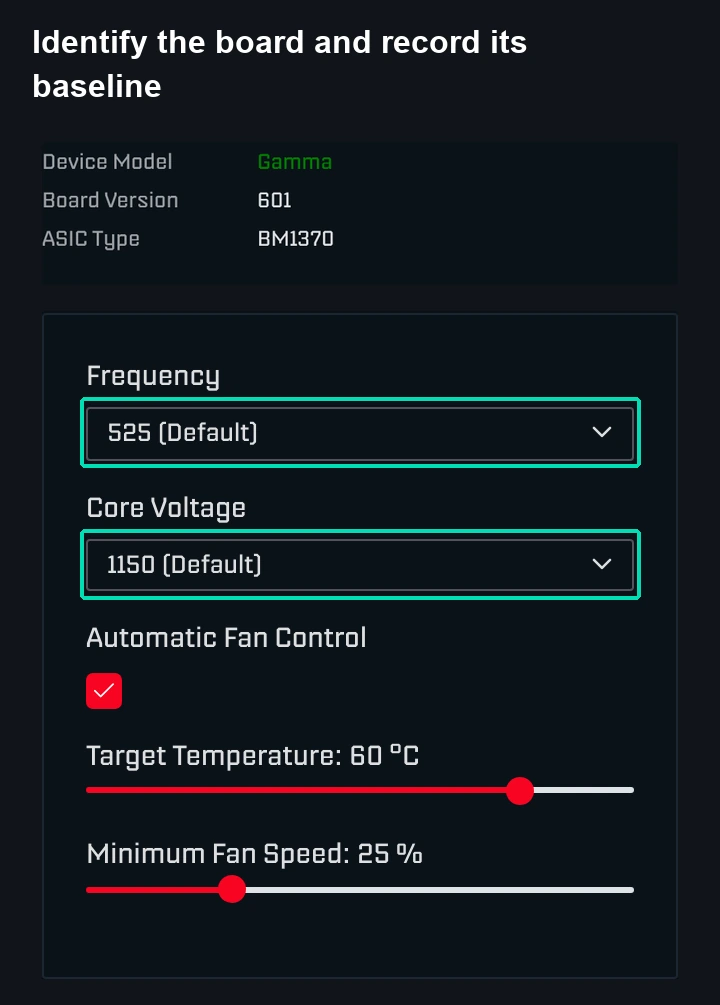
Open the miner’s local IP address in a browser on the same network. Record the board model, firmware version, current settings, and pool configuration before making changes. Check the correct frequency and core-voltage defaults for that board; a seller-configured profile may differ from the upstream firmware defaults. Apply the appropriate default profile only after checking the supporting hardware, and let the readings settle.
Record baseline hashrate, ASIC temperatures, regulator temperature, fan settings, power, error percentage, share counters, and uptime. Save the previous working profile so you can return to it if necessary.
Step 2: Increase Frequency by a Small Supported Step
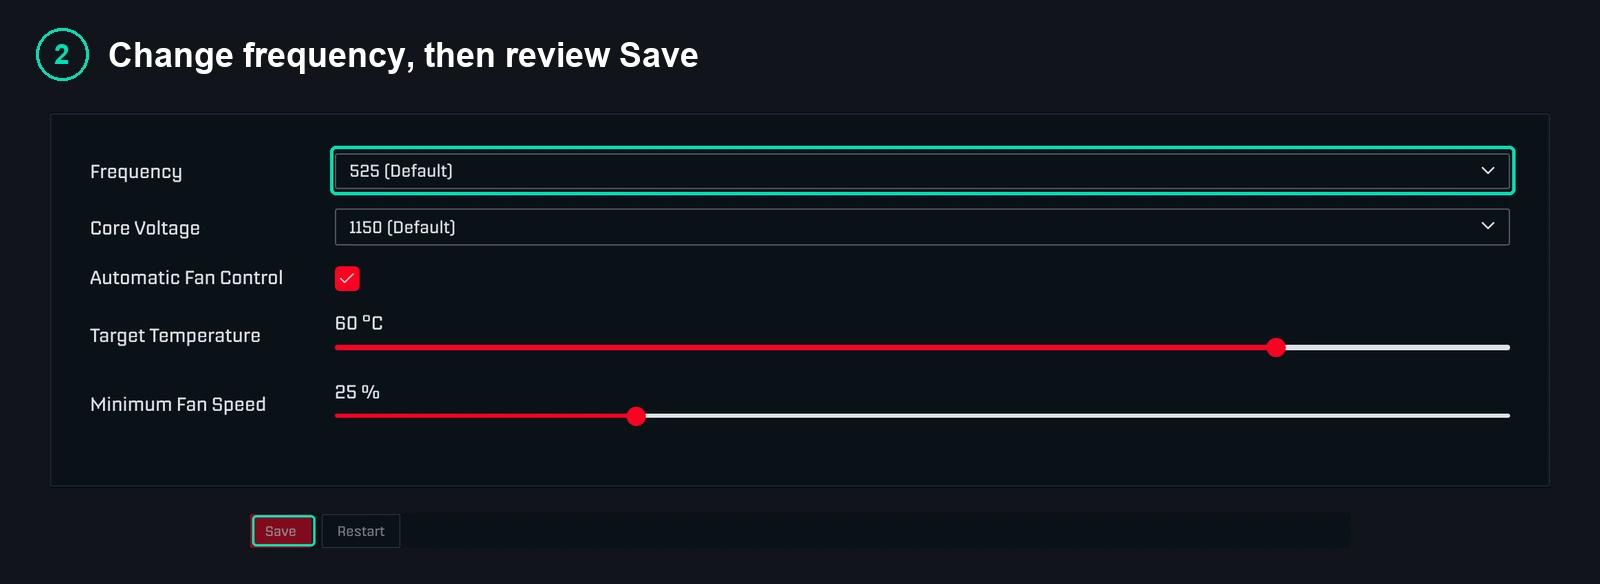
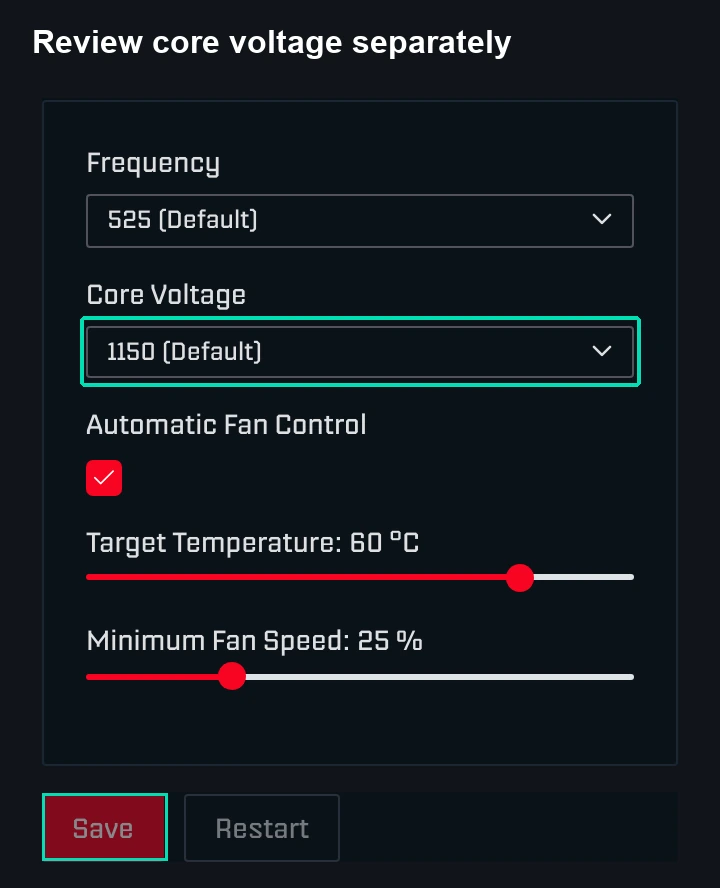
Increase frequency by 25 MHz where supported, keeping voltage unchanged. Save using the installed firmware’s controls and follow any restart prompt. Wait at least 15–20 minutes for an initial check; this is a screening interval, not proof of long-term stability. Compare sustained hashrate and errors with the default baseline, aiming for under 2% ASIC errors and a preferred ASIC operating temperature of 60–65°C or lower.
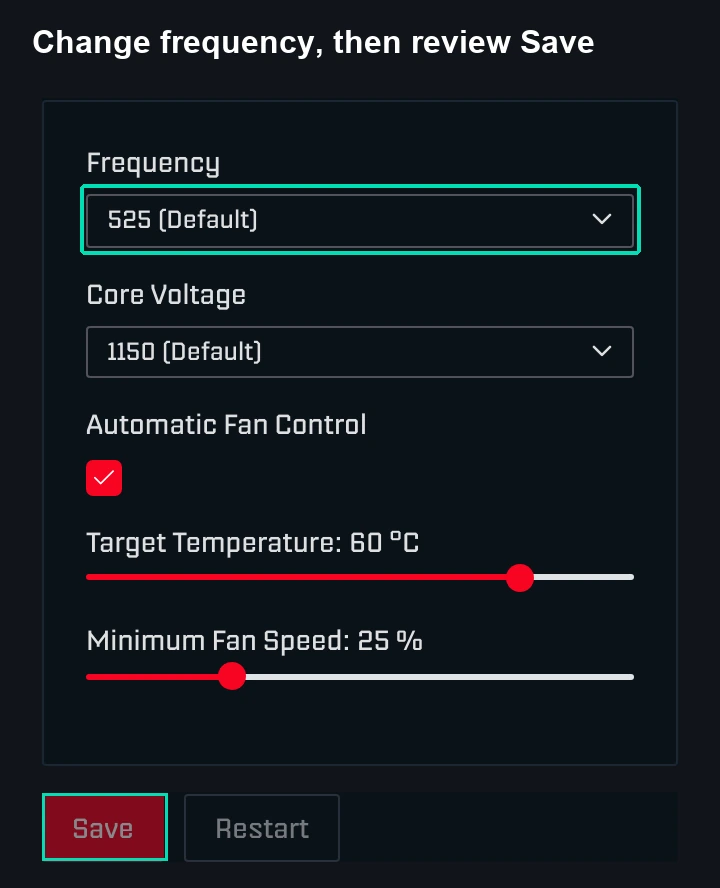
Step 3: Check Before Increasing Again
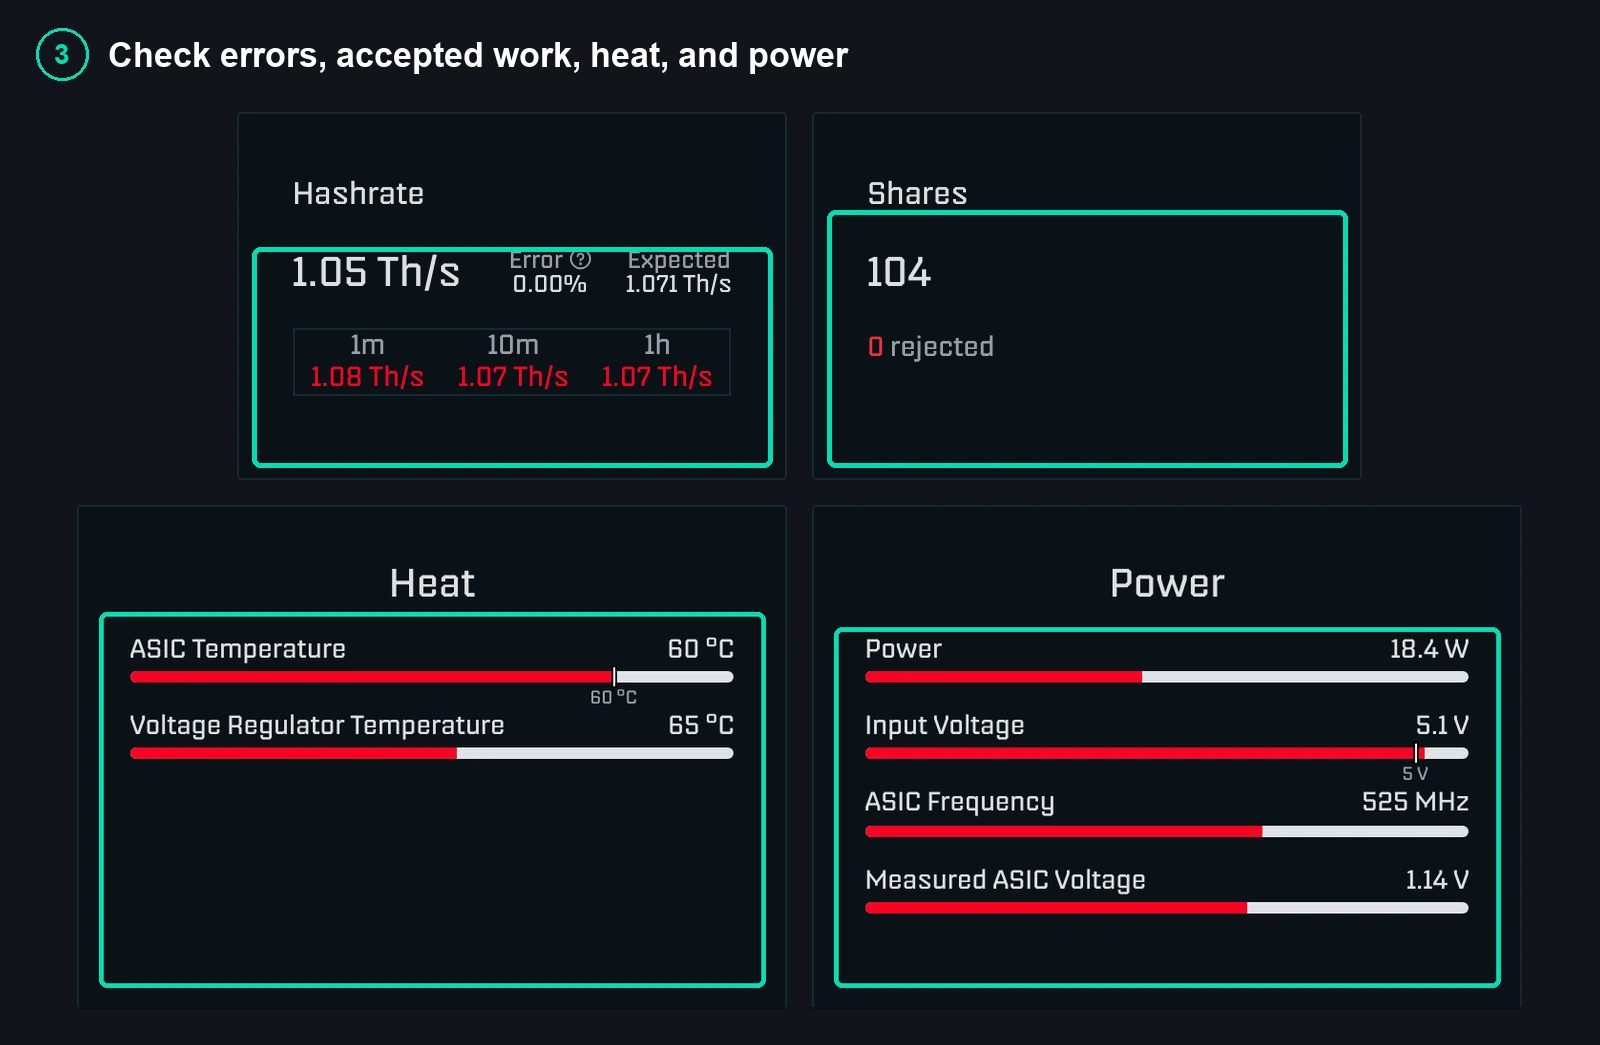
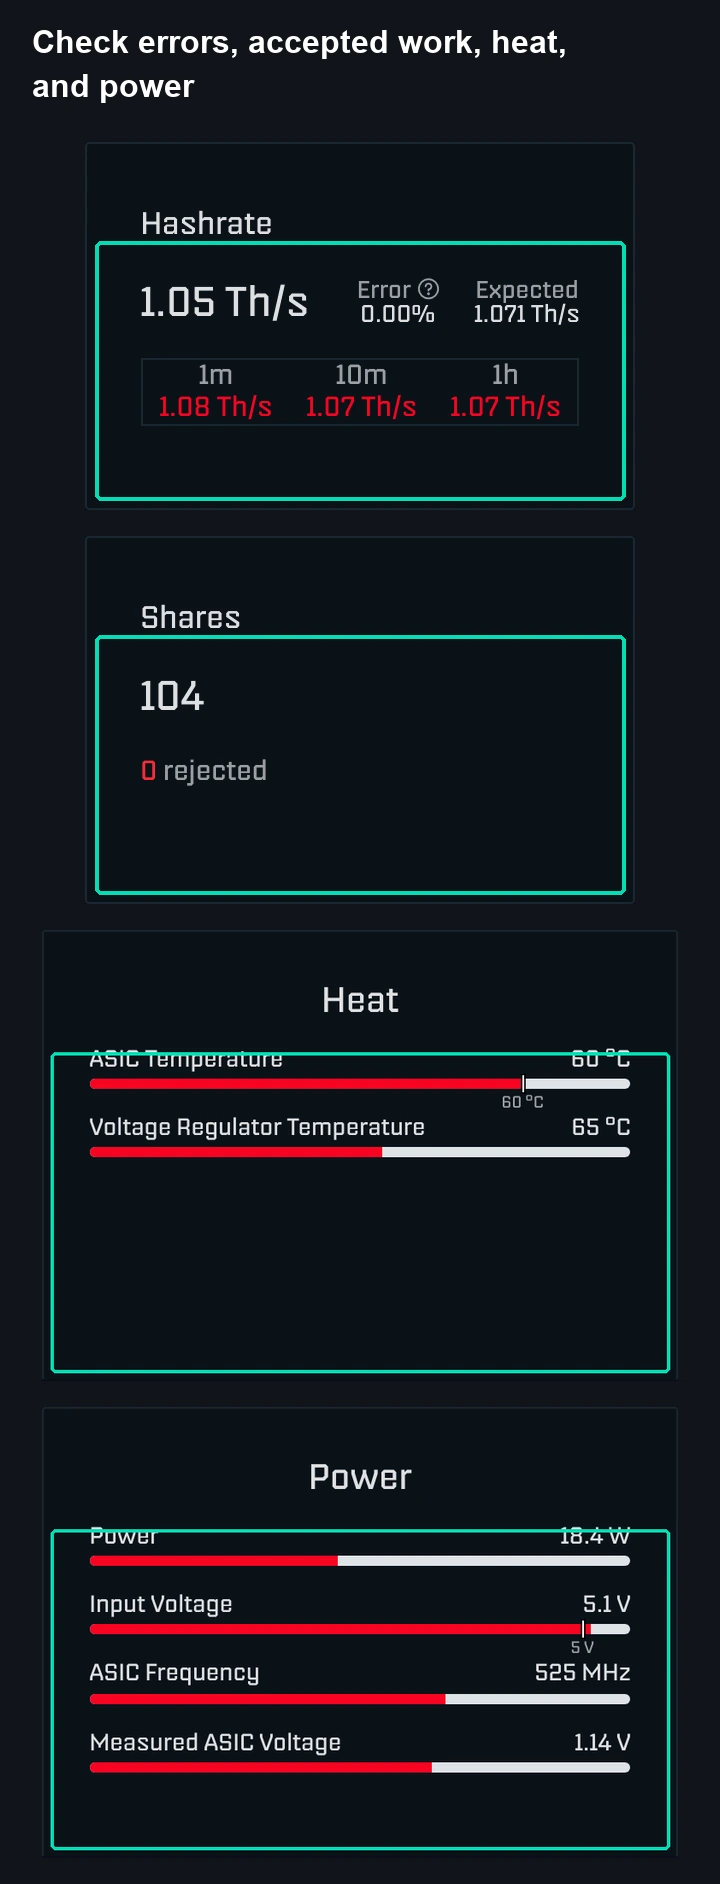
If useful hashrate improves and temperatures, power, input voltage, and regulator readings remain acceptable, try another small frequency step. Pause if errors rise above the 2% tuning target, hashrate drops, the miner restarts, or ASIC temperature exceeds 65°C. Check rejected-share reasons separately. Do not keep increasing settings simply because the miner has not shut down.
Step 4: Reduce Frequency or Assess a Voltage Adjustment
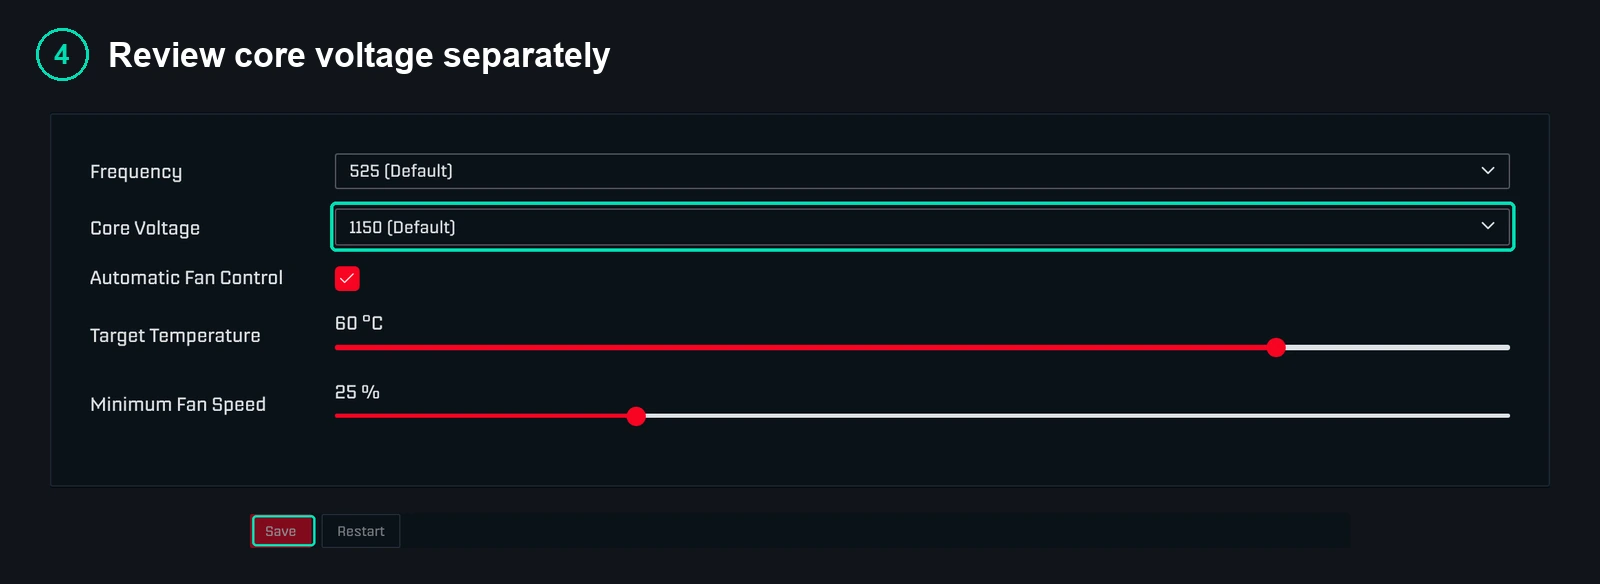
Returning to the previous stable frequency is the first option. If there is electrical and thermal headroom, a small voltage adjustment, such as 25 mV where supported, may help a frequency that was unstable. Stay within documented board-specific limits and compare the result with the previous profile. More voltage increases load and heat; it cannot correct inadequate cooling, a poor connection, or a failing power supply.
Step 5: Validate for 24–72 Hours
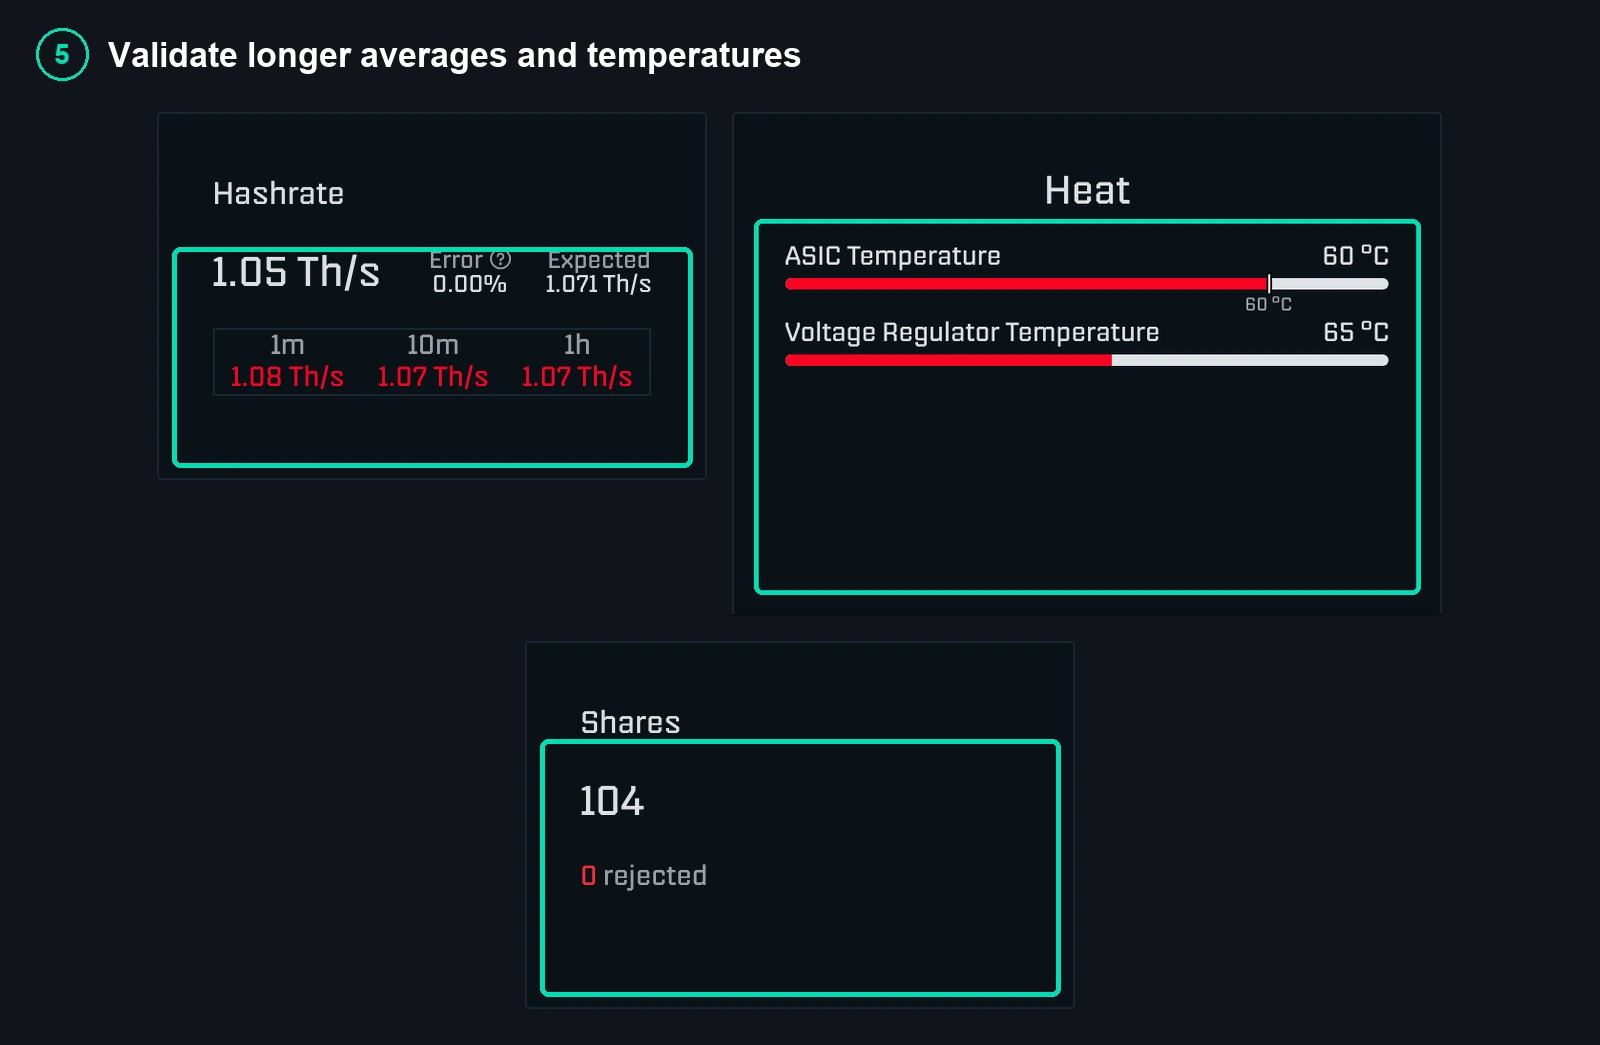
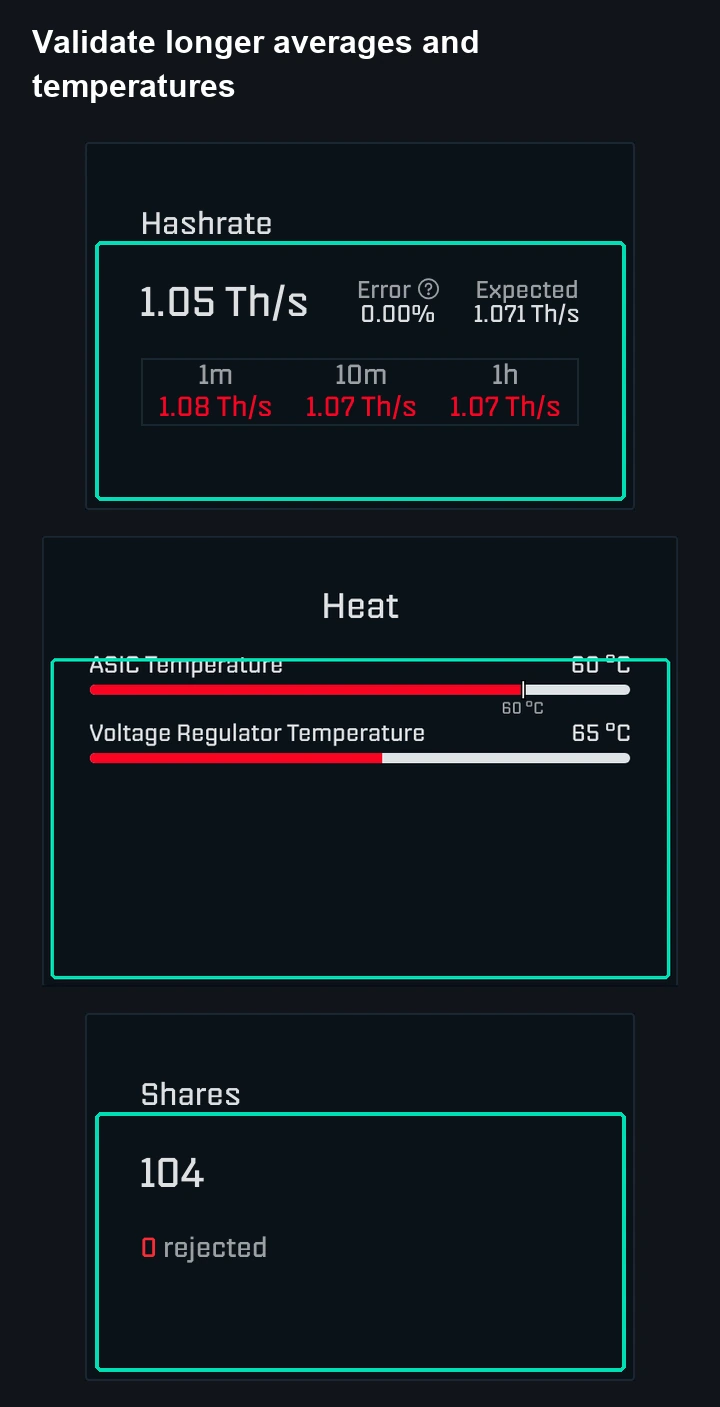
Run a candidate profile for at least 24 hours, preferably 48–72 hours, including warmer ambient conditions. Aim for under 2% ASIC errors, ASIC temperatures no higher than 65°C, and zero unexpected restarts. Also confirm accepted work continues, regulator readings remain within the hardware’s operating limits, and there is no sustained power or voltage deterioration. A short successful test does not replace this validation.
Step 6: Record and Compare the Results
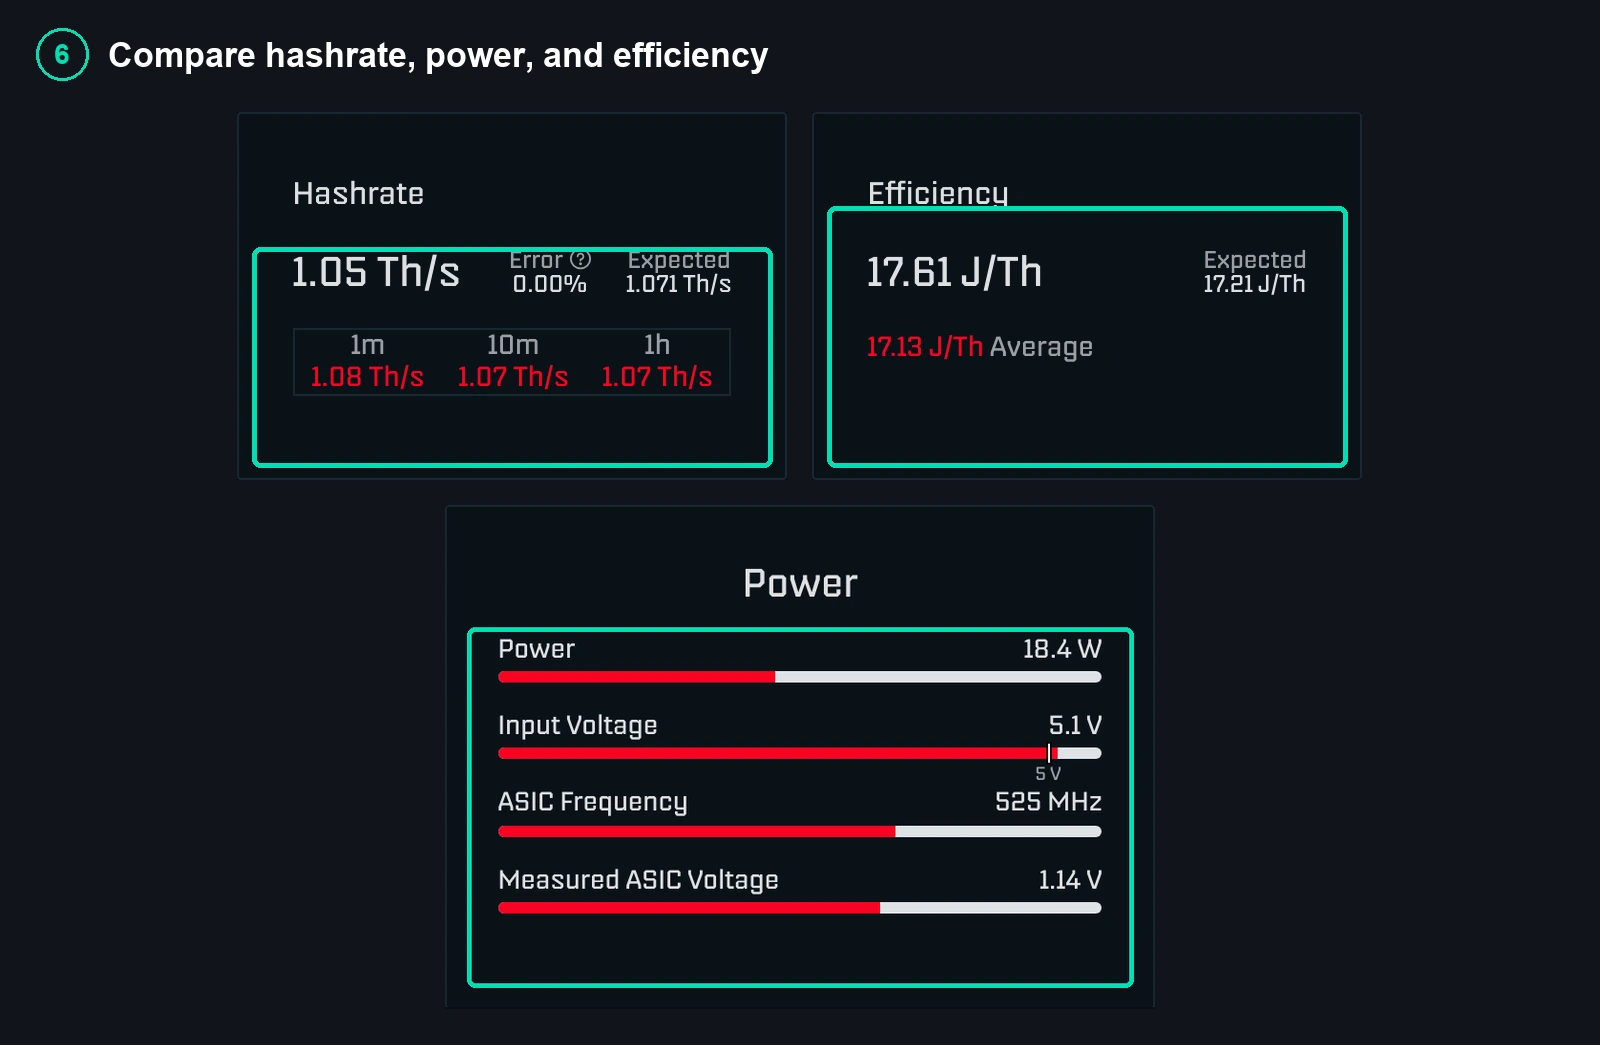
Record the date, test duration, ambient conditions, firmware, frequency, configured voltage, sustained hashrate, error percentage, all available ASIC temperatures, regulator temperature, fan settings, share-counter changes, and power-measurement method. Compare profiles over equivalent windows. Back up settings before firmware work; updates and recovery procedures can handle configuration differently. Keep the best validated profile and a known-working recovery profile.
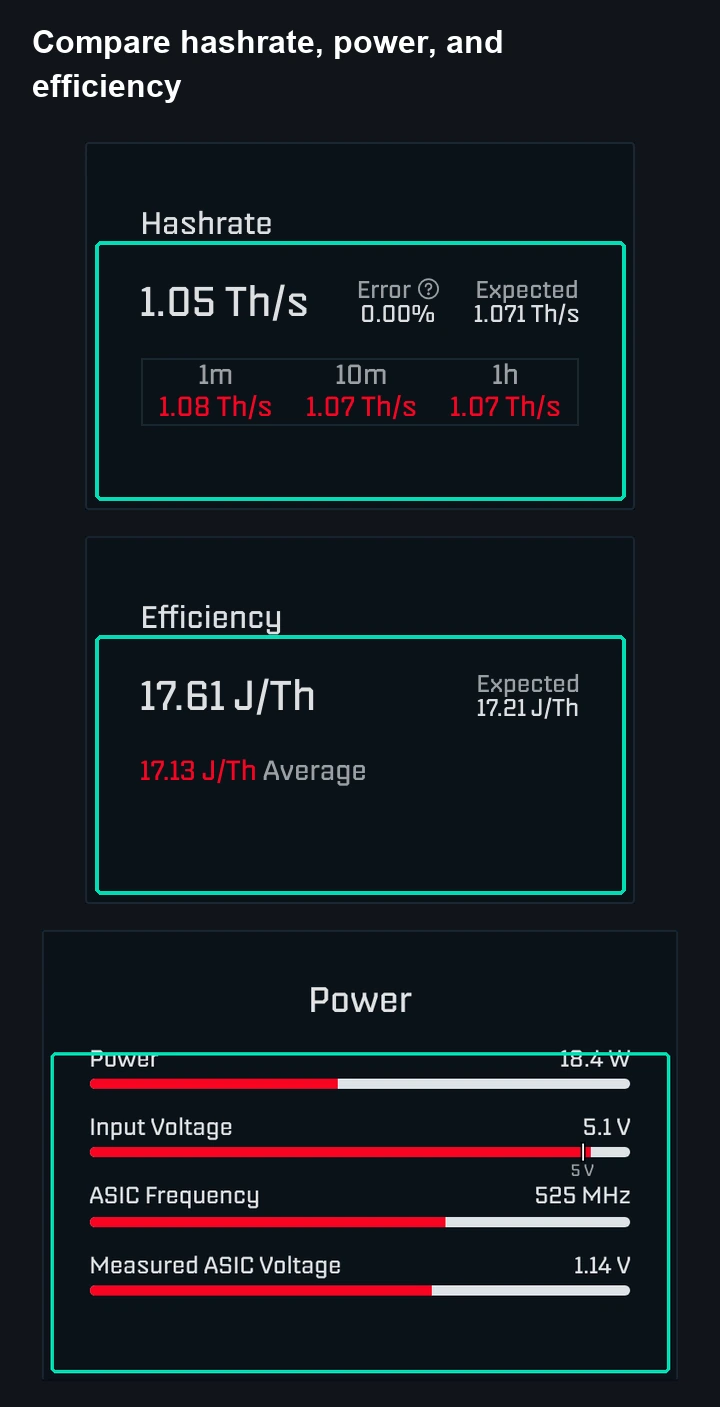
Bitaxe Gamma 602 Overclocking Profile (BM1370, 1 Chip, 5V)
The Gamma 602 uses one BM1370 ASIC. The following table shows recorded bench readings. It demonstrates the relationship between frequency, power, cooling, and regulator temperature on that setup; it is not a guaranteed settings ladder for another unit.
Bench conditions: 69°F (21°C) ambient, auto fan, Dark Horse heatsink, Mean Well LRS-50-5 at 5.15V input, and Kryonaut Extreme thermal paste.
| Freq (MHz) | Volt (mV) | Fan (%) | Noise (dB) | VR °C | ASIC °C | Hashrate (TH/s) | Power (W) | J/TH |
|---|---|---|---|---|---|---|---|---|
| 525 (stock) | 1150 | 44 | 43 | 57 | 49.3 | 1.07 | 17.8 | 16.6 |
| 600 | 1150 | 48 | 44 | 62 | 51.4 | 1.22 | 20.1 | 16.5 |
| 625 | 1250 | 59 | 46 | 71 | 56.1 | 1.27 | 25.2 | 19.8 |
| 700* | 1250 | 65 | 48 | 80 | 58.9 | 1.43 | 28.4 | 19.9 |
| 750 | 1250 | 68 | 49 | 86 | 60.3 | 1.54 | 30.2 | 19.6 |
| 800** | 1250 | 72 | 49 | 94 | 62.4 | 1.63 | 32.2 | 19.8 |
| 850 | 1250 | 71 | 48 | 81 | 61.8 | 1.73 | 33.0 | 19.1 |
| 900*** | 1250 | 74 | 50 | 90 | 64.3 | 1.84 | 35.2 | 19.1 |
* Higher-load tests used the listed LRS-50-5 supply; connector and cable limits still apply. ** The 800 MHz record was taken before adding MOSFET heatsinks; the 850 and 900 MHz records include them. *** The 900 MHz point is a result for this setup, not a universal operating recommendation. The original record does not specify the sound-meter distance or whether power was measured at the wall, so noise and J/TH should be compared within that stated limitation.
In this record, 600 MHz at 1,150 mV produced 1.22 TH/s, compared with 1.07 TH/s at 525 MHz. The 800 MHz row reached 94°C at the regulator while the ASIC read 62.4°C. The later 850 MHz result used added MOSFET heatsinks, so the lower regulator temperature is not a frequency-only comparison. Rows are individual operating points: establish stability before changing voltage rather than copying the gap between adjacent rows.
Dedicated deep-dive: How to Overclock Bitaxe Gamma.
Bitaxe Duo 650 Overclocking Profile (2x BM1370, 5V)
The Bitaxe Duo 650 packs two BM1370 chips in the same footprint as the Gamma. 1.63 TH/s at 25.8W stock. Same 5V barrel jack. Both chips respond to settings simultaneously. Two chips share the cooling system, so evaluate both available temperature readings and the regulator rather than assuming the single-chip Gamma’s headroom.
| Profile | Freq (MHz) | Volt (mV) | Hashrate (TH/s) | ASIC °C | Power (W) | J/TH |
|---|---|---|---|---|---|---|
| Stock | 525 | 1150 | 1.63 | 50-55 | 25.8 | 15.8 |
| Conservative | 600 | 1150 | 1.87 | 54-58 | 30 | 16.0 |
| Aggressive | 700 | 1250 | 2.20 | 58-63 | 42 | 19.1 |
| Extreme | 800+ | 1250 | 2.50+ | 62-68 | 50+ | Varies |
The reference table lists 1.87 TH/s at 600 MHz and 1,150 mV. Use the measured load and available cooling to decide whether another step is worthwhile. The higher-power rows require checking the 5V barrel connection and cable as carefully as the supply; attaching a larger PSU alone does not make those rows appropriate.
Full breakdown: Bitaxe Duo 650: The Sweet Spot Between the Gamma and the GT.
Bitaxe GT 801 Overclocking Profile (2x BM1370, 12V)
The Bitaxe GT 801 uses two BM1370 ASICs, an enlarged cooling assembly, and a 12V XT30 input. The reference stock figure below is 2.15 TH/s. Check the exact revision and supplied configuration before choosing its starting settings.
| Profile | Freq (MHz) | Volt (mV) | Hashrate (TH/s) | ASIC °C | Power (W) | J/TH |
|---|---|---|---|---|---|---|
| Stock | 525 | 1150 | 2.15 | 48-55 | 43 | 20.0 |
| Conservative | 600 | 1200 | 2.50 | 52-60 | 50 | 20.0 |
| Aggressive | 750 | 1250 | 3.10 | 58-65 | 65 | 21.0 |
| Extreme | 900+ | 1250-1300 | 3.60+ | 62-70 | 80+ | Varies |
The reference aggressive row lists 3.10 TH/s at 750 MHz and 1,250 mV. A 12V input changes the input-current requirement, but connector type alone does not establish regulation quality, noise, or a safe overclock. Compare the unit’s actual sustained readings with its default profile.
Bitaxe Turbo Touch Overclocking Profile (2x BM1370, 12V, Enclosed)
The Bitaxe Turbo Touch uses the GT 801 platform inside a custom enclosure with a 4.3″ capacitive touchscreen and dual-side honeycomb vents. Same 2.15 TH/s stock. Supported touchscreen firmware provides selectable performance modes, while AxeOS exposes the miner’s manual tuning controls. Preset names and values depend on the installed touchscreen and miner firmware.
| Profile | Freq (MHz) | Volt (mV) | Hashrate (TH/s) | ASIC °C | Power (W) |
|---|---|---|---|---|---|
| Stock | 525 | 1150 | 2.15 | 50-58 | 43 |
| Low (preset) | ~575 | ~1175 | 2.34 | 53-60 | 41 |
| Medium (preset) | ~600 | ~1200 | 2.44 | 55-62 | 45 |
| High (preset) | ~650 | ~1200 | 2.67 | 58-64 | 48 |
| Manual Aggressive | 750 | 1250 | 3.06+ | 62-68 | 65 |
| Manual Extreme | 850+ | 1250-1300 | 3.40+ | 66-73 | 78+ |
Keep the enclosure vents clear and verify a preset’s actual applied settings rather than assuming its name describes a fixed frequency or voltage. The table preserves the earlier guide’s reference figures; confirm them against your installed versions. For manual tuning, monitor the miner in AxeOS and assess enclosure airflow under sustained load. Configure the touchscreen’s own Wi-Fi connection separately, as described in the setup guide.
Setup guide: Bitaxe Turbo Touch Setup Guide.
Bitaxe Supra Overclocking Profile (BM1368, 1 Chip, 5V)
The Bitaxe Supra runs the BM1368 from the Antminer S21. 12W stock for 500-650 GH/s. Its stable tuning range depends on the specific chip, board, cooling, and input power. The broad ranges below are references rather than measurements from a shared test condition.
| Profile | Freq (MHz) | Volt (mV) | Hashrate (GH/s) | ASIC °C | Power (W) | J/TH |
|---|---|---|---|---|---|---|
| Stock | 490 | 1200 | 400-650 | 45-55 | 12 | 18.5–30.0 |
| Conservative | 550 | 1200 | 550-700 | 50-60 | 15 | 21.4–27.3 |
| Aggressive | 600 | 1250 | 650-750 | 55-65 | 19 | 25.3–29.2 |
| Extreme | 700+ | 1300 | 750-900+ | 60-70+ | 25+ | Varies |
Treat the listed frequency and voltage pairs as reference points. Verify default settings first, and monitor power, ASIC errors, and temperature after every change. Rows with open-ended hashrate and power ranges do not establish a precise efficiency figure.
Bitaxe Ultra Overclocking Profile (BM1366, 1 Chip, 5V) (Legacy)
The Ultra uses one BM1366 ASIC and is included for owners of earlier Bitaxe hardware. Confirm the board revision and supported firmware before tuning. Its reference voltage range should not be transferred to BM1370 or BM1373 boards.
| Profile | Freq (MHz) | Volt (mV) | Hashrate (GH/s) | ASIC °C | Power (W) | J/TH |
|---|---|---|---|---|---|---|
| Stock | 485 | 1200 | 400-500 | 45-55 | 12 | 24.0–30.0 |
| Conservative | 525 | 1200 | 500-575 | 50-60 | 14 | 24.3–28.0 |
| Aggressive | 575 | 1250 | 575-650 | 55-65 | 18 | 27.7–31.3 |
| Extreme | 625+ | 1300 | 650-750+ | 60-70+ | 22+ | Varies |
A frequency increase at unchanged voltage may work on an individual Ultra, but the table is not a guarantee. Stop when additional settings no longer improve useful work within the cooling and electrical limits. A miner’s reported block find does not establish the settings used or a predictable winning interval.
Bitaxe Naja Duo 1201: Published Settings Reference (2x BM1373, 12V)
The Naja Duo 1201 uses two BM1373 ASICs and a 12V XT30 input. Its v2.15.4 board configuration specifies 327 MHz and 1,000 mV. The figures below are published ratings and tuning examples, not measurements of this unit.
| Profile | Freq (MHz) | Volt (mV) | Hashrate (TH/s) | ASIC °C | Power (W) | J/TH |
|---|---|---|---|---|---|---|
| Published stock rating | 327 | 1000 | ~4.4 | Not measured here | ~42 | ~9.5 |
| Published OC example | 600 | 1120 | ~8.0 | Not measured here | ~92 | ~11.5 |
The published overclock example increases power faster than hashrate and is not a universal target. Establish the Naja’s own default baseline, then tune incrementally within the actual supply, connector, regulator, and cooling limits. Do not copy the voltage settings from BM1370 or BM1366 profiles.
Covered Models Compared: Stock vs Overclocked
Gamma figures refer to the recorded table above; the other rows summarize reference profiles or published specifications. These are not identical-condition benchmarks across every model.
| Model | ASIC | Chips | Input | Stock Hash | Stock W | OC Hash (Aggressive) | OC W | Status |
|---|---|---|---|---|---|---|---|---|
| Gamma 602 | BM1370 | 1 | 5V | 1.07 TH/s | 17.8 | 1.54 TH/s | 30.2 | Current |
| Duo 650 | BM1370 | 2 | 5V | 1.63 TH/s | 25.8 | 2.20 TH/s | 42 | Current |
| GT 801 | BM1370 | 2 | 12V | 2.15 TH/s | 43 | 3.10 TH/s | 65 | Current |
| Turbo Touch | BM1370 | 2 | 12V | 2.15 TH/s | 43 | 3.06 TH/s | 65 | Current |
| Supra | BM1368 | 1 | 5V | 650 GH/s | 12 | 750 GH/s | 19 | Legacy |
| Ultra | BM1366 | 1 | 5V | 500 GH/s | 12 | 650 GH/s | 18 | Legacy |
| Naja Duo 1201 | BM1373 | 2 | 12V | ~4.4 TH/s | ~42 | Not tested here | Not tested here | Published stock rating |
Cooling Solutions for Overclocking
Cooling is one important constraint. ASIC variation, regulator capacity, supply quality, cable and connector limits, and firmware behavior can also limit an overclock, even when the ASIC temperature looks acceptable.
Stock Heatsink Limitations
The heatsink that ships with your Bitaxe depends on where you purchased it. Some sellers ship with a basic 40x40x15mm aluminum block. Others, including Solo Satoshi, ship with upgraded cooling like the Dark Horse pin-fin heatsink on the Gamma 602 and Duo 650. Check the cooler’s actual performance at defaults. Material, surface contact, mounting pressure, airflow, and ambient conditions all affect temperatures; a cooler’s appearance does not establish a particular frequency ceiling.
Upgraded Heatsinks
The Dark Horse heatsink uses a high-density pin array with black anodized coating for increased convective surface area and radiative emissivity. Check measured temperatures before and after installation under equivalent settings and ambient conditions. Better ASIC cooling can create thermal margin, but it does not increase the regulator, connector, or supply rating.
Fan Upgrades
Choose a fan with the correct voltage, connector, dimensions, and control interface. Evaluate both airflow through the heatsink and noise under the actual load. A quieter replacement may provide less cooling on a particular assembly; compare temperature and regulator readings rather than relying on RPM alone. Check compatibility before choosing a replacement Bitaxe fan.
3D Printed Stands and Airflow
The stackable stand elevates the device for convection airflow underneath while directing exhaust outward and upward. Free STL downloads: Gamma stand, GT stand. For multi-unit setups, space miners apart so exhaust heat from one does not become intake air for the next.
Thermal Paste Replacement
Disconnect power and let the miner cool. Follow the cooler’s removal and installation instructions, clean the mating surfaces with an appropriate electronics-safe method, and apply the specified interface material with even contact. Recheck mounting, fan operation, and temperatures at defaults before resuming an overclock. Paste replacement is condition-dependent, not a guaranteed temperature reduction or a reason to change an intact pad assembly.
Ambient Temperature Math
ASIC temp = ambient temp + temperature rise from power dissipation. If your cooling adds 30 degrees C above ambient: 15 degree C basement = 45 degree C ASIC. 22 degree C living room = 52 degree C. 30 degree C summer room = 60 degree C. These illustrative readings are at or below the preferred 60–65°C target; actual temperature rise depends on the load and cooling. Position your Bitaxe in the coolest spot available. Avoid enclosed cabinets, confined spaces, and direct sunlight.
VRM Cooling and Firmware Protection
The Gamma record shows why ASIC temperature alone is insufficient: the regulator reached 94°C at 800 MHz while the ASIC measured 62.4°C. The later rows changed the cooling setup. Check the board-specific MOSFET heatsink placement guide before fitting small regulator heatsinks.
The ESP-Miner project documents version-specific protection behavior. In the v2.15.4 power-management code, filtered ASIC readings above 75°C or a regulator reading above 105°C can trigger overheat handling. The controller cuts ASIC power and manages cooling and a reduced-settings recovery. These emergency thresholds are not recommended operating temperatures. Investigate the cause rather than relying on repeated protection cycles.
Advanced Techniques
Undervolting for Efficiency
Begin at the correct board defaults. Reduce core voltage in small supported increments, such as 25 mV where available, while keeping frequency unchanged. Aim for errors below 2%, but also confirm sustained hashrate and accepted work remain comparable. Claim an efficiency improvement only when comparable measurements show lower power for the useful work produced. The available reduction is unit-specific. Lower power at comparable useful hashrate can help multi-unit or power-constrained setups, but undervolting must pass the same stability checks as overclocking.
Seasonal Tuning
Recheck a profile when room temperature, airflow, or ventilation changes. A setting that works in a cool room may fail in warmer conditions. Reduce load when the existing cooling cannot maintain the operating targets.
Custom Fan Curves
Where supported, use AxeOS automatic fan controls or an appropriate manual setting to keep ASIC temperatures at or below the preferred 60–65°C operating range. Fan-control options vary by firmware and board. Check regulator cooling separately from the ASIC reading. Full fan output near 65°C indicates limited remaining thermal headroom.
Auto-Tuning Scripts
The open-source community has built auto-tuning tools that use the AxeOS API to incrementally find optimal settings. Projects like bitaxe-gamma-oc-script and BitaxePID adjust frequency and voltage while monitoring hashrate and temperature. Check each tool’s supported boards, firmware, settings, and stop behavior before use. Keep firmware protections enabled, supervise the initial run, and validate any retained profile independently.
Hashrate Benchmarking
The Bitaxe Hashrate Benchmark tool logs hashrate, temperature, and error data over time from the AxeOS API. Useful for validating overclock stability across long test windows and comparing your chip’s performance against community-submitted results. Run it alongside your 24-hour stability test to generate a data log you can reference when fine-tuning settings.
Multi-Unit PSU Wiring
The LRS-350-5 is a 5V, 60A, 300W supply reference. A multi-miner installation needs correctly rated, individually protected branches and suitable distribution, not an assumed number of wires per screw terminal. Follow the supply’s terminal, conductor, enclosure, ventilation, and derating specifications.
Match each barrel pigtail to its actual connector and current rating. For compatible 12V installations, the LRS-600-12 and appropriately rated XT30 branches are separate references. Size the installation for combined peak demand and the manufacturer’s operating conditions. A generic 80% rule does not replace those requirements.
Monitoring Hashrate Errors During Overclocking
AxeOS reports an ASIC hardware error percentage separately from the pool’s rejected-share count. Use it to compare settings alongside sustained hashrate, temperature, power, accepted work, and restarts. Measurement details depend on the ASIC and firmware; the percentage is not a direct reading of electricity wasted.
We use these practical tuning checkpoints:
- 0–2%: Preferred error range when establishing the default baseline and validating a tuning profile.
- Above 2%: Pause further increases and compare with the baseline. Check whether the change produces more useful sustained hashrate.
- Above 5%: Investigate the profile before keeping it. Check cooling, power delivery, and the frequency/voltage combination rather than treating the displayed percentage as a precise loss of useful work or power.
- Above 10%: Reduce frequency and reassess from a known-working profile.
These are tuning checkpoints, not manufacturer guarantees or universal pass/fail limits for every chip. Brief spikes and sustained changes need different treatment. A low error percentage alone does not establish safe voltage, adequate cooling, or long-term stability.
Pool rejections require their own diagnosis. Stale work, duplicate submissions, difficulty mismatches, connection problems, or other rejection reasons can affect the pool counter. Do not increase core voltage simply because the pool reports a rejected share.
Using the Error Percentage as a Tuning Guide
Start from the board defaults and compare each small change over a consistent test interval. If errors increase without a worthwhile improvement in sustained hashrate, return to the previous profile. The silicon lottery helps explain why identical units need different settings. A higher error reading alone does not prove that a lower-frequency unit produces more useful work, and the percentage should not be mechanically subtracted from hashrate. For the detailed calculation and interpretation, see how Bitaxe hashrate error percentage works.
Troubleshooting
ASIC Not Found After a Settings Change
Return to the saved working profile if AxeOS remains accessible. Check input power, cable connections, and the board’s initialization logs. If the dashboard cannot be reached, follow the board-specific firmware recovery instructions. Holding BOOT is a download-mode procedure on supported hardware, not a universal factory reset.
High ASIC Errors
Compare the reading with the default baseline. Reduce frequency first when a recent change increases errors without improving sustained work. Assess power, cooling, and regulator readings before considering a voltage change. Use the checkpoints above alongside useful hashrate and stability, not as a substitute for them.
Rejected or Stale Shares
Read the rejection reason in AxeOS or the pool log. Check the pool URL, port, worker configuration, assigned difficulty, connection latency, and uptime. Stale work is different from an invalid submission or a duplicate. A rejected-share counter alone is not a reason to increase voltage.
Temperature Rises or Protection Activates
Reduce load, then check the installed heatsink, thermal contact, fan operation, clear airflow, and ambient conditions. Monitor the regulator as well as the ASIC. Follow the board-specific cooling guidance; additional heatsinks do not make an excessive electrical load acceptable.
Wi-Fi Disconnects Under Load
Compare connectivity at defaults and at the higher-load profile. Check 2.4 GHz signal quality, router conditions, uptime, and input voltage under load. Power instability can contribute, but network congestion, interference, and configuration can also cause disconnects. Do not infer one cause from RSSI alone.
Hashrate Fluctuates or the Miner Restarts
Compare the one-minute and longer averages rather than one instantaneous value. Check error trends, pool activity, temperatures, regulator readings, power, and logs. Revert the last tuning change when instability appears. Reboots can have electrical, thermal, firmware, or connection-related causes; adding voltage is not a general fix.
Returning to Defaults
Use the settings confirmed for the exact board, firmware, and supplied configuration. Keep a known-working backup. OTA updates, full factory-image flashing, and configuration-preserving updates have different effects; a reflash does not always preserve Wi-Fi or clear every setting. Use the correct artifact and procedure described in the Bitaxe web-flasher guide.
Overclocking and Solo Block Finds
More useful sustained hashrate increases the number of attempts a miner can make, but it does not create a predictable solo payout schedule. Published block-find stories demonstrate that small ASIC miners can produce valid work; they do not prove the winning device was overclocked or that a particular profile caused the find.
A block explorer can verify a block and its outputs, while hardware attribution and operating settings require separate evidence from the miner or pool operator. Avoid using a series of unrelated wins as proof of a shortening expected interval. For pool selection and reward context, see our solo mining pool comparison.
Related Guides and Sources
- Using AxeOS settings, monitoring, and recovery tools
- Interpreting Bitaxe hardware errors
- Setting up the Turbo Touch and its touchscreen
- USB flashing and board-specific recovery
- Bitaxe hardware and compatible accessories
Firmware references were checked against ESP-Miner v2.15.4 on November 9, 2026. Recorded Gamma conditions and reference-profile limitations are identified beside their tables. A dashboard power reading and an AC wall-meter reading are different measurement boundaries; compare like with like.