To start Bitcoin mining at home, choose a SHA-256 ASIC miner, match its power and cooling requirements, configure a compatible mining service, and verify that the service accepts its work. Begin at the device’s documented defaults, then compare actual electricity use and rewards with your budget before expanding.
This guide covers the complete first-miner decision: equipment, network setup, wallets, shared-pool and solo rewards, operation, costs, and maintenance. A small home miner is a practical learning tool, but purchasing one does not guarantee a profit or a Bitcoin block.
Quick overview
- Choose around your home: A Gamma-class desktop miner uses roughly 18–20W at stock settings, while a mining heater or larger ASIC can require hundreds or thousands of watts. Compare the complete PSU package, ventilation, and noise before buying.
- Prepare the connection: ESP32-S3 Bitaxe models use 2.4 GHz Wi-Fi. Follow the exact device guide, and enter the pool hostname, port, worker, and password in the format its firmware expects.
- Choose the reward method: Shared-reward pools offer lower-variance earnings under their payout rules; hosted solo services retain the possibility of a whole-block payout for the winning participant, less applicable fees. Self-hosting adds a node and mining-server layer.
- Verify useful work: A powered fan, connected indicator, or momentary hashrate is not enough. Check sustained device readings, accepted work at the intended service, temperatures, and your configured reward destination.
- Calculate costs honestly: At $0.12/kWh, a continuously operating 20W miner uses about $1.73 of electricity over 30 days. Hardware recovery, pool fees, cooling, and useful heat are separate parts of the calculation.
- Keep expectations realistic: At a hypothetical 800 EH/s network, 1.2 TH/s has about one chance in 666.7 million per next block, or about a 0.00788% annual chance under fixed assumptions. Neither a short test nor a past small-miner win predicts your result.
What Is Bitcoin Mining?
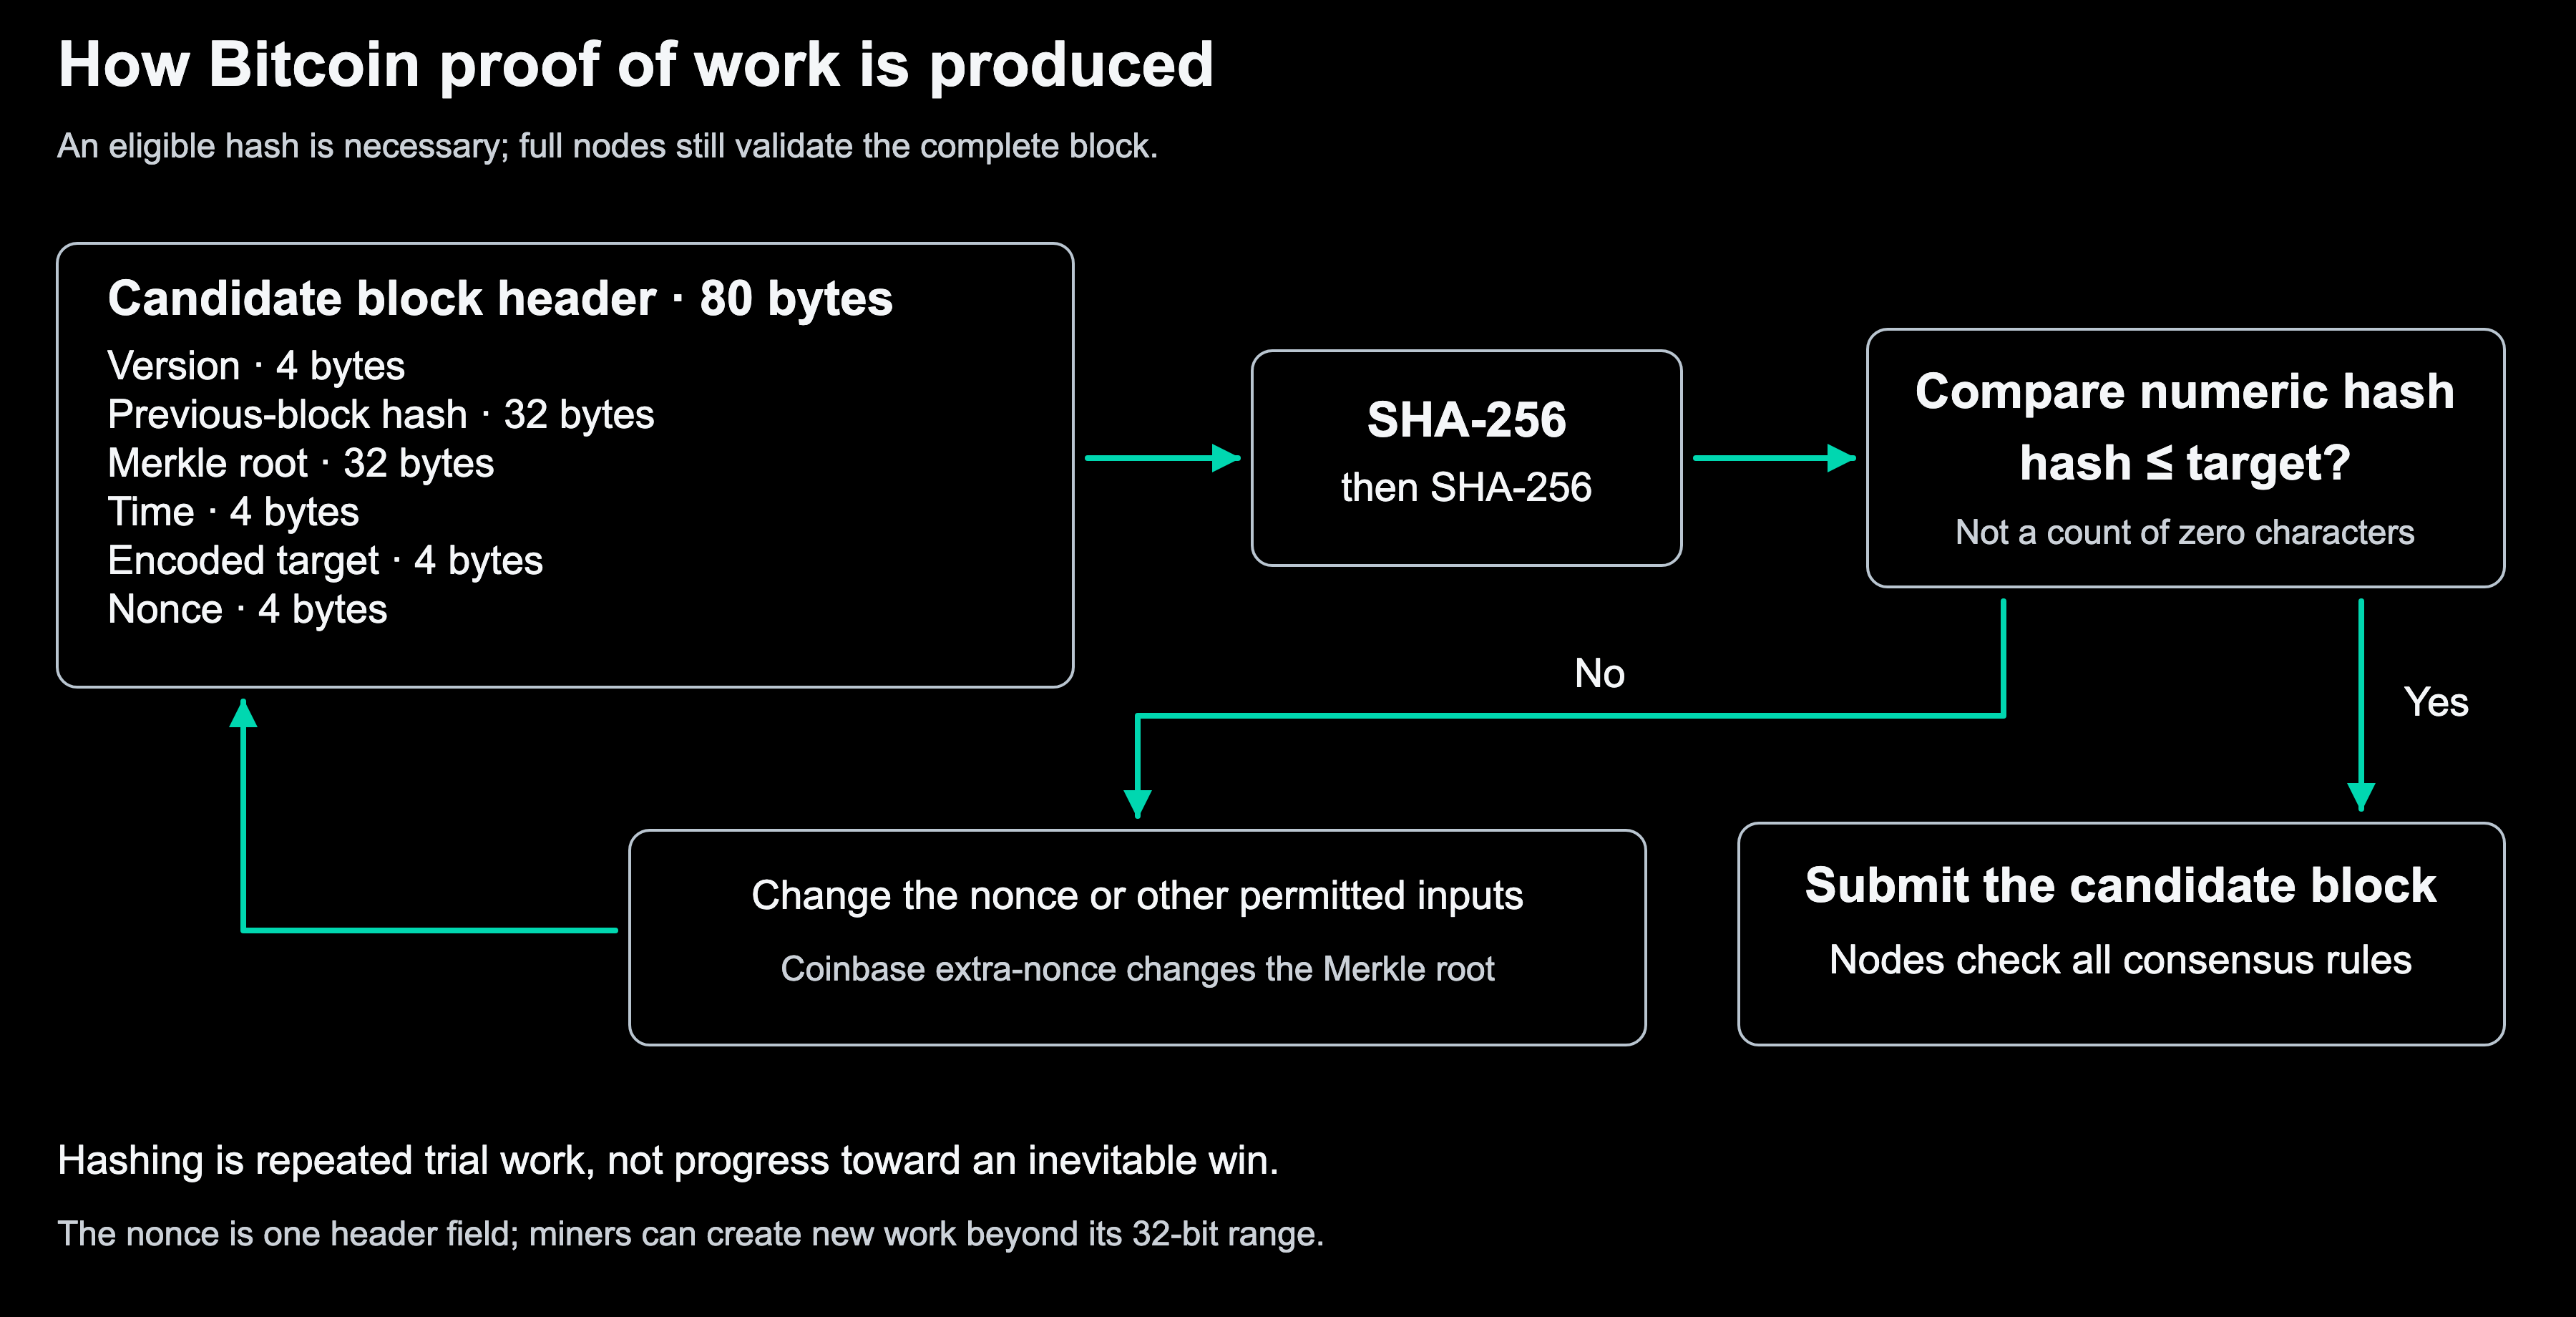
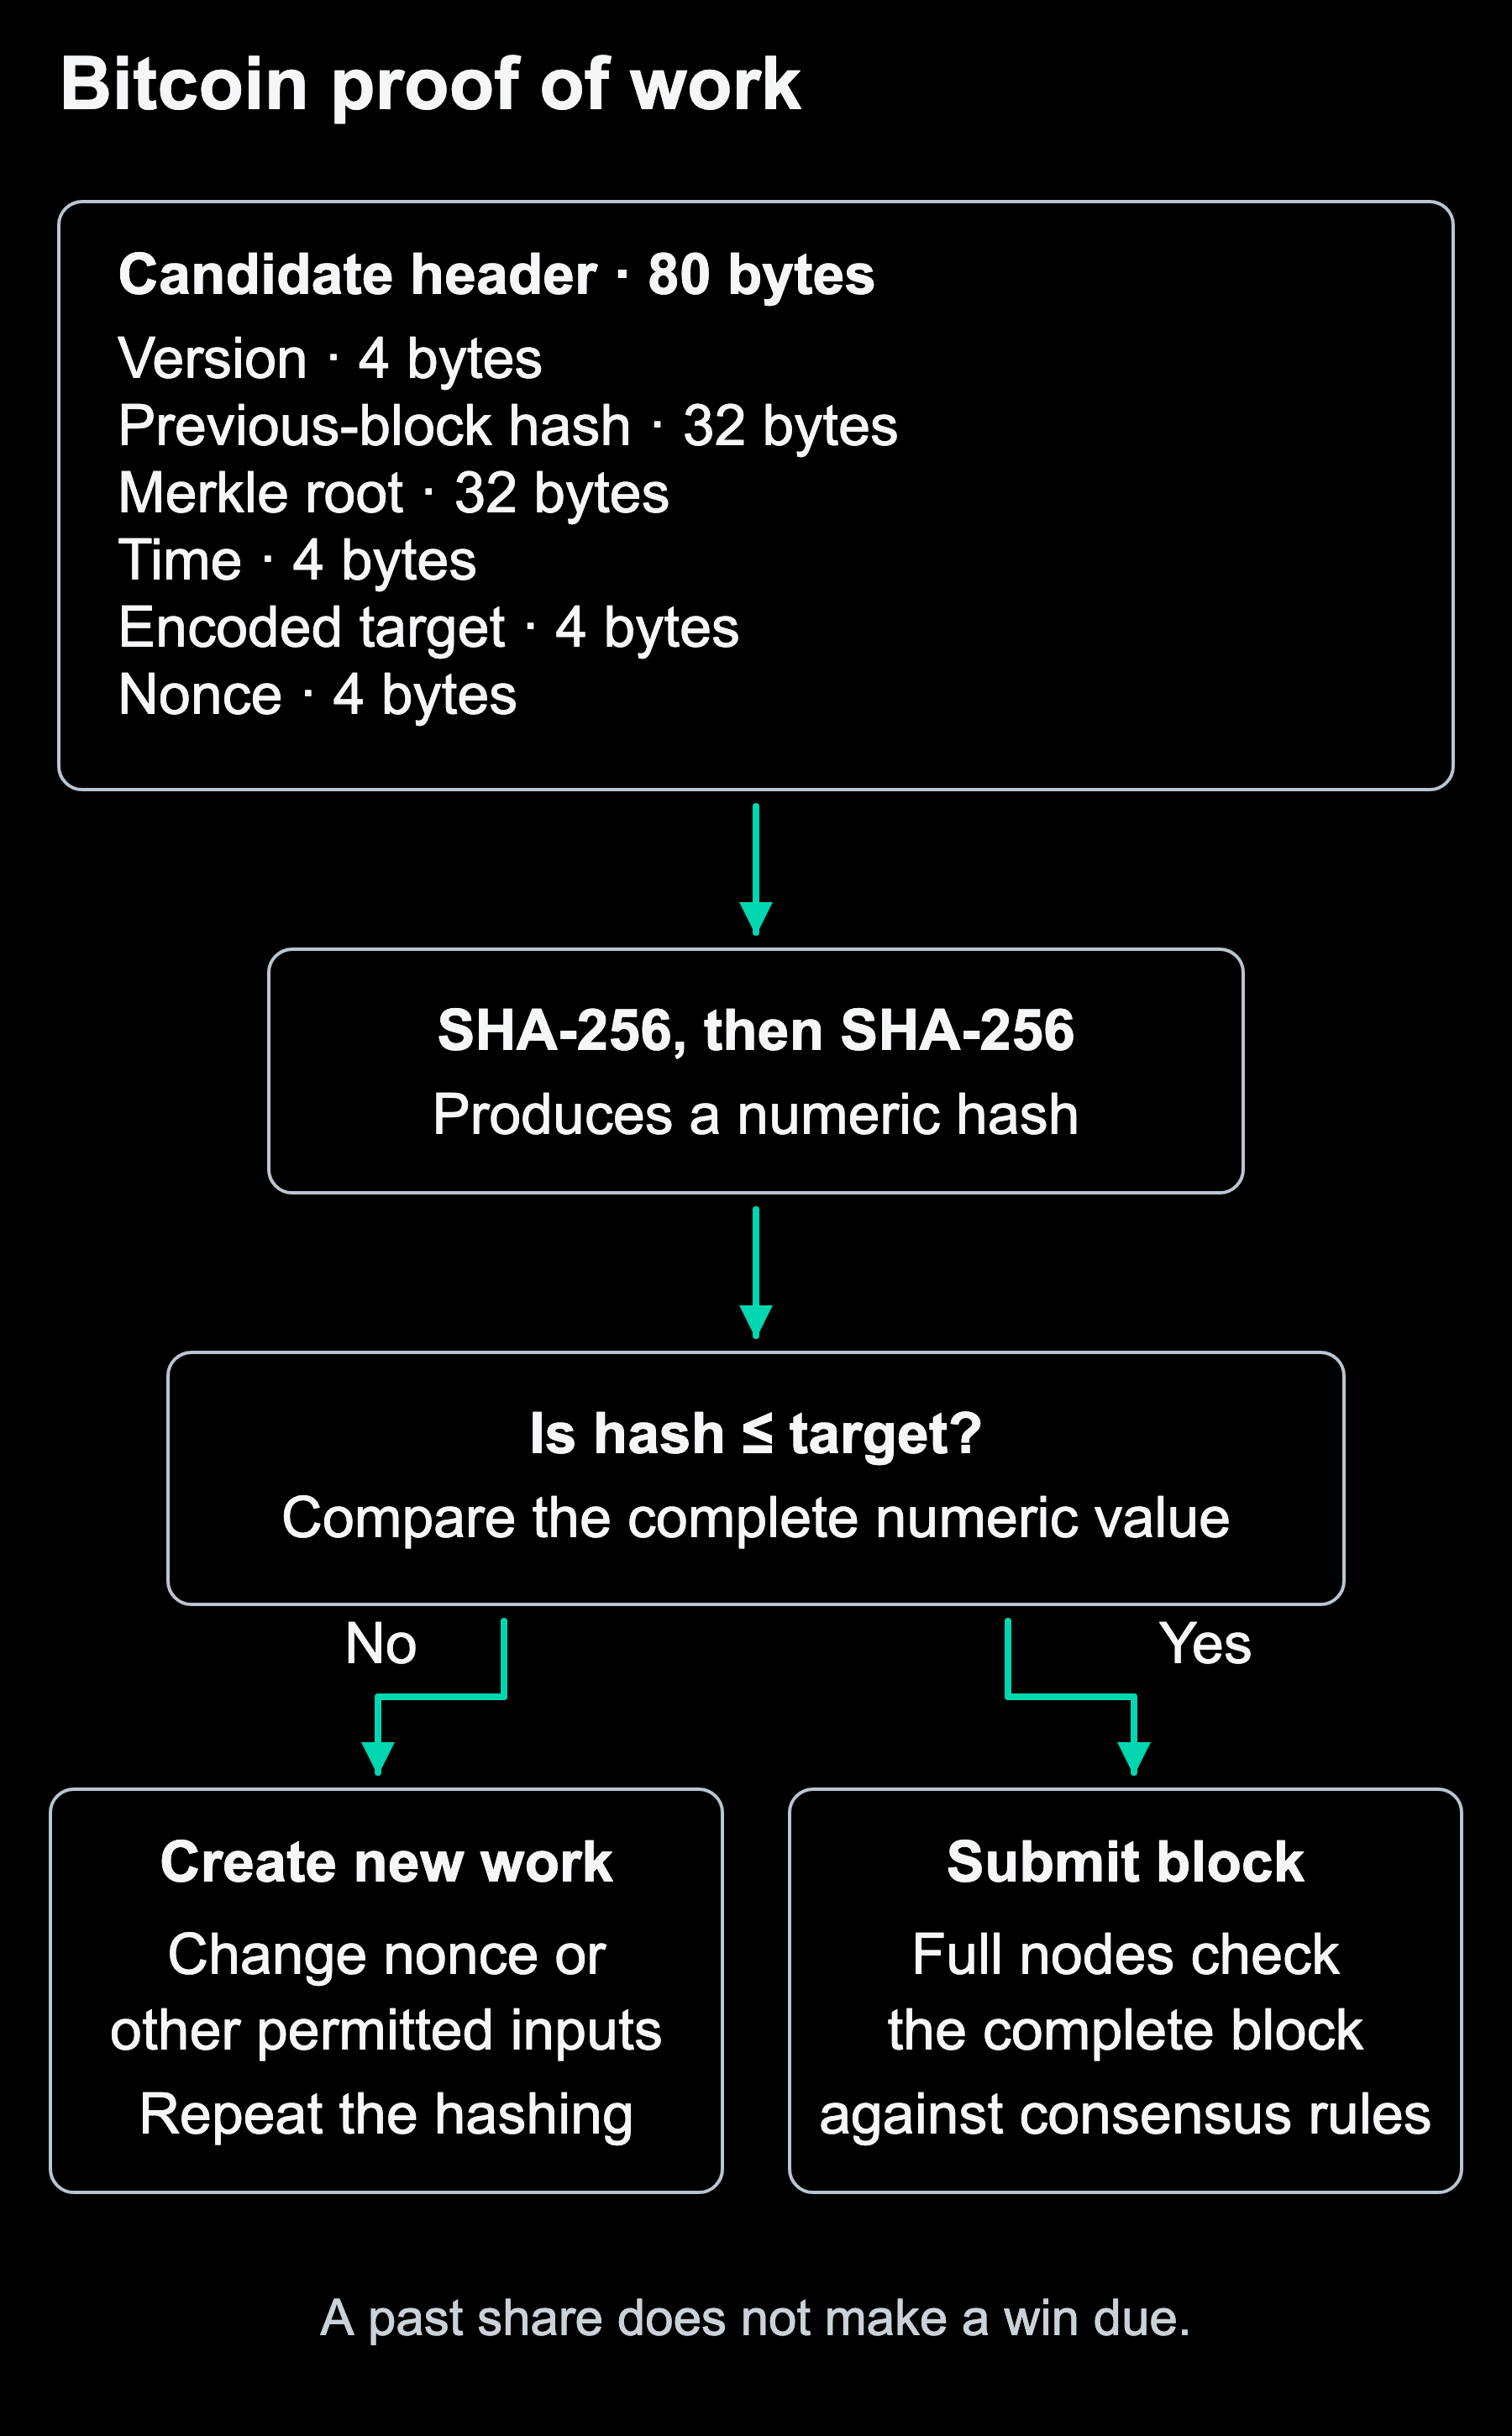
Bitcoin mining is the repeated hashing of candidate block headers to find proof of work that satisfies the network’s target. Full nodes independently check the resulting block and its transactions against their consensus rules.
The mining chip performs an enormous number of simple trials rather than solving a problem through reasoning. A block header commits to the previous block and a set of transactions; changing its nonce, time, or transaction commitment creates different hashing work. A valid proof of work is necessary, but an invalid transaction or an excessive coinbase reward still makes the block unacceptable to validating nodes.
The block reward comprises the scheduled subsidy plus the included transaction fees. During the current subsidy era, the subsidy is 3.125 BTC; it is not the entire reward. The amount a particular miner receives depends on whether it mined independently or participated under a service’s payout rules.
| Term | Practical meaning |
|---|---|
| Hashrate | Hash trials per second. 1 TH/s is one trillion hashes per second; 1 EH/s is one million TH/s. |
| ASIC | A chip designed for a particular task. Bitcoin miners use SHA-256 ASICs, not general-purpose CPU or GPU mining software. |
| Difficulty and target | Difficulty expresses the work associated with the proof-of-work target. Mainnet adjusts its target every 2,016 blocks; individual block intervals remain unpredictable. |
| J/TH | Energy per terahash. At a consistent measurement boundary, power in watts divided by hashrate in TH/s gives J/TH. Lower is more efficient. |
| Share | Proof of work meeting the service’s easier share target. Most accepted shares are not Bitcoin blocks; payout treatment depends on the service. |
| Stratum | A family of protocols for communicating mining work and results. Host, port, transport, and worker settings must match both service and firmware. |
For deeper terminology, use our Bitcoin mining glossary. The distinction that matters immediately is between generating proof of work, validating Bitcoin, and deciding how rewards are distributed.
For the original design, read Bitcoin’s whitepaper. It provides historical protocol context rather than a modern miner onboarding procedure.
Why Start Mining Bitcoin at Home?
Home mining can provide hands-on education, independent hardware ownership, and useful heat, while giving your device a chance to contribute valid proof of work. Whether it makes financial sense depends on your actual costs and chosen reward method.
A desktop miner lets you observe work assignments, accepted shares, error rates, temperature, and power instead of treating mining as an abstract investment. It can also lead to learning about self-hosted services and block construction. Those are useful outcomes even when the hardware does not recover its purchase price.
Decentralization has several layers: where the physical machines run, who operates the mining infrastructure, and who chooses block templates. Moving hardware into a home does not automatically decentralize template selection if every machine follows the same hosted operator. Running a full node serves a different role from adding hashrate.
| Goal | Useful starting approach | Expectation to check |
|---|---|---|
| Learn the basics | A low-power desktop ASIC with a matched enclosed PSU | Setup and measurements matter more than headline overclock figures. |
| Earn shared-pool rewards | A supported miner and a pool with suitable payout terms | Small earnings may accumulate slowly before reaching a withdrawal threshold. |
| Try solo rewards | A compatible hosted solo endpoint or an independently operated mining stack | There may be no reward throughout the device’s operating life. |
| Reuse heat | A miner suited to an existing seasonal heating demand | Compare the heating system actually displaced, not a hypothetical free-energy credit. |
The history from CPU mining to ASICs explains why a modern Bitcoin miner uses dedicated hardware. Buying a larger computer or enabling a browser miner is not a substitute for choosing a suitable SHA-256 ASIC.
What Equipment Do You Need?
You need an ASIC miner, its correctly matched power equipment, a supported network connection, and the reward-destination setup required by your mining service. An extra computer is not required to keep a typical standalone Bitaxe hashing after configuration.
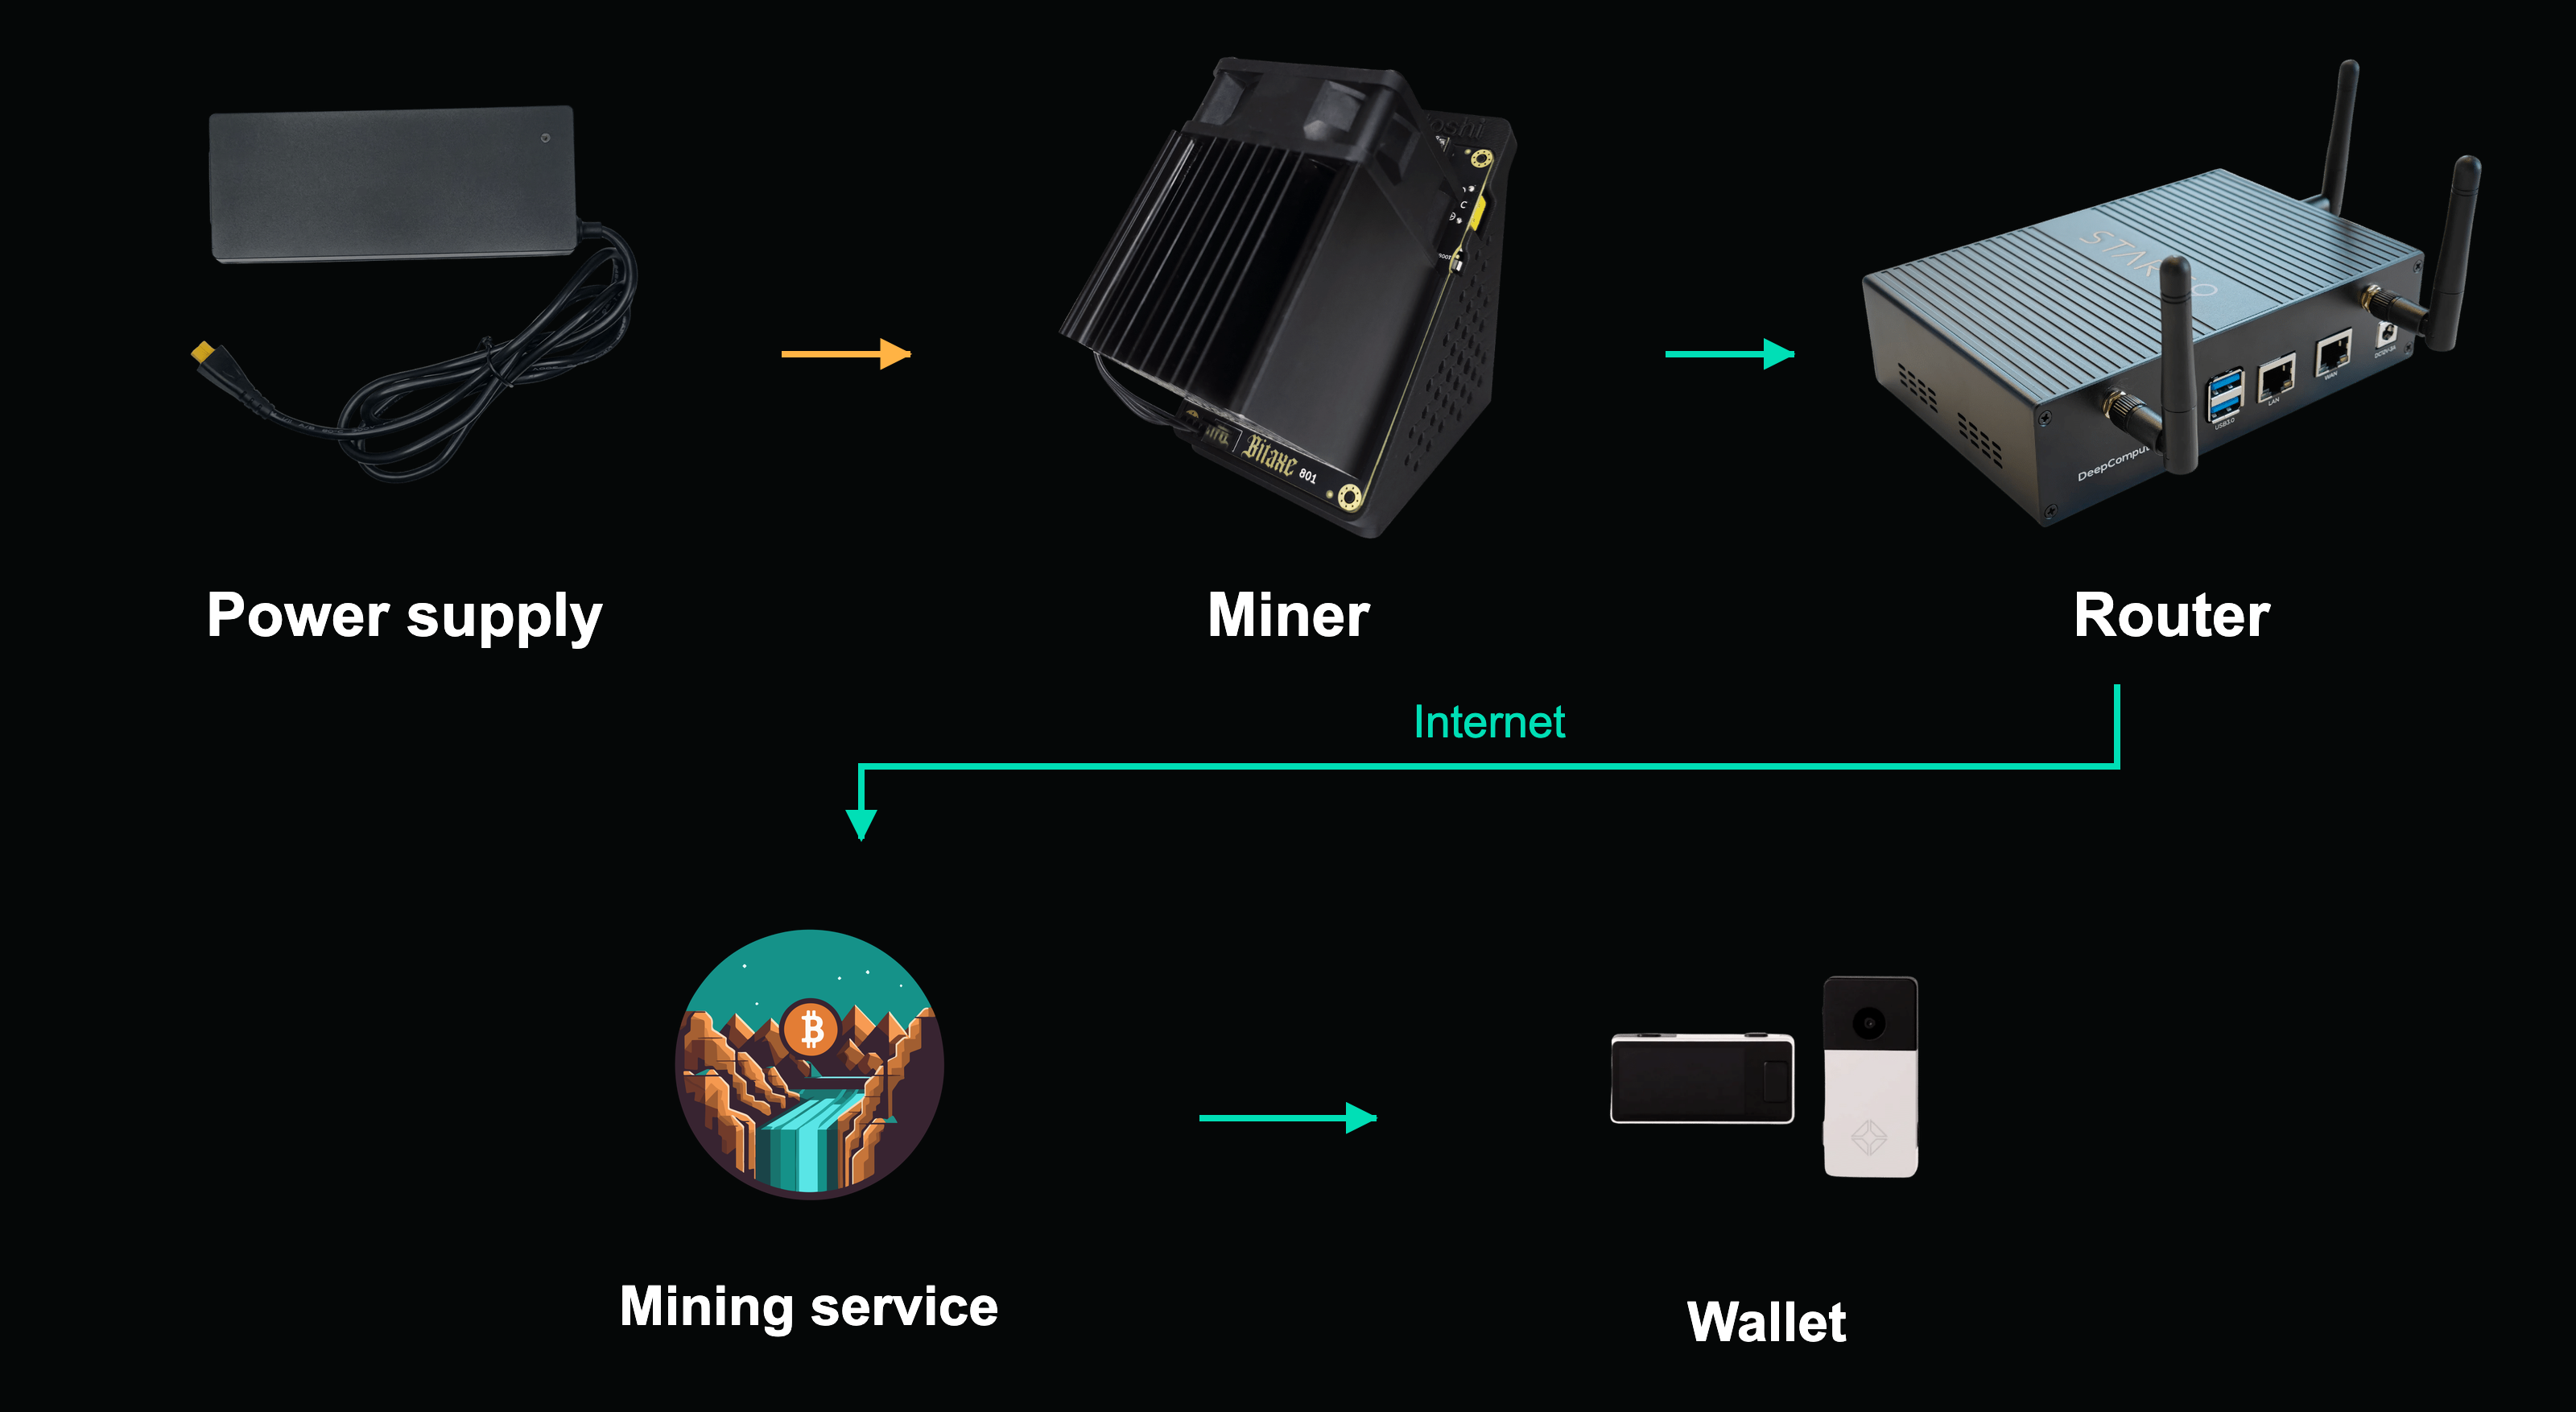
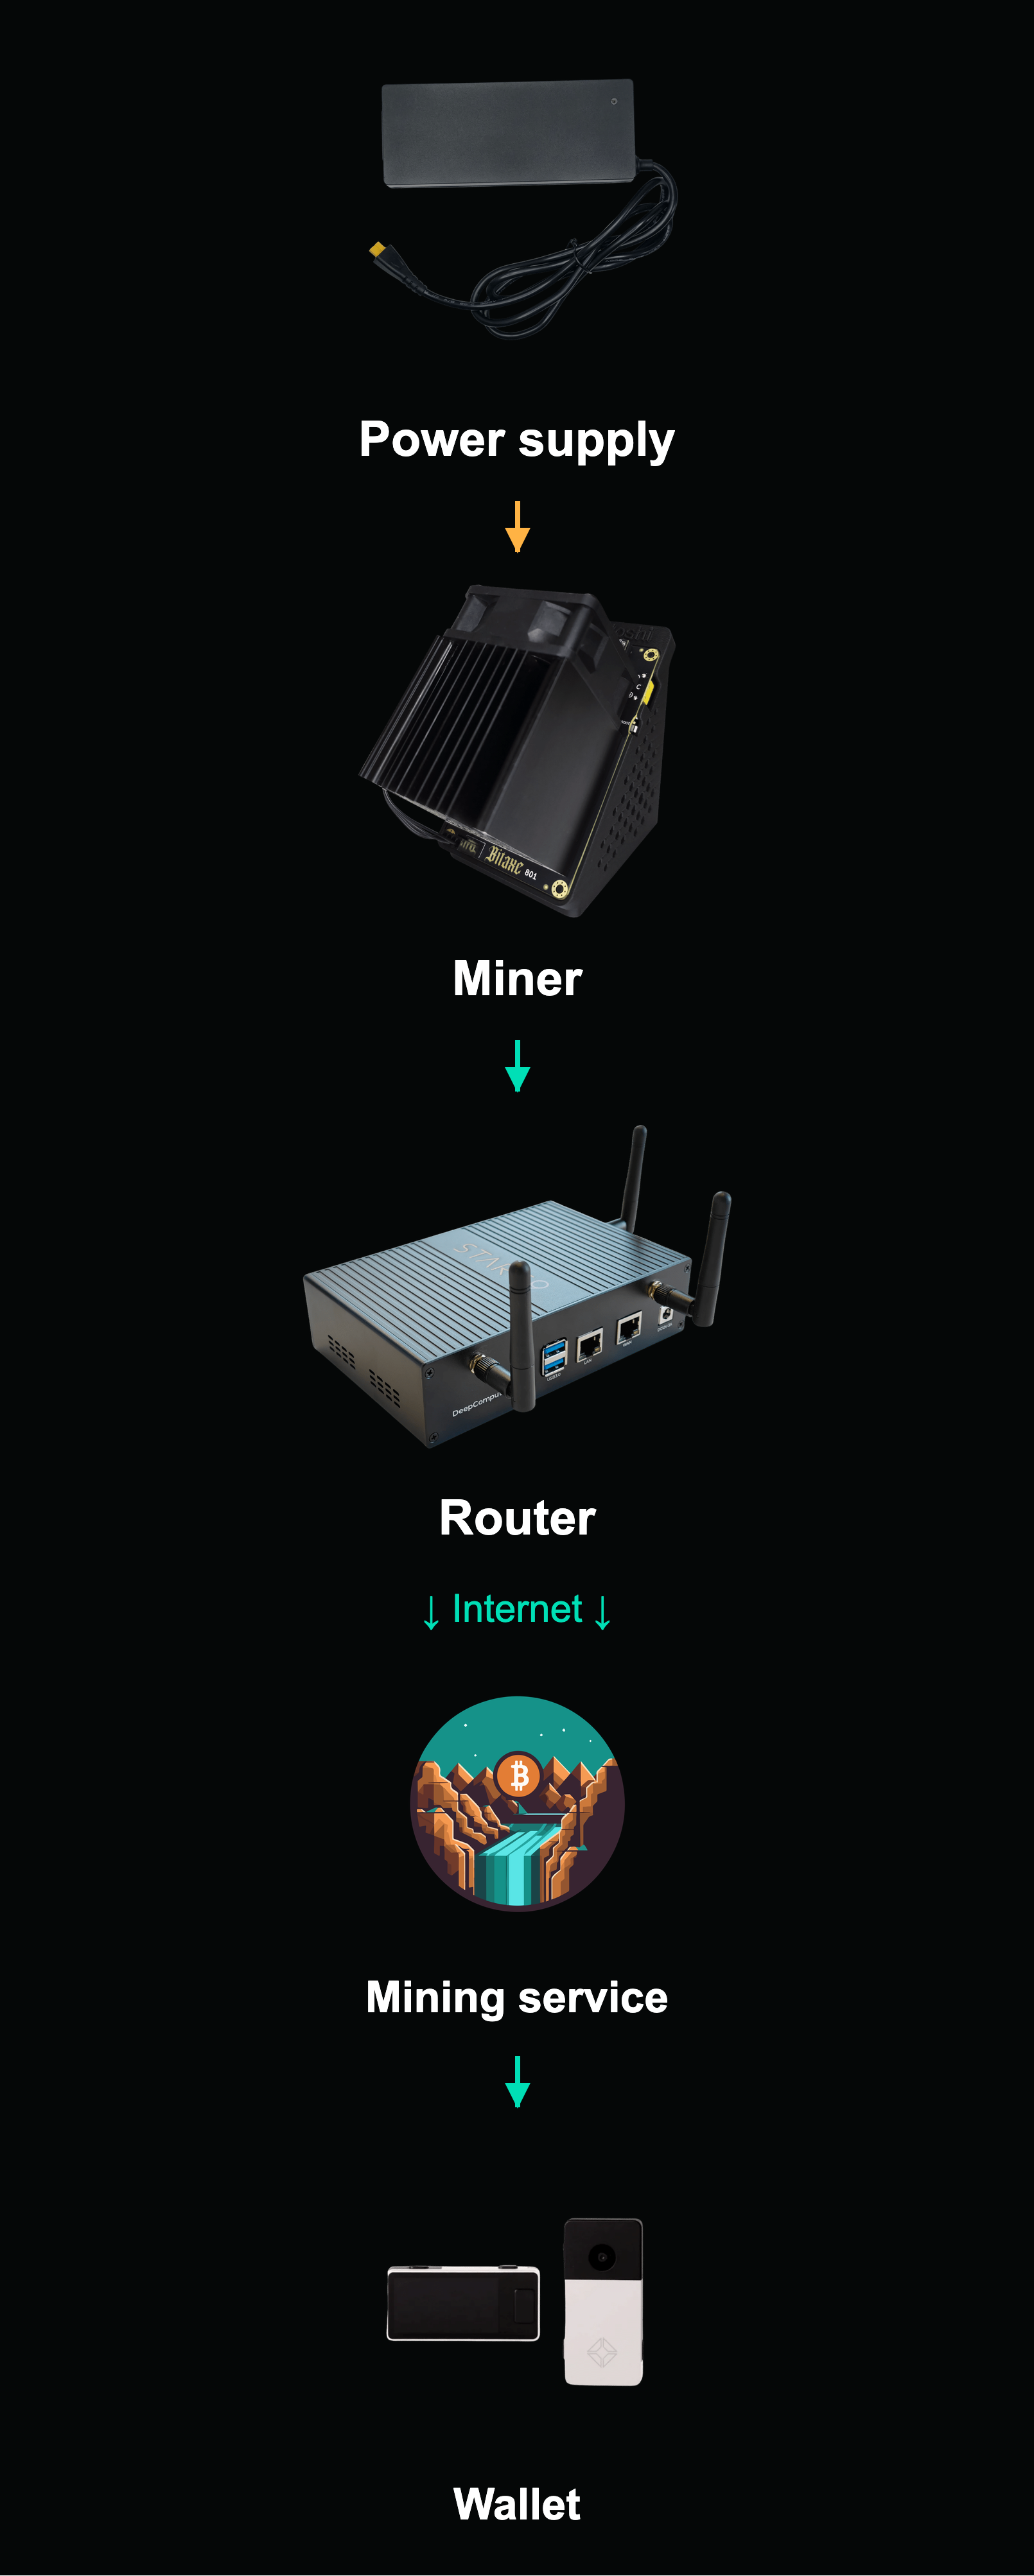
- Power supply: Connect the AC outlet to a compatible supply, then connect its DC output to the miner. Match voltage, polarity, connector, and capacity before powering on.
- Miner and router: The miner hashes work received through the router and sends results back to the selected service. This example uses 2.4 GHz Wi-Fi; the pictured router has wireless hardware installed, which may be a separate purchase. Power the router with its own specified adapter.
- Mining service: The logo illustrates one hosted service. Follow the exact operator’s endpoint, worker format, reward method, fees, and block-handling rules. The next comparison separates shared rewards from solo arrangements.
- Wallet: Configure your own compatible receiving address or payout method where required. The hardware wallet represents control of the receiving keys; it does not plug into the miner or need to remain online for an on-chain payment to arrive.
| Item | What to verify before powering on |
|---|---|
| Miner and revision | Exact board/model identity, firmware family, cooling assembly, and documented stock configuration. |
| Power supply and cable | Correct DC voltage, polarity, connector, current capacity, regional AC input, and a package that actually includes the selected PSU. |
| Placement and cooling | Stable surface, dry environment, unobstructed intake/exhaust, and room temperature within the exact model’s limits. |
| Network | Supported Wi-Fi band or Ethernet hardware, stable signal, local administration access, and suitable network isolation. |
| Wallet and pool information | Your own compatible receiving setup, exact Stratum endpoint, worker format, password requirements, fees, and payout conditions. |
| Configuration device | A phone, tablet, or computer able to follow the manufacturer’s onboarding and reach the miner locally. |
A wall power meter is useful because the dashboard’s estimate may measure a different part of the power path. Keep the quick-start information, purchase records, and device identification available for troubleshooting. A stand, additional fan, or heatsink upgrade can be useful, but none replaces correct power selection.
An independent solo stack additionally needs a synchronized Bitcoin node and mining-server or gateway software. A hosted service can supply that infrastructure instead. Do not buy a separate server merely because an article uses the word “solo”; first decide which operating arrangement you intend to use.
If you want to operate the infrastructure yourself, the Bitcoin node guide covers validation, requirements, and the extra mining-server layer.
Choosing a Bitcoin Miner: Models, Packages, and Performance
Choose a miner whose complete package, electrical load, noise, and heat output fit your home before comparing maximum hashrate. The stock or rated examples below are more useful for a first purchase than a record overclock from a different unit.
| Miner | Hashrate | Power | Efficiency | Base / North American PSU package | Power and ASIC context |
|---|---|---|---|---|---|
| Bitaxe Gamma 602 | 1.2 TH/s | 18–20W | 15–16.7 J/TH | $61 / $67 | 5V; one BM1370 |
| Bitaxe Duo 650 | 1.63 TH/s | 25.8W | 15.8 J/TH | $104.29 / $111.69 | 5V; two BM1370 |
| Bitaxe GT 801 | 2.15 TH/s | 43W | 20 J/TH | $173.99 / $195.99 | 12V; two BM1370 |
| Bitaxe Naja Duo 1201 | 4.4 TH/s | 42W | 9.5 J/TH | $366 / $385 | 12V; two BM1373 |
| NerdQaxe++ Rev. 7 | 4.8 TH/s | 69.5W | 14.48 J/TH | $189.99 / $210.99 | 12V; four BM1370 |
| Avalon Nano 3S | 6 TH/s | 140W maximum | 23.3 J/TH | $219, PSU included | 28V via bundled adapter |
| Avalon Mini 3 | 37.5 TH/s | 800W maximum | 21.3 J/TH | $749.99, PSU integrated | 110–240V AC |
| Avalon Q | 90 TH/s | 1,674W rated | 18.6 J/TH | $1,398, PSU integrated | 110–240V AC |
Prices are the inspected Solo Satoshi configurations before shipping and taxes. For configurable Bitaxe and NerdQaxe packages, the second price includes the listed North American PSU and no optional stand or rear-fan upgrade. Performance is published or previously documented stock/rated data, not a new benchmark; firmware, ambient conditions, unit variation, and measurement boundaries affect readings.
Small desktop miners
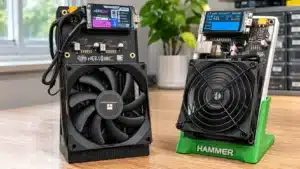
The Gamma 602 is the lowest-power starting point in this comparison. Its single BM1370 is rated around 1.2 TH/s at 18–20W. The Duo 650 adds a second BM1370 and a documented stock example of 1.63 TH/s at 25.8W, while the GT 801 uses a different 12V arrangement and a roughly 2.15 TH/s, 43W configuration. A connector that looks similar is not evidence that their supplies are interchangeable.
The Naja Duo uses two BM1373 ASICs and a published example of about 4.4 TH/s at 42W. The NerdQaxe++ Revision 7 instead uses four BM1370 chips and approximately 4.8 TH/s at 69.5W stock. Chip count alone therefore does not determine efficiency or the right purchase.
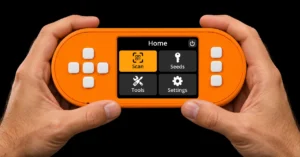
For touchscreen operation, the current Turbo Touch is built on the dual-chip GT platform, not a single-chip Gamma with a decorative screen. Its display controller and miner each need the appropriate network configuration; follow the Turbo Touch setup guide rather than a generic Bitaxe-only sequence.
Mining heaters and higher-power hardware
The Nano 3S is rated at 6 TH/s and up to 140W, Mini 3 at 37.5 TH/s and up to 800W, and Avalon Q at 90 TH/s and 1,674W rated. Their footprints, mode controls, and power arrangements differ. Our Avalon Home Series comparison covers their modes, manufacturer noise qualifications, setup, and ownership costs.
Industrial miners require a separate site assessment. The Antminer S21 and S21 Pro are distinct products; their chip identities and specifications should not be merged into a casual size comparison. High-power equipment may require dedicated circuits, different voltages, ventilation, and noise management. A machine can physically fit in a room while being unsuitable for operating there.
Documented results are not universal settings
Solo Satoshi’s existing Rev. 7 record distinguishes approximately 4.8 TH/s at 69.5W stock from a tested 8.1 TH/s at 140W with upgraded power, extra cooling, and manual tuning. The optional 124W supply is unsuitable for that 140W test point. Do not select a PSU from a stock figure and then assume it covers every published overclock.
For a broader budget comparison, see Bitcoin miners under $500. Use the exact listing’s options when comparing checkout totals.
What Does Open-Source Mining Hardware Change?
Open-source hardware and firmware make designs available for inspection, modification, and community development. They do not guarantee that every shipped unit, downloaded binary, or network configuration is secure.
Published schematics help explain a board’s power delivery and component choices. Firmware source can reveal how controls, shutdown behavior, and work handling are implemented. Practical trust still depends on the source of the hardware and firmware, the build you install, and how you protect the device’s management interface.
Open source does not make a kill switch impossible. Bugs, malicious builds, stolen credentials, exposed network services, and upstream dependencies can still affect operation. Inspectability is an advantage, not a substitute for access control or a verified recovery procedure.
The complete Bitaxe guide explains the hardware and firmware families. Keep the broader project overview separate from the specific setup instructions for the board you actually own.
Electrical Requirements and Safe Placement
The wall circuit, PSU, cables, connectors, and miner must all support the chosen continuous load. A PSU’s ability to accept 120V does not establish that every 120V receptacle or shared circuit is suitable.
Start with the miner’s documented stock power, allow for supply losses and supporting equipment, and account for other loads on the same circuit. Identify the actual breaker and receptacle ratings rather than estimating from the shape of the plug. Where a circuit’s permitted continuous load is 80% of its rating, a 15A circuit at 120V provides 1,440W of continuous-load capacity; that example is not a universal installation approval.
A 1,674W-rated Q therefore deserves a different assessment from a 20W desktop miner. Its broad input-voltage range does not remove the need to check circuit capacity. Have a qualified electrician assess uncertain wiring, dedicated circuits, or high-power equipment instead of treating a buying guide as mains installation instructions.
| Quantity | Relationship | Example |
|---|---|---|
| Power | Watts ≈ volts × amps for a simple estimate | 120V × 10A = 1,200W; AC power factor and real operating conditions can affect current. |
| Current | Amps ≈ watts ÷ volts | A 500W load at 120V is roughly 4.17A before any relevant power-factor adjustment. |
| Energy | kWh = watts ÷ 1,000 × hours | 20W over 720 hours uses 14.4 kWh. |
- Use properly rated, undamaged cables and a secure connection that matches the equipment.
- Keep power supplies ventilated, dry, and clear of combustible material; do not hide them under insulation or fabric.
- Do not daisy-chain power strips or overload an outlet, extension lead, or connector.
- Stop operation if a plug or cable shows abnormal heat, discoloration, melting, or damage.
The home-mining power guide explains continuous-load headroom in more detail.
Choosing the Correct Power Supply
A suitable PSU must match the miner’s specified voltage, connector, polarity, and current requirements. Higher available wattage does not make an incorrect-voltage supply compatible.
For example, the Gamma and Duo use 5V arrangements, while GT-class hardware uses a 12V XT30 input. The Nano 3S uses its bundled 28V adapter. Treat product names and connector photographs as starting information, then verify the exact selected supply and board documentation.
Choose a complete, enclosed, region-appropriate power arrangement for a beginner setup. An open-frame industrial supply such as the LRS series is a component for an appropriately designed installation, not a plug-in desktop adapter. Do not expose mains terminals or improvise AC wiring from a hobby guide.
Instability can arise from inadequate current delivery, voltage drop, poor contacts, excessive cable resistance, or the miner itself. A larger supply does not repair a loose connector or a failing board. Return to the documented stock configuration and inspect the complete power path before increasing a limit.
Our Mean Well power-supply guide covers model selection and installation context. Keep the selected PSU package and its limits in your setup notes.
Network Setup and Internet Requirements
A Bitaxe using an ESP32-S3 needs a supported 2.4 GHz Wi-Fi network; it cannot join a 5 GHz-only network. Reliable connectivity and timely work delivery matter more than a high advertised download speed.
Mining communication usually uses far less bandwidth than video streaming, but there is no universal bandwidth allowance per miner. Pool protocol, share difficulty, reconnects, monitoring, and firmware updates affect traffic. A separately operated Bitcoin node has different bandwidth and storage demands from an ASIC receiving work.
Check signal strength where the miner will actually sit. A weak signal, guest-network isolation, captive portal, or incompatible authentication setup can prevent local administration or stable work delivery. A dual-band router can be suitable when its 2.4 GHz service and onboarding behavior are compatible.
Ethernet is useful where the device has a supported wired interface or approved adapter. Buying an Ethernet switch does not add wired networking to a board that lacks compatible hardware. For larger installations, plan switch ports, local addressing, monitoring access, and the consequences of router or internet failure.
Keep management on an appropriate private network. Do not expose the miner’s web dashboard or node RPC directly to the internet. Document its local address and use the manufacturer-supported remote-access method if remote management is needed.
The band requirement is documented in the ESP32-S3 datasheet; it is a hardware capability, not a preference for the less congested Wi-Fi band.
Cooling and Heat Management
A miner turns almost all of its electrical input into heat in the surrounding environment. Stable operation requires both removing heat from the chips and moving that heat away from the equipment.
| Power | Approximate heat output | Context |
|---|---|---|
| 20W | 68 BTU/hour | A small desktop miner example. |
| 43W | 147 BTU/hour | A GT-class stock-power example. |
| 69.5W / 140W | 237 / 478 BTU/hour | Rev. 7 stock versus the documented higher-power test. |
| 800W | 2,730 BTU/hour | Mini 3 maximum-power example. |
| 1,674W | 5,712 BTU/hour | Avalon Q rated-power example. |
Conversion: watts × approximately 3.412 = BTU/hour. Use actual wall power for the room’s heat and electricity budget.
For Bitaxe tuning, our preferred ASIC operating target is generally 60–65°C, with lower readings acceptable. Voltage-regulator limits must be assessed separately. That preference is not a universal firmware shutdown point or a safe ambient-room maximum for every miner.
Check the exact device’s ambient-temperature range and cooling instructions. Temperature sensors can report different locations, so a single displayed ASIC value does not establish that every connector, regulator, or power-supply component is within its limits. Look at fan behavior, error rates, power stability, and sustained operation together.
Start with the stock heatsink and fan arrangement specified for the exact device. Keep intake and exhaust open, prevent hot exhaust recirculation, and remove accumulated dust with the unit safely powered down. Add cooling only after identifying the real limitation; changing paste, fan curves, and voltage at once makes diagnosis harder.
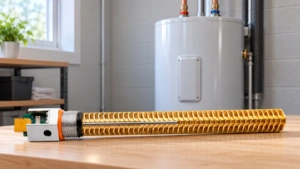
A mining heater can offset an existing heat demand during suitable weather. It may also add unwanted summer heat or require cooling. Our mining heat-reuse guide compares practical arrangements without treating electricity as automatically free.
Bitcoin Wallets and Mining Payouts
Your wallet controls the keys needed to spend mining rewards, while the service determines how and when it pays. Use a receiving arrangement supported by both the wallet and the chosen service, and verify the destination before mining.
An on-chain Bitcoin address, a Lightning invoice, and a pool account name serve different purposes. Some pools expect an account.worker username and a payout address saved separately; others use address.worker. Never assume a wallet address belongs in every username field.
| Format | Typical prefix | What to verify |
|---|---|---|
| Legacy | 1 | Use only where appropriate; transaction cost depends on the eventual transaction. |
| P2SH, including nested SegWit | 3 | The prefix alone does not identify every spending condition. |
| Native SegWit | bc1q | Commonly supported, but confirm the pool’s exact address rules. |
| Taproot | bc1p | Confirm support and the intended spend path; it is not universally the lowest-fee choice. |
Transaction fees depend on virtual transaction size, the input and output types, the spending path, and the fee rate. Do not choose an address type solely because a table calls it “lowest fee.” The wallet’s recovery and the service’s compatibility are more immediate requirements.
A hot wallet is convenient for learning but keeps signing material on a connected device. A hardware wallet can isolate signing keys when used correctly; physical handling, backups, software, and verification still matter. An exchange balance is a custodial claim, not the same control as your own keys.
For example, Blockstream Jade is one hardware-wallet option. Our mining wallet guide covers the broader decision. Store recovery information securely, verify receiving details through the wallet’s supported process, and never enter a seed phrase or private key into a miner or mining-pool setup form.
Shared Pools, Hosted Solo, and Self-Hosted Mining
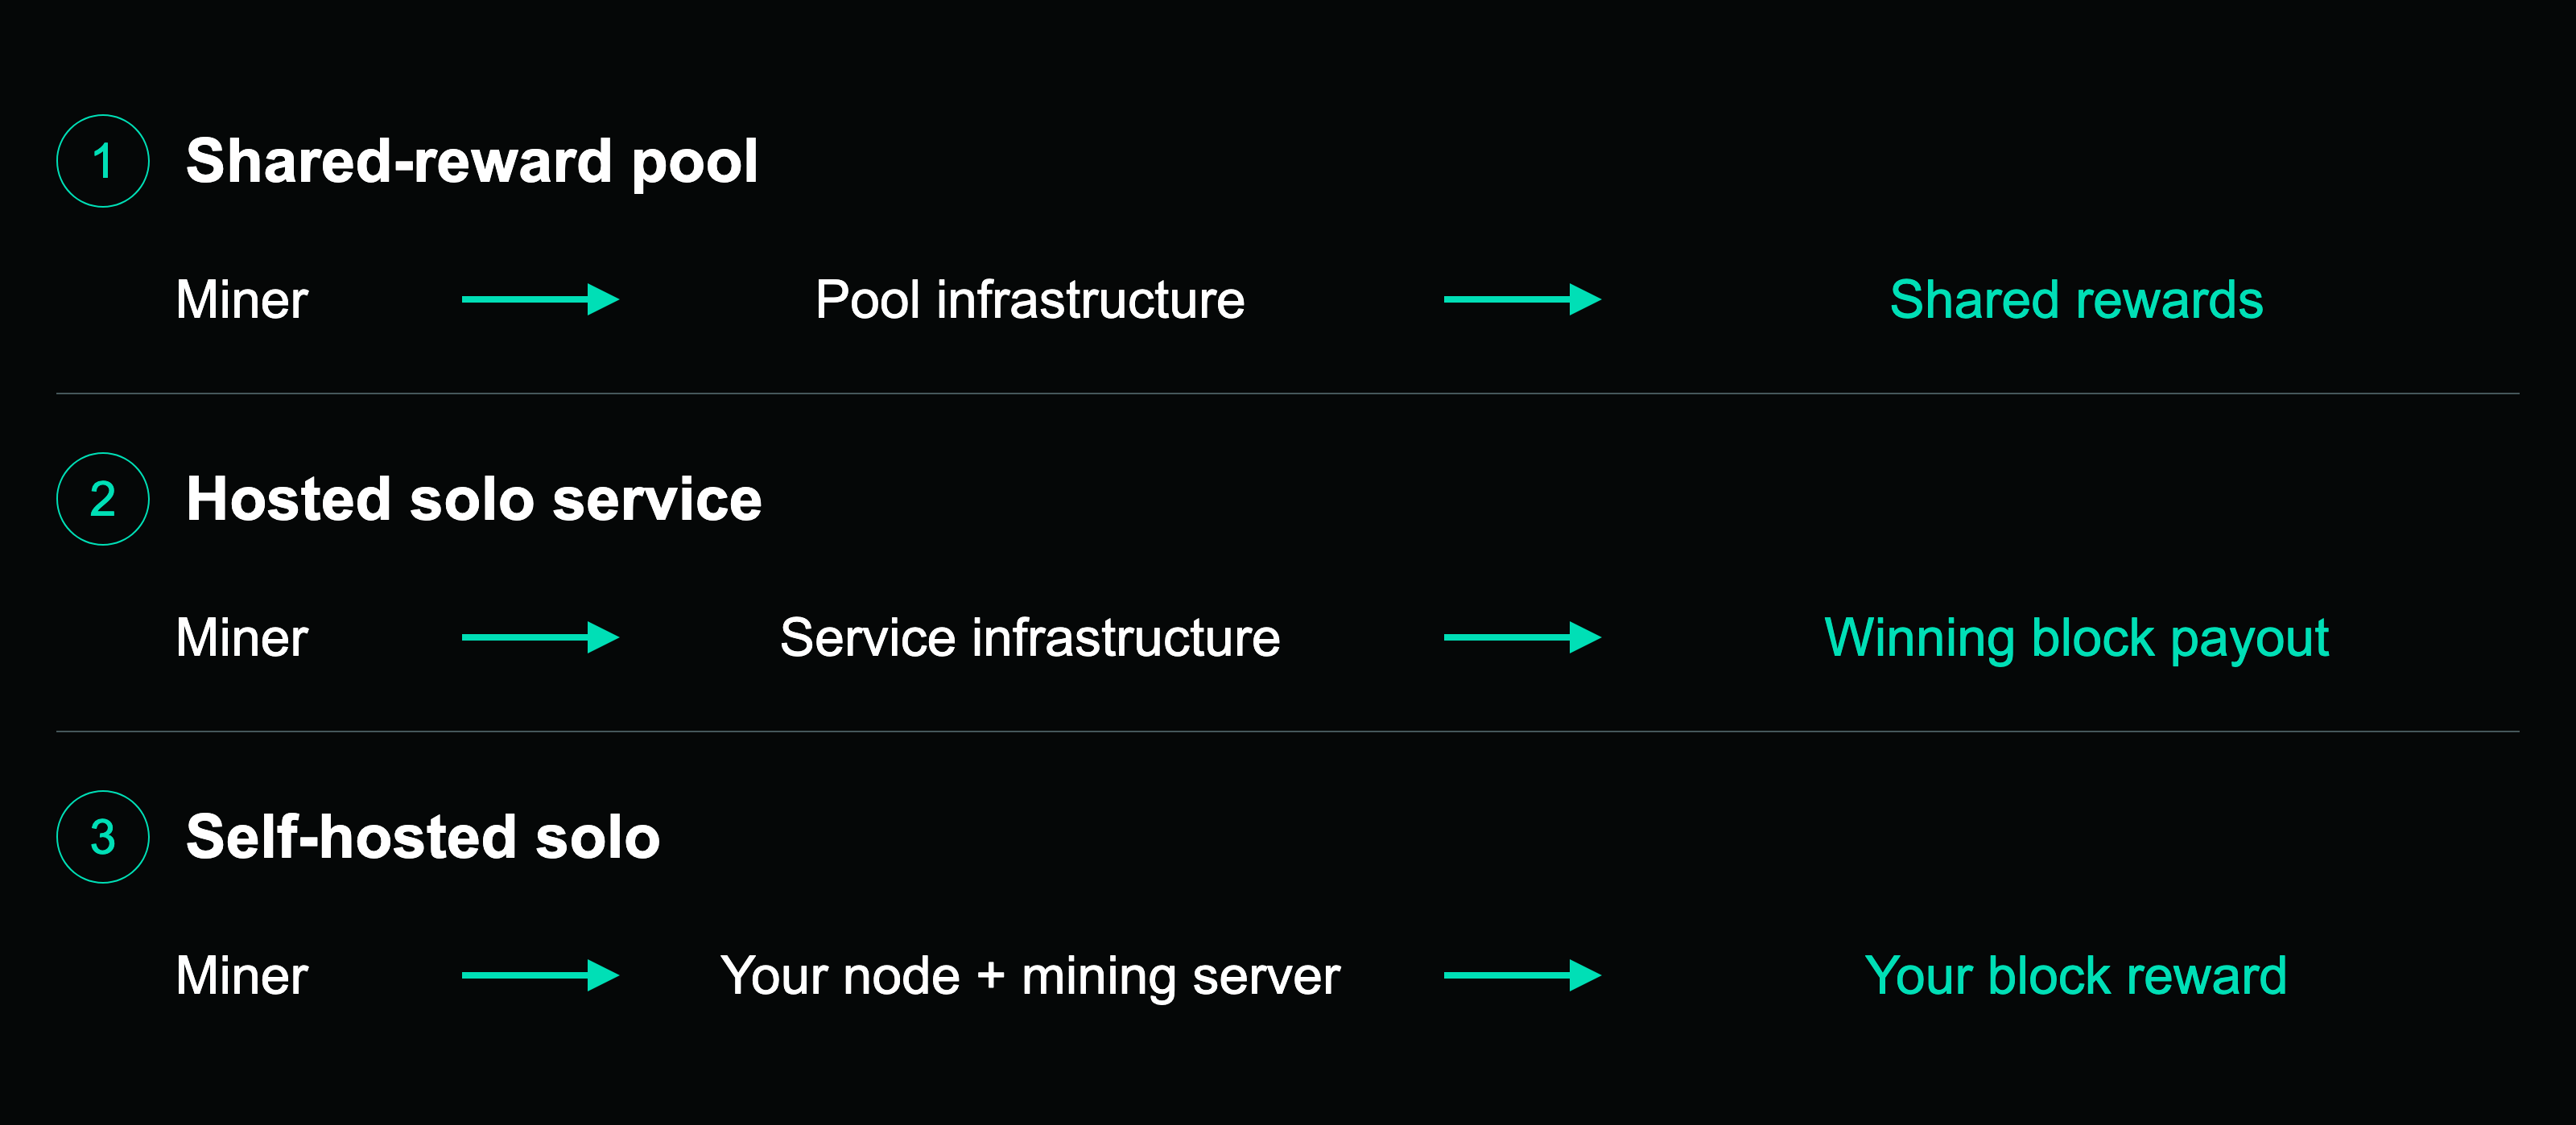
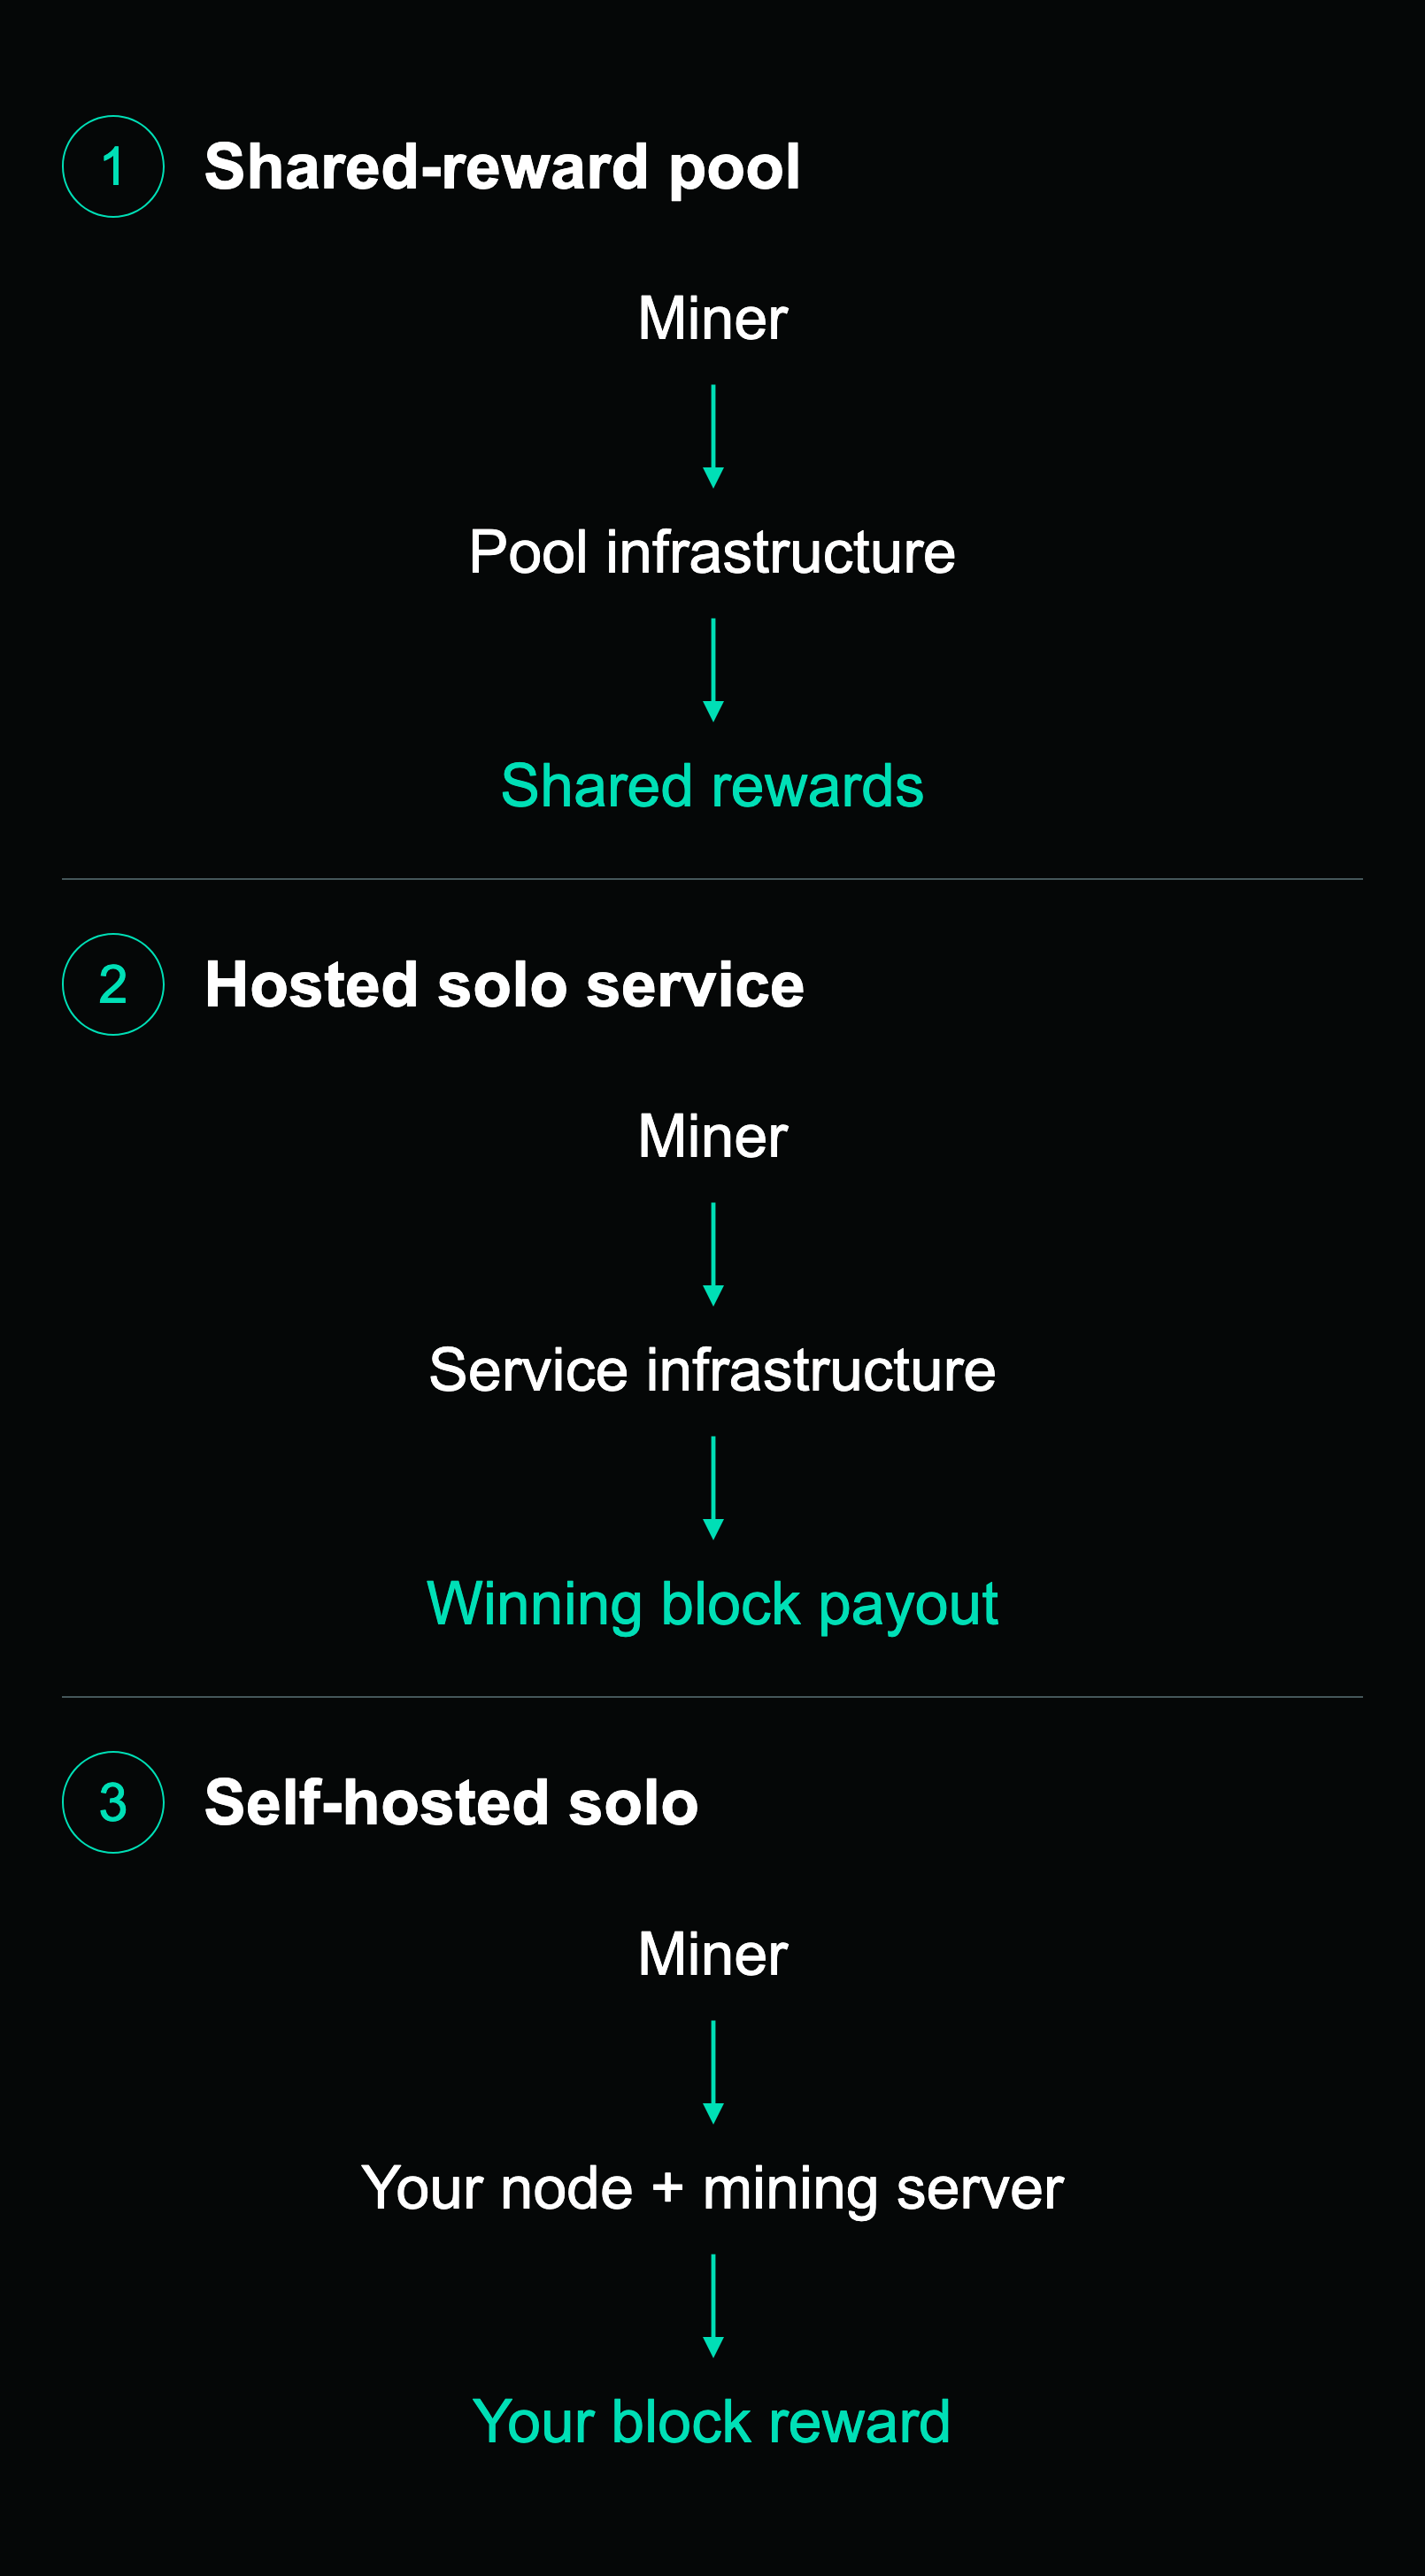
Shared pools distribute rewards under a payout scheme, while solo arrangements leave the qualifying winning participant exposed to whole-block reward variance. Whether you operate the node and mining server yourself is a separate infrastructure choice.
| Arrangement | Who supplies infrastructure? | Reward behavior | What to check |
|---|---|---|---|
| Shared-reward pool | A pool operator, with some arrangements allowing miner-side template construction | Rewards follow PPS, FPPS, PPLNS, or another published method | Fees, minimum payout, withdrawal method, work accounting, and operator risk. |
| Hosted solo service | The service supplies the mining-server and node infrastructure | The winning participant receives the applicable block payout less stated charges | Endpoint, worker/address rules, block-handling policy, and fee. |
| Self-hosted solo stack | You operate a node plus compatible mining-server or gateway software | Your operation receives its valid block reward, without a hosted-service deduction | Synchronization, template construction, payout configuration, connectivity, and administration. |
Solo CKPool currently states a 2% service fee and an address-based username format. Its official configuration instructions are the authority for that endpoint. Public Pool is also deployable software; the terms of a particular hosted Public Pool service must not be inferred from the code’s license or another operator’s deployment.
For shared pools, a low headline fee is only one consideration. At small hashrate, a withdrawal threshold can delay receiving anything in your wallet even when the account balance grows. Check the supported payout path and whether inactivity, account requirements, or withdrawal charges matter to your use.
For solo mining, accepted ordinary shares indicate connection and work reporting; they do not create a shared reward entitlement. A past small-miner win establishes possibility, not a minimum winning hashrate, a countdown, or an expected income schedule. Compare the actual arrangements in our solo-service comparison.
Step-by-Step First-Miner Setup
Set up the exact board and firmware you own, then verify both local operation and accepted work at the selected mining service. The following sequence is a common checklist, not a replacement for model-specific onboarding screens.
- Inspect before power. Confirm the model, revision, power equipment, connector, cooling assembly, and placement. Leave tuning at documented defaults.
- Follow the device’s onboarding. Use its quick-start instructions for access-point, app, touchscreen, or Ethernet setup. Network names, initial credentials, and reset behavior vary; do not assume an open access point or a universal reset duration.
- Join the supported local network. For ESP32-S3 Bitaxe hardware, use compatible 2.4 GHz Wi-Fi. Complete any separate display-controller onboarding required by a touchscreen model.
- Find the miner locally. Use the device display or the router’s client list, then open its management interface from an authorized device on the appropriate local network. An example IP from a guide is not your miner’s address.
- Enter the service’s exact settings. Match hostname, transport, port, worker identity, and password. If firmware separates hostname and port, do not paste a complete protocol URL into the hostname box.
- Verify the reward destination. Confirm your own address or account settings, supported address type, payout threshold, and fees. Do not copy a demonstration receiving address.
- Save through the actual interface. Apply or restart only as required by that firmware. Confirm the settings persisted, the intended endpoint connected, and no unexpected fallback service is active.
- Confirm useful operation. Check stable hashrate, temperatures, fans, errors, and accepted work on the correct service dashboard before treating onboarding as complete.
Which detailed instructions should you follow?
The Bitaxe setup guide covers the hardware’s onboarding, while the AxeOS guide explains the current interface. Use the NerdQaxe setup guide and Nerd*OS guide for the relevant Nerd-family board and firmware. Avalon models use their own controls and app; the Canaan comparison above provides that handoff.
What confirms that setup worked?
Compare a sustained device average with the service’s accepted work over its reporting window. They will not necessarily match moment by moment because of share difficulty, sampling, and stochastic variation. A brief peak or a spinning fan is not proof of accepted mining work.
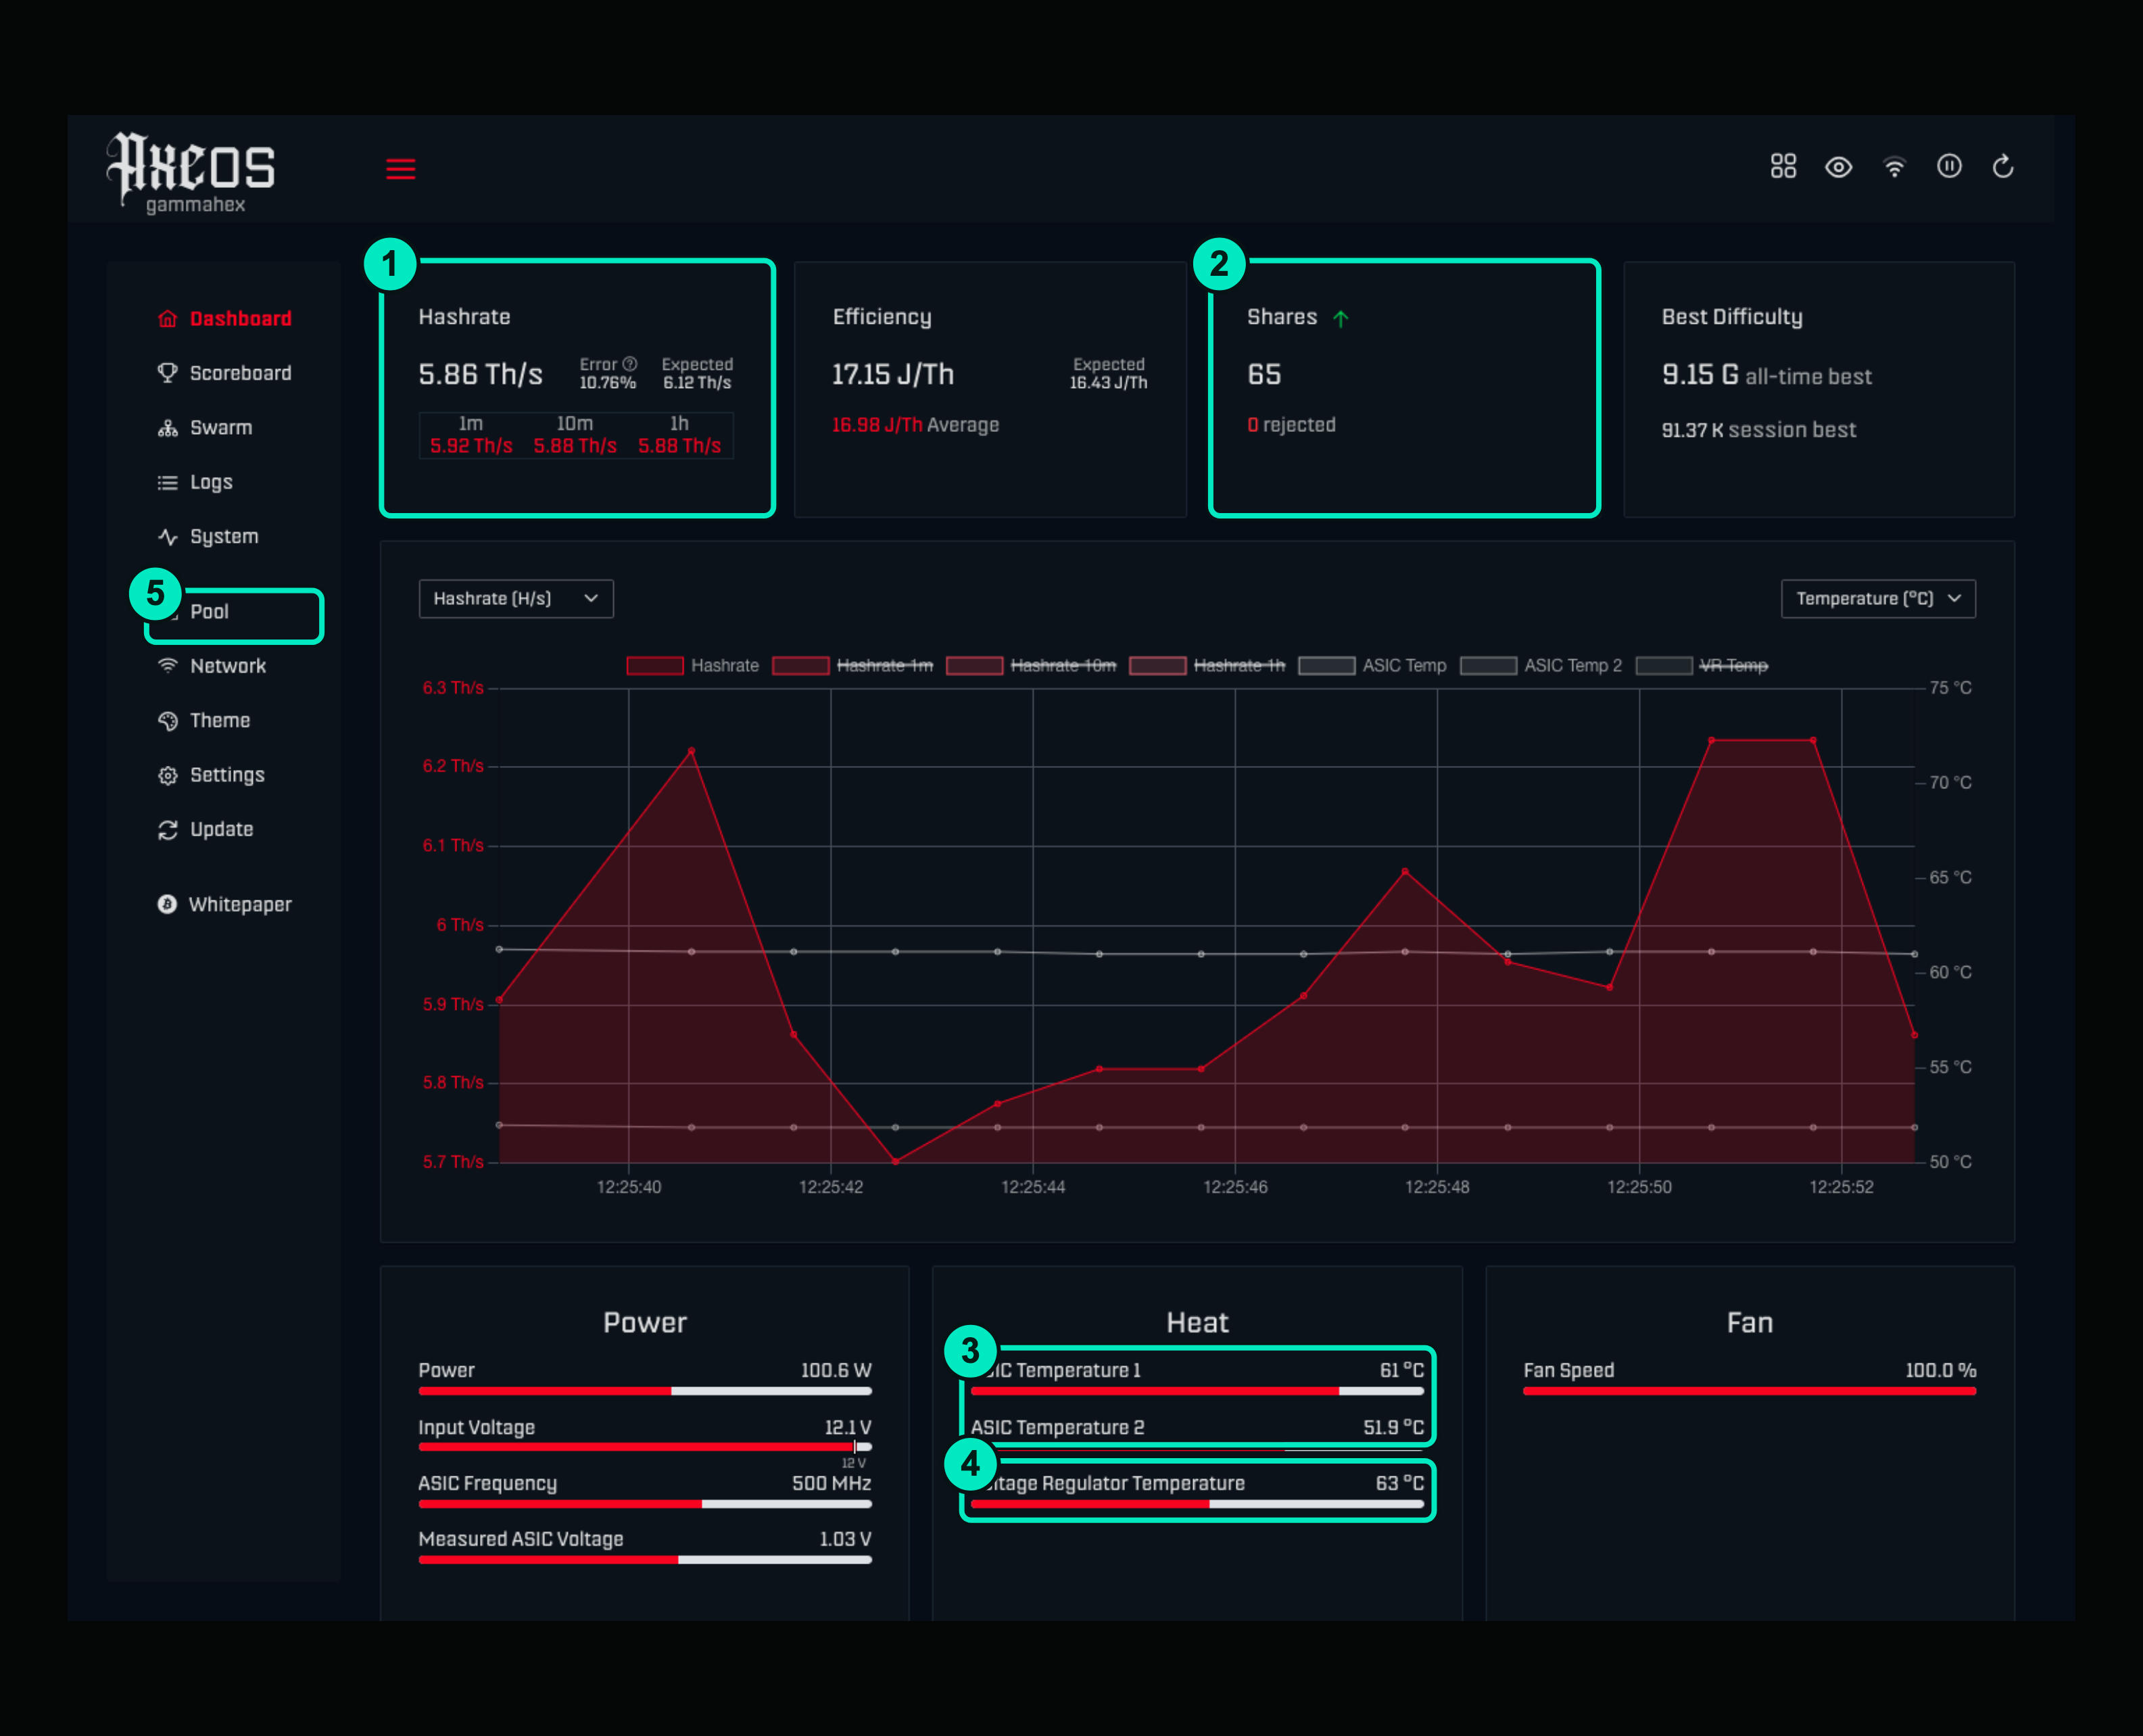
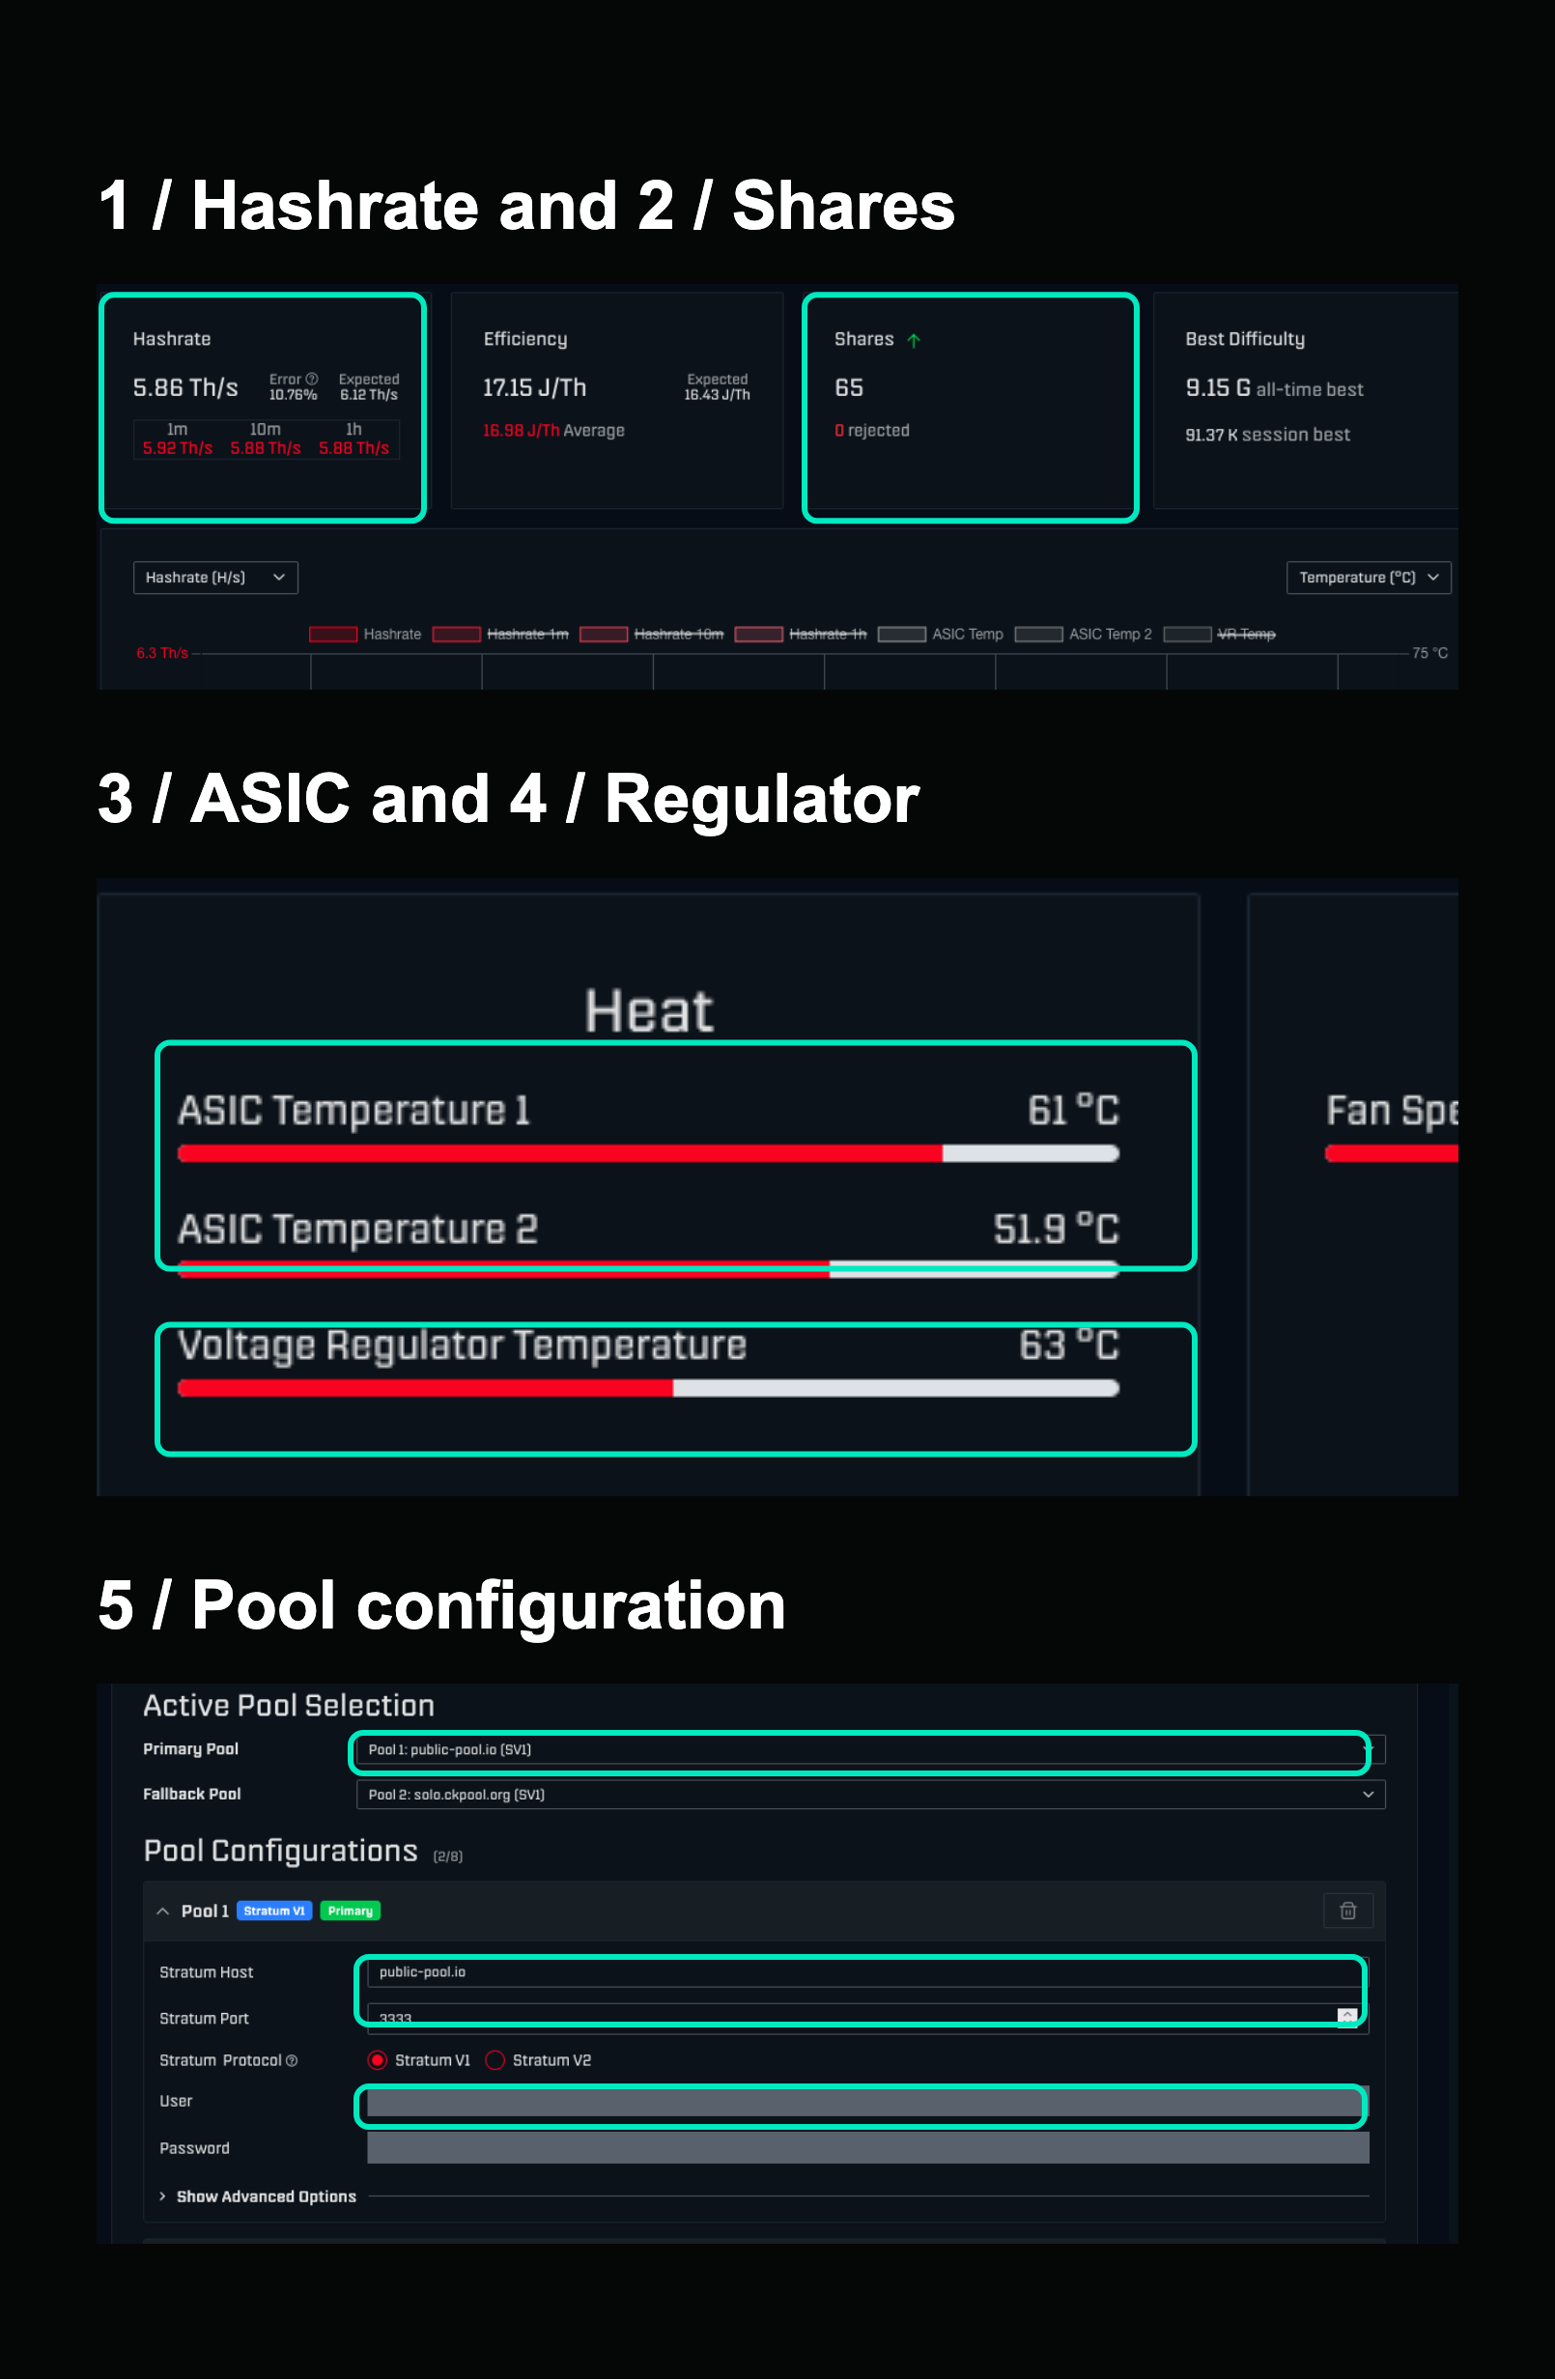
- Hashrate: Check that readings update, then compare a sustained average with the expected performance for your exact model and settings. A brief peak does not establish stable operation.
- Shares: Watch for new accepted work and investigate persistent rejection reasons. Confirm that the service dashboard identifies your intended worker; the device and service estimates may differ over short reporting windows.
- ASIC temperatures: Read every available chip sensor, rather than assuming one displayed temperature represents the whole board. Compare readings with the exact board’s operating guidance.
- Regulator temperature: Check power-delivery temperature separately from ASIC temperature. A cool ASIC alone does not establish a cool regulator.
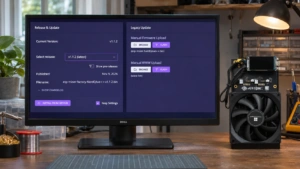
- Pool configuration: Open Pool and verify the active endpoint, port, transport, worker identity, and any fallback selection. Saved fields alone do not establish that the endpoint is connected or accepting work.
These are captured example readings, not recommended tuning settings or a new benchmark. ASIC-error and pool-rejection counters describe different events; zero pool rejects does not establish error-free hardware. Private credentials are masked in the configuration detail view.
Check that the service identifies your intended worker and reward destination. Investigate persistent rejects, reconnect loops, restarts, overheating, or an unexpectedly low hashrate before making changes. For a self-hosted stack, also check node synchronization and that fresh mining work reaches the ASIC.
Mining Costs, Profitability, and Solo Odds
Mining is financially positive only when the rewards you can actually realize exceed the costs you include in the calculation. Operating margin and recovery of the hardware purchase are different questions.
Electricity cost = wall watts ÷ 1,000 × operating hours × electricity rate.
Operating margin = realized mining revenue − electricity − service charges − other operating costs.
Use an actual wall reading, runtime, and utility tariff, including relevant time-of-use or demand charges. If you amortize hardware, show that cost separately instead of subtracting the entire purchase price from a single day’s revenue and calling it daily profit.
| Continuous load | 30 days at $0.12/kWh | 30 days at $0.16/kWh |
|---|---|---|
| 20W | $1.73 | $2.30 |
| 43W | $3.72 | $4.95 |
| 69.5W | $6.00 | $8.01 |
| 140W | $12.10 | $16.13 |
| 800W | $69.12 | $92.16 |
| 1674W | $144.63 | $192.84 |
Here, $0.12/kWh and $0.16/kWh are illustrative rates, not asserted national averages. A 20W miner uses 14.4 kWh over 720 hours, costing $1.728 at the first rate. A fixed “80 sats per day” claim would require a dated hashrate, network state, reward, service method, fee, and uptime assumption.
Use our mining profitability calculator for a scenario, not a guaranteed forecast. For shared pools, distinguish displayed accrual from an amount eligible for withdrawal. For solo mining, an expected value spread across many hypothetical trials is not cash flow you can depend on.
Correctly calculating a small miner’s solo chance
At a hypothetical fixed 800 EH/s network, a 1.2 TH/s miner has a share of 1.2 ÷ 800,000,000, or about one chance in 666,666,667 per next network block. Using 144 expected blocks per day, its approximate chance of at least one block over 365 days is 0.00788% under fixed hashrate and full-uptime assumptions.
With difficulty D: λ ≈ h × seconds ÷ (D × 2³²); P(at least one block) ≈ 1 − exp(−λ).
The relationship uses hash trials per second for h and is the usual difficulty-based approximation. Network difficulty, uptime, and effective hashrate change; ten minutes is a target average, not a scheduled draw. After an unsuccessful period, the miner is not “due.” Our solo-mining probability calculator lets you change the assumptions.
How to value useful heat
Keep the electricity bill in the cash flow and show any displaced heating cost separately. A miner replacing electric resistance heat during a cold period can serve both purposes, but that credit ends when the heat is unwanted. A heat pump, gas system, different room, or different runtime changes the comparison. Bitcoin rewards are not automatically pure profit.
Firmware Updates and Overclocking
Use official, board-compatible firmware and establish stable stock operation before tuning. A profile from a different miner, supply, cooler, or firmware version is not a universal starting configuration.
Updating and recovery
Read the release notes and confirm the exact image type and board support. An ordinary running-system update differs from a full factory flash used for recovery. Save configuration or recovery information where supported, maintain stable power, and follow the actual interface instead of assuming a “Check for Updates” button exists.
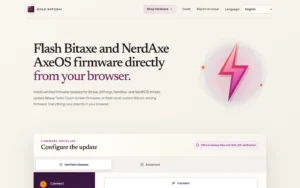
The firmware update guide covers ordinary updates. The browser flasher guide explains compatible USB recovery paths. A USB data cable and the correct model selection matter; flashing the wrong target can create another problem rather than solve the original one.
What overclocking changes
Higher frequency can increase hashing attempts, but it also changes power demand and cooling requirements. More voltage can improve a particular operating point while increasing heat and stressing the power path. Judge sustained useful work, errors, restarts, power, noise, and temperatures together rather than treating a higher displayed frequency as a successful upgrade.
Change one setting at a time from the board’s proper defaults, keep a record, and return to a known-good setting when stability worsens. Our complete Bitaxe overclocking guide explains model-specific examples and their operating conditions. Nerd-family devices need their own revision-specific procedures and limits.
Our generally preferred 60–65°C Bitaxe ASIC range is an operating target, not permission to ignore regulator temperature or the manufacturer’s limits. Keep thermal protection active and do not use repeated shutdowns as a normal way to discover a tuning ceiling.
The official ESP-Miner source and release project is the starting point for checking board support and firmware provenance.
Maintenance and Troubleshooting
Maintain a baseline of stable stock settings, accepted work, and normal temperatures so that changes are easier to diagnose. Inspect power and airflow before attempting firmware recovery or increasing voltage.
| When | Check | What deserves attention |
|---|---|---|
| During routine monitoring | Hashrate averages, accepted work, temperatures, uptime | Persistent changes rather than a single brief reading. |
| Periodically, based on dust and use | Fan movement, intake/exhaust, filters, cables | Dust accumulation, strain, abnormal connector heat, or damage. |
| When considering an update | Official release notes and board compatibility | A relevant security, stability, or compatibility improvement. |
| After hardware changes | PSU limits, cooling attachment, sensors, stock stability | Do not assume the old tuning profile remains appropriate. |
Power down, disconnect, and allow cooling before physical cleaning. Follow the product’s filter and fan instructions; do not introduce moisture into electronics or force fans to overspeed with compressed air. Thermal-paste replacement should follow condition and manufacturer guidance, not an arbitrary annual schedule.
Zero hashrate or no accepted work
Check network connectivity, endpoint, port, transport, and worker identity first. Confirm the service accepts the selected account or address format and that the node is synchronized if you self-host. A universal “wallet address in username” instruction can itself be the fault.
High temperatures or low hashrate
Restore the documented stock profile, check fan operation and clear airflow, and review the power path. Compare readings at similar ambient conditions and over a meaningful reporting window. Do not disable protection to keep a failing configuration running.
Unresponsive interface or repeated restarts
Separate a local-network access problem from a firmware or power fault. Inspect the supply and connector, follow the documented restart method, and use recovery only when the diagnosis supports it. Keep the board revision and any configuration changes available when contacting support.
The mining-log guide helps interpret work, connection, and error messages. Logs are diagnostic evidence, not a reason to publish passwords, private keys, or recovery information.
Building a Sustainable Home-Mining Setup
A useful home-mining setup is one you can operate, maintain, and afford under changing network conditions. Expansion should follow measured experience with one miner rather than a promise of inevitable efficiency gains or more frequent solo wins.
Hardware development can improve what is available, but a newer chip’s efficiency does not guarantee profitable mining at your electricity rate. Likewise, a growing community does not establish that hashrate or template selection has become evenly distributed. Judge each claim using its actual measurement and source.
Start small, keep your records, understand the service’s accounting, and decide whether your main outcome is education, rewards, heat, or independent infrastructure. After stable operation, you can evaluate another miner, self-hosting, or careful tuning with a much better grasp of the costs.
Browse current Bitcoin mining hardware when you are ready to compare complete packages. Keep learning and operational verification ahead of a larger hashrate number.